
Avoiding overexposure of actions in outbound
5 Tasks
15 mins
Scenario
U+ Bank, a retail bank, currently sends credit card-related promotional emails to qualified customers.
Now, the business wants to prevent overexposure of any one action or group of actions as overexposure negatively impacts the customer experience, and customers do not receive an opportunity to receive other offers they might qualify for.
To prevent overexposure, the business wants to avoid sending a credit card promotional offer email for the next 60 days if one has been sent in the past 30 days.
Use the following credentials to log in to the exercise system:
| Role | User name | Password |
|---|---|---|
| Decisioning Architect | DecisioningArchitect | rules |
Your assignment consists of the following tasks:
Task 1: Adjust the segment to select a maximum 100 customers
Update the All outbound customers to select a maximum of 100 customers that meet the criteria conditions of the segment.
Task 2: Define an action-level contact policy
In Next-Best-Action Designer>, on the Constraints tab, in the Contact policy library section, define an action-level contact policy to suppress the pending credit card offers. Define the following suppression rule:
If a customer has a pending credit card offer in the past 30 days, do not show that offer to that customer again for the next 60 days.
Task 3: Add the new contact policy to the Credit Cards group
In Next-Best-Action Designer, on the Engagement policy tab, add the new contact policy to the Credit cards group.
Task 4: Configure and run a schedule and confirm Interaction History report
In Next-Best-Action Designer, configure a scheduled run and confirm that records are added to the interaction history with Outcome value as Pending.
Note: In the Recurrence section, ensure the Refresh the audience check box is selected. Also, ensure that the All outbound customers segment is selected as starting population.
Task 5: Schedule another run and confirm the run results
Run a new schedule and confirm that all the actions are suppressed.
Challenge Walkthrough
Detailed Tasks
1 Adjust the segment to select a maximum of 100 customers
- On the exercise system landing page, click Pega CRM suite.
- Log in to Customer Decision Hub as the Decisioning Architect with User name DecisioningArchitect and Password rules.
- In the navigation pane on the left, click Audiences > Segments.
- On the Segments landing page, click the All outbound customers segment.
- Click Check out to make changes.
- Click the Options and Schedule tab.
- Select Select a portion (sample) of criteria results.
- In the Select a maximum of _________ of the results field, enter 100.
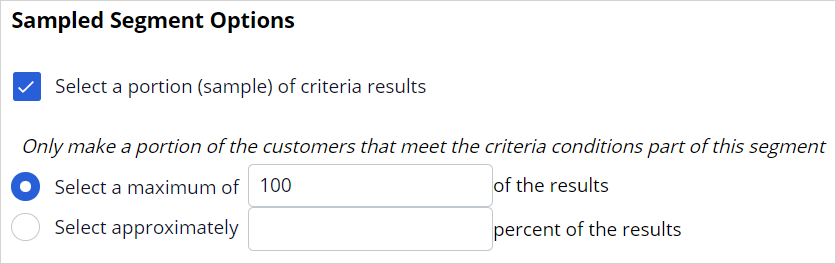 Note: Selecting the Select a portion (sample) of criteria results option ensures only a portion of customers that meet the criteria conditions for the segment are selected for the outbound schedule. In this case, a maximum of 100 qualified customers will be selected from the segment.
- Click Check in to add check-in comments and save the changes.
2 Define an action-level contact policy
- In the navigation pane, click Next-Best-Action > Designer.
- Click the Constraints tab to view the existing contact limits and policies.
- On the Constraints tab, click Edit.
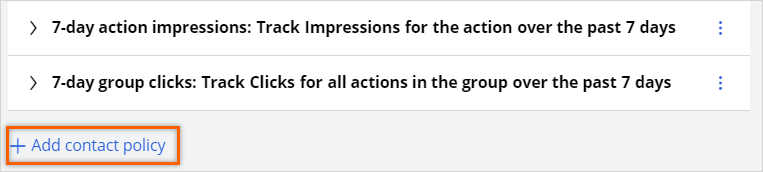
- In the Contact policy library section, click Add contact policy to add a new contact policy to the library.
- In the Add contact policy dialog box, enter the following information:
- Name: 30-day action pending
- Scope: Track Pending for the action within the past 30 days.

- Click Submit to add the new contact policy to the library.
- In the 30-day action pending contact policy, define the following suppression policy:
If there is 1 Pending for Email treatments, suppress the action for 60 days.
- Click Save to save the newly created contact policy.
3 Add the new contact policy to the Credit cards group
- In Next-Best-Action Designer, click Engagement policy.
- In the Business structure, click Grow / Credit cards.
- Click Edit to edit the engagement policy for the group.
- In the Customer actions section, to the right of the Contact policy, click the Gear icon to configure the contact policy for the group.

- In the Configure contact policy dialog box, to the right of the 30-day action pending tile, click Add.
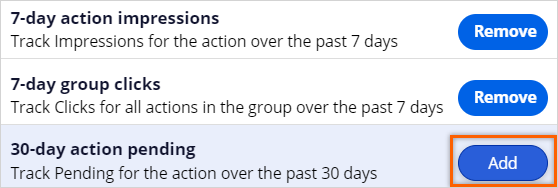
- Click Apply to confirm the selection.
- Click Save to save the changes.
4 Configure and run an outbound schedule and confirm Interaction History report
- In Next-Best-Action Designer, click the Channels tab.
- Scroll down to the Primary Schedule section, and then click the More icon and select Suspend to suspend the existing outbound schedule.
Note: If the Primary schedule is in Draft state, you can skip step 2.
- Scroll up to the Channels section, and then click Edit to make changes.
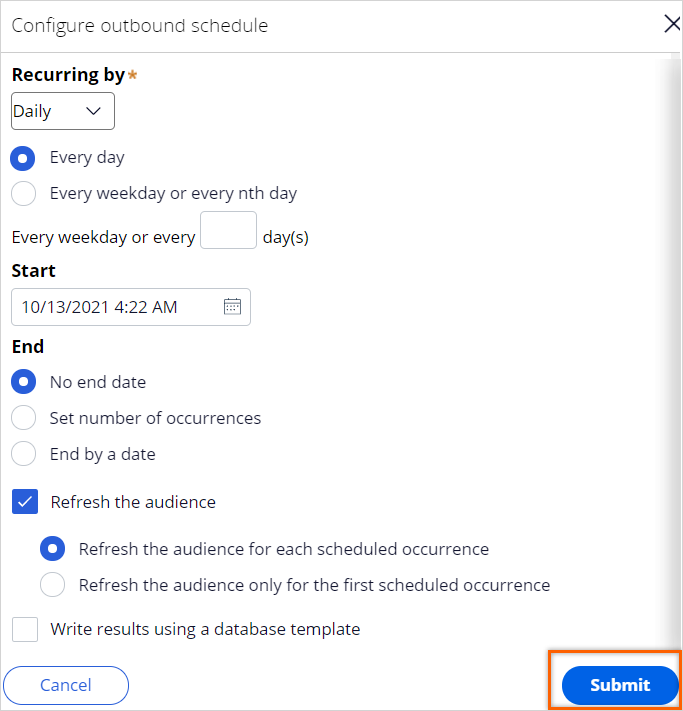
- To the right of Recurrence, click the Gear to configure a schedule run frequency.
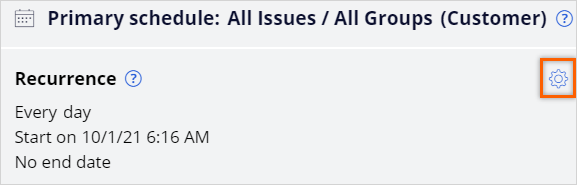
- For the Start Date, ensure today's date is selected. Also, ensure the time is current and in US EST time zone.
- In the End section, ensure No end date option is selected.
- Ensure that the Refresh the audience check box is selected.
- Click Submit to save outbound schedule and close the dialog box.
- Click Save to save the changes made to the Channels tab.
- Scroll down to the Primary Schedule section and click the More icon, and then select Run to run the outbound schedule.

- Refresh the tab to see the latest status of the run.
Note: The status then changes to Running when it starts processing. An entry for upcoming runs is displayed in the Run Schedule section.
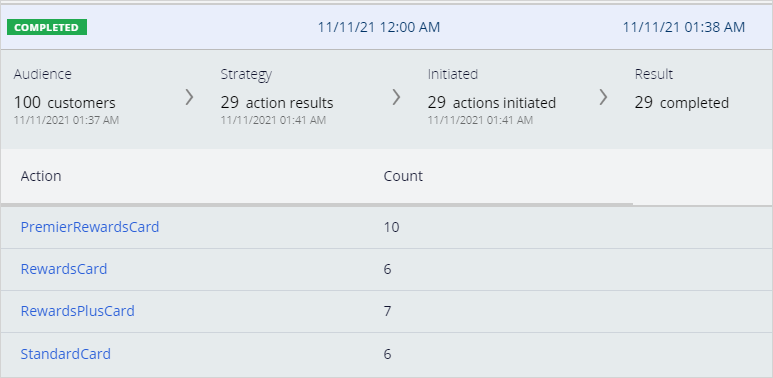
- Once the run is complete, click the COMPLETED run row to view the run results.
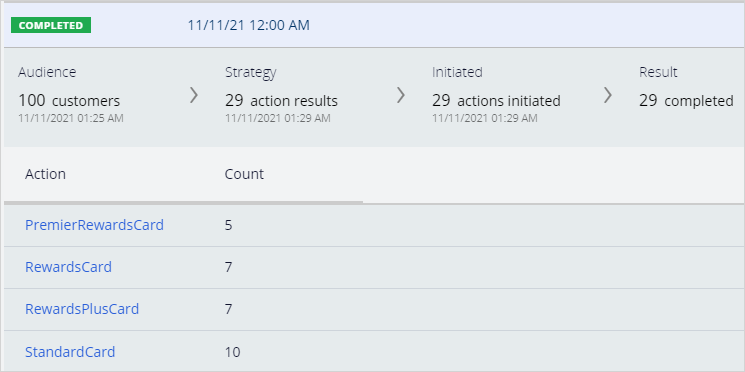 Note: A total of 29 customers are offered with credit cards offers.
- In the Customer Decision Hub portal, in the upper-right corner, click Reports > Interaction History to verify the interaction history records for the previous run.
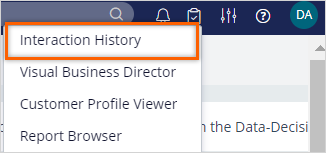
- In the Interaction History, click Recent interactions to view the records corresponding to the last run.
 Note: All the pending outcomes related to the credit card offers have been recorded for Email channel.
5 Schedule another run and confirm the run results
- In the Primary Schedule section, click the More icon and select Suspend to suspend the existing outbound schedule.

- Scroll up to the Channels section, and then click Edit to make changes.
- In the Configure outbound schedule dialog box, clear the Refresh the audience check box to target the same customers again.
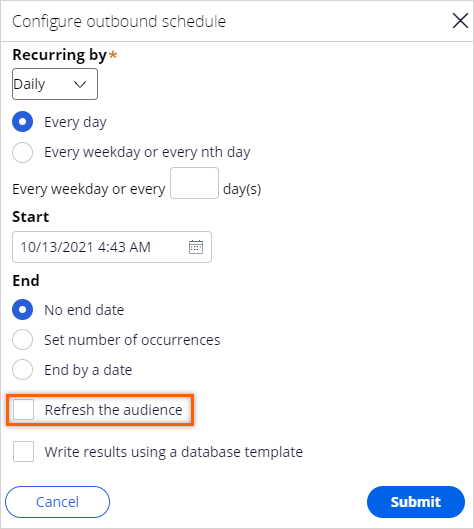 Note: You are clearing Refresh the audience option to ensure the same set of audience from the previous run is considered for the second run as well. In a real-life implementation scenario, the option must not be cleared to ensure the system selects a set of customers based on the criteria specified.
 - Click Submit, and then click Save.
- Scroll down to run the outbound schedule.
- Refresh the tab to view the latest status of the run.
- Once the run is complete, click the latest COMPLETED run row to view the run results.
 Note: Because customers can qualify for more than one action, the second run results can output the same or a lesser number of actions as the first run. This is because the recently added suppression policy preventes actions in a pending state from being selected.
For example, Customer 1 qualifies for Standard card and Rewards card and Customer 2 qualifies for Premier Rewards card. If Customer 1 receives Standard card and Customer 2 receives Premier Rewards card in the first run, the second outbound run will suppress the Standard card in pending status, and then offer the Rewards card to Customer 1 and no cards to Customer 2. - In the Customer Decision Hub portal, in the upper-right corner, click Reports > Interaction History to verify the interaction history records for the previous run.
- In the Interaction History, click Recent interactions to view the records corresponding to the last run.
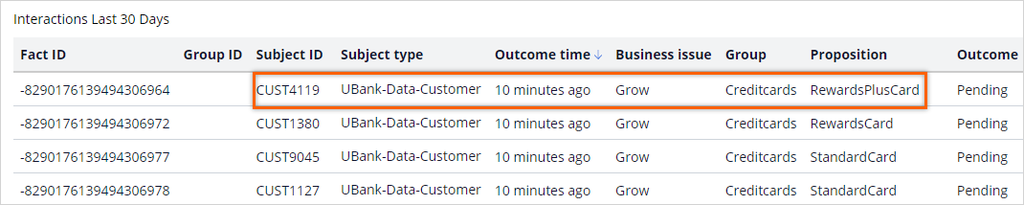 Note: A customer who was offered RewardsCard in the first run is now offered RewardsPlusCard in the second run. This is because the RewardsCard in pending status was suppressed, and so the other card that the customer qualifies for is offered instead.
This Challenge is to practice what you learned in the following Module:
Available in the following mission:
If you are having problems with your training, please review the Pega Academy Support FAQs.
Want to help us improve this content?