
Building models with Pega machine learning
6 Tasks
15 mins
Scenario
U+ Bank implements Customer Decision Hub™ to determine which credit card offer to show a customer on the bank's website. To reduce the number of clients that leave the bank, the business wants to make use of the historical data that the bank has collected on customers that have churned in the past, so that they can predict which customers are likely to leave the bank soon. The bank wants to show retention offers to the potential churners, instead of credit card offers.
As a data scientist, your task is to create a predictive model that predicts churn. You decide to create the model by using Pega machine learning.
Use the following credentials to log in to the exercise system:
| Role | User name | Password |
|---|---|---|
| Data Scientist | DataScientist | rules |
Your assignment consists of the following tasks:
Task 1: Create a new predictive model
Create a new predictive model, ChurnPML, by using the Churn Modeling template in the Retention category.
Task 2: Prepare the data
Load the data set by using the CustomerData.zip file. Set the type of predictors that have no predictive power, such as CustomerID, to Not used. Create a uniform sample that uses 100% of the data. Retain 20% for the test set and 20% for the validation set. In the Outcome definition, use a Binary outcome type and Outcome as the outcome field. Map the values of the outcome field to the outcome categories.
Task 3: Analyze the data
Examine the trends exhibited by the best-performing predictors. Create a virtual field by combining several numerical predictors, and then examine the trend exhibited by this new predictor.
Task 4: Develop predictive models
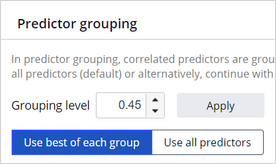
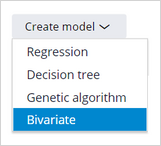
For predictor grouping, use the best predictor of each group. Create a new bivariate model.
Task 5: Analyze the models
Compare the scores of the three models. Pay particular attention to Discrimination.
Task 6: Select model
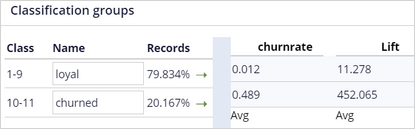
Select the Regression model. Ensure that all predictors are mapped to customer properties. Reclassify the classes into a loyal class and a churned class. Save the model.
Challenge Walkthrough
Detailed Tasks
1 Create a predictive model
- On the exercise system landing page, click Pega CRM suite to log in to Customer Decision Hub.
- Log in as a data scientist:
- In the User name field, enter DataScientist
- In the Password field, enter rules.
- In the navigation pane on the left, click Intelligence > Prediction Studio.
- In the navigation pane of Prediction Studio, click Models to open the models work area.
- In the upper-right corner, click New > Predictive model.
- In the New predictive model dialog box, in the Name field, enter ChurnPML.
- In the Category list, select Retention.
- In the Template list, select Churn Modeling.
- Click Start to proceed to the data preparation step.
2 Prepare the data
- Download and extract the CustomerData.csv file.
- In the Source selection section, click Choose File, and then select the CustomerData.csv file.
- Check the data, and then click Next to proceed to the sample construction step.
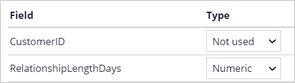
- In the CustomerID field, change the type to Not used.
- In the Hold-out sets section, retain 20% for validation and 20% for testing.

- Click Next to proceed to the outcome definition step.
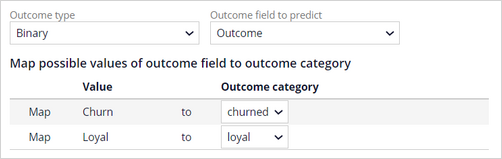
- In the Outcome definition section, in the Outcome type list, confirm that Binary is selected.
- In the Outcome field to predict list, select Outcome.
- In the Churn row, in the Outcome category column, select churned.
- In the Loyal row, in the Outcome category column, select loyal.
- Confirm that the number of cases in the development, validation, and test sets are approximately equal for both outcome categories.

- Click Next to proceed to the data analysis step.
3 Analyze the data
- In the list of predictors, click CreditScore and examine the grouping for this predictor.
- In the upper-right corner, click Cancel to close the predictor report.
- Click New virtual field to open the Virtual field dialog box.
- In the Virtual field dialog box, in the Name field, enter DebtToIncomeRatio*Age.
- Click Fields, select DebtToIncomeRatio, click Insert, and then enter *.
- Click Fields, select Age, and then click Insert.
- Complete the expression to read DebtToIncomeRatio * Age.
- Click Save & close.
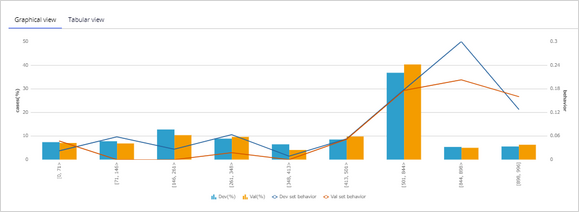
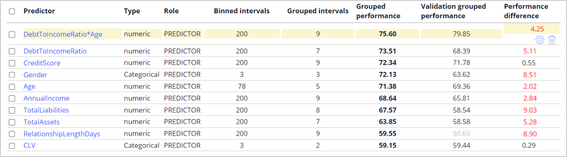
- Confirm that the newly created predictor outperforms the two original predictors in the validation.
- Click Next to proceed to the model development step.
4 Develop predictive models
- In the Predictor grouping section, select Use best of each group.
- Click Next to proceed to the model creation step.
- In the Model creation section, in the Create model list, select Bivariate.
- In the upper-right corner, click Submit to add the model to the model list.
- Click Next to proceed to the model analysis step.
5 Analyze the models
- On the Score comparison page, ensure that all the model checkboxes are selected.
- Click Analyze charts to access the model analysis.
- On the Discrimination tab, examine the results.
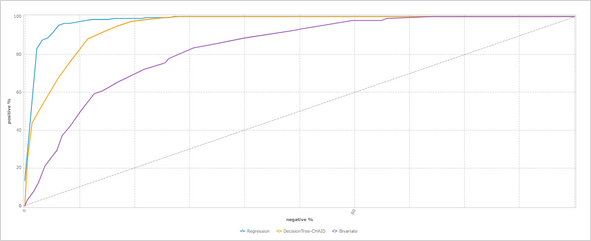 Note: The regression model outperforms the decision tree model and the bivariate model as it has the largest area under the curve (AUC). However, before you choose a model, consider the number of predictors required by the model. Under certain circumstances, you might decide to select a predicting model that is lower performing but has fewer predictors.
- In the upper-left corner, click the arrow next to Model analysis charts to return to the Score comparison page.

- Click Next. On this page, you can analyze the score distribution.
- Click Next. On this page, you can analyze class comparison.
- Click Next to proceed to the model selection step.
6 Select the model
- In the Model selection section, ensure that the Regression model is selected.
- In the Save model section, in the Apply to field, enter UBank-CDH-Data-Customer.

- Click Finish to select the model.
- On the Model tab, in the Expected score distribution section, click the area between Result9 and Result10 in the score distribution chart.

- In the Classification groups section, in the class 1-9 row, in the Name column, enter loyal.
- In the Class 10-11 row, in the Name column, enter churned.
- On the Mapping tab, ensure that all predictors are mapped to the appropriate customer fields.
- In the upper-right corner, click Save.
Confirm your work
- In the upper-right corner, click Run to test the predictive model.
- In the Run predictive model dialog box, in the Inputs section, select data transform Troy, a customer that is likely to churn, as the data source.
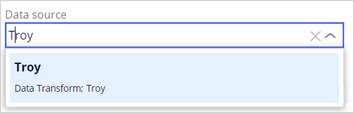
- Click Run, and then in the Outputs section, certify that the result for Troy is churned.

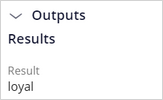
- Re-run the model with data transform Barbara, a customer that is expected to stay loyal, as the data source.
- In the Outputs section, verify that the result for Barbara is loyal.
This Challenge is to practice what you learned in the following Modules:
Available in the following mission:
If you are having problems with your training, please review the Pega Academy Support FAQs.
Want to help us improve this content?