RobotManagerUsageStatistics.zip
(511.8 KB)
Creating Custom Reports in Pega Robot Manager
5 Tasks
20 mins
Scenario
MyTown has used the robotic process automation (RPA) services for two months and has received complaints from users that both Service requests and Inquiries are moving slowly during specific periods. As an administrator, you generate a report that can pinpoint the issue by using the Pega Robot Manager reporting feature.
To ensure that only recent data is analyzed, you must archive data from the oldest date referenced in the system, April 1, 2020, before creating the report. Create two reports: one that shows inquiries that take longer than three seconds and service requests that take longer than five seconds. Finally, make this report Public so that you can share the report with the other product owners and export the report for further use.
Detailed Tasks
1 Install the report data RAP
- Click the following link to download the application data for MyTown reporting.
- In the Save As dialog box, navigate to a local directory, and then click Save to store the file.
- Launch the Pega Training instance and log in with the user name RMSysAdmin and password myt0wn@pp1.
- In the header of Dev Studio, click Configure > Application > Distribution > Import to access the Import wizard.
- In the Import wizard, click Choose file.
- In the Open dialog box, navigate to your RobotManagerUsageStatistics.zip file, and then click Open.
- In the Import wizard, click Next to begin the import process.
- Click Next on each screen of the Import Wizard until you reach the completed rules import window.
- On the completed rules import window, click Done to exit the Import wizard.
2 Archive old report data
- In the header of Dev Studio, click Launch portal > Robot Manager to open the Pega Robot Manager dashboard.
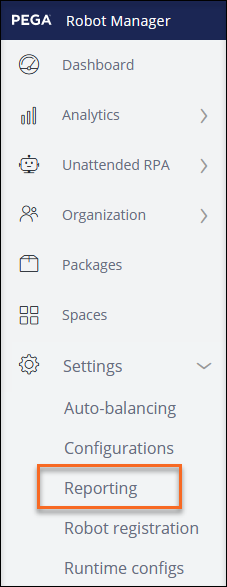
- On the left navigation panel, click Settings > Reporting to display the Reporting landing page.
- On the Reporting landing page, expand the Auto-archiving of operational statistics data section.
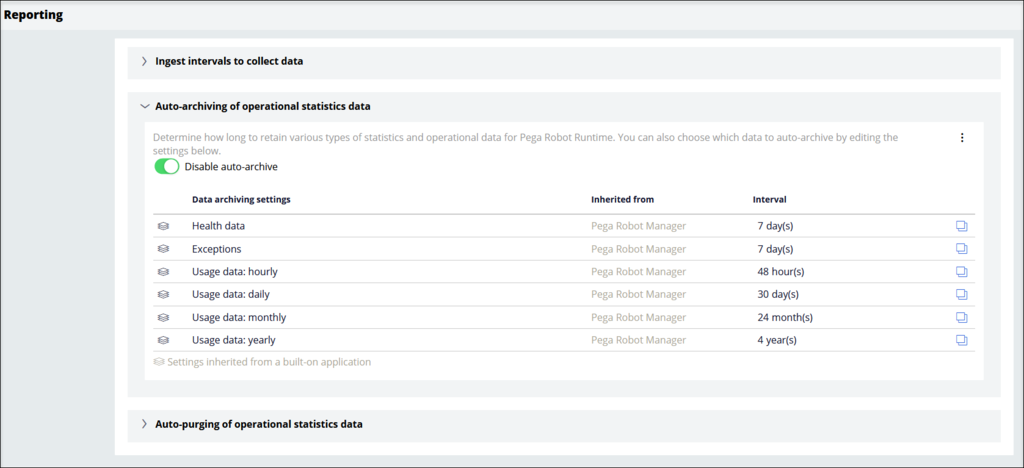
- In the upper right corner of the section, click More > Archive data to display the Archive data dialog box.
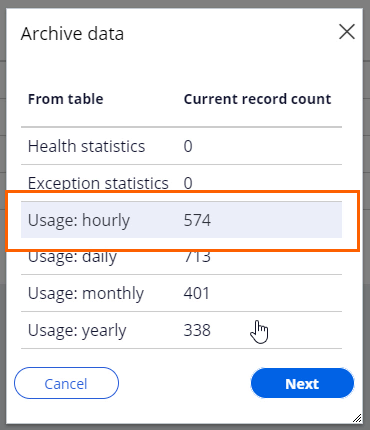
- In the Archive data dialog box, click the select Hourly,and then click Next. The Select date range to archive window is displayed..
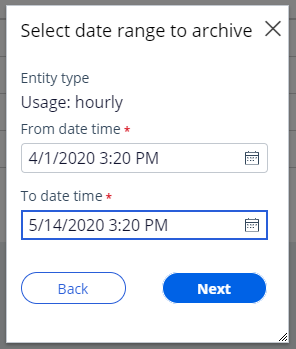
- In the From date time field of the Select date range to archive diaog, click the calendar icon, and then select 4/1/2020. This date represents the oldest date referenced in the data.
- In the To date time field, click the calendar icon, and then select 5/14/2020. This date represents the end of the older data within the system.
- Click Next to proceed to the confirmation dialog box.
- In the confirmation dialog box, click Submit to confirm the data archive selection.

3 Create your custom usage report
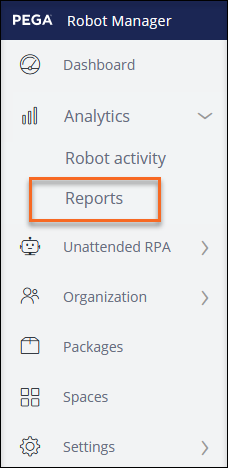
- On the left navigation panel, click Analytics > Reports to display the Reports landing page.
- In the upper-right corner of the Reports landing page, click New Report to create a new report.
- In the Create new report window, select the following options:
- In the Report on list, select Robot Usage Statistics
- In the Usage data aggregated section, click Hourly.
- In the Report type list, leave the default List option.
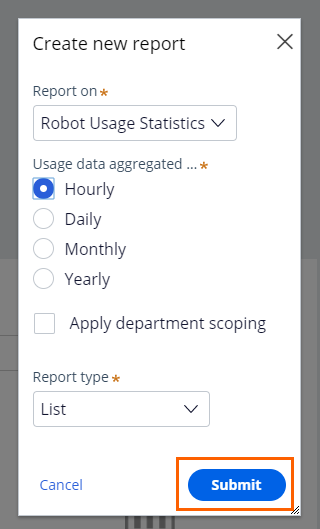
- Click Submit to close the Create new report window to display the Report Configuration page.
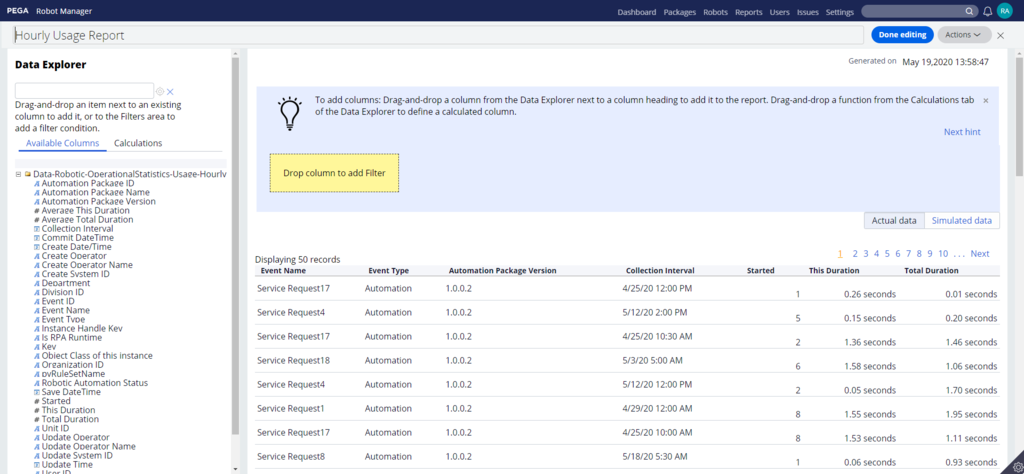
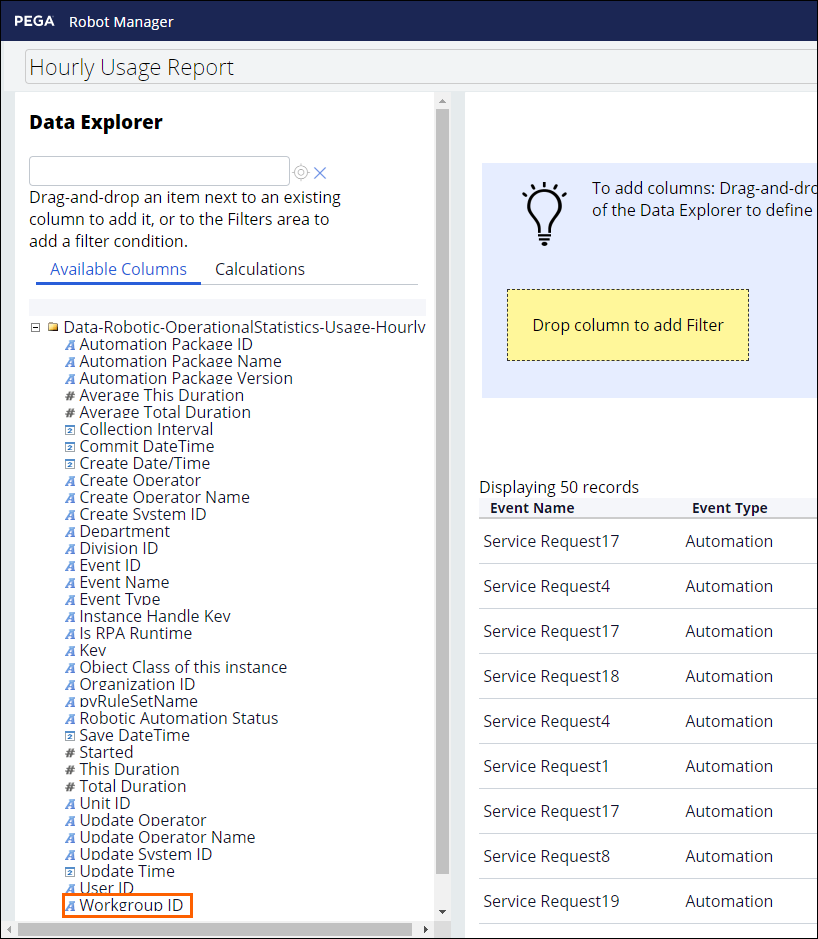
- Within the Data Explorer section of the Report Configuration page, scroll to the bottom of the Available Columns list, and then drag the Workgroup ID column to the report next to Event Name column.
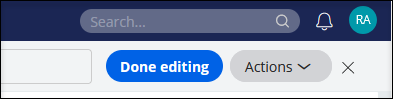
- In the upper-right corner the Report Configuration page, click Done editing to display the Save as dialog box.
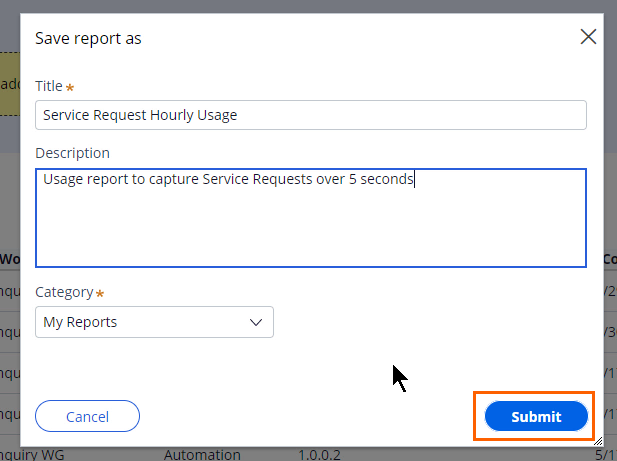
- In the Save report as dialog box, enter the following information:
- In the Title field, enter Service Request Hourly Usage.
- In the Description text box, enter Usage report to capture Service Requests over 5 seconds.
- Click Submit to save the report.
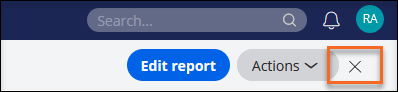
- In the upper right, click the Close icon to close the Report Configuration page.
- Repeat steps 1-9 to create a new report with the following information:
- Title is Inquiry Hourly Usage
- Description is Usage report to capture Inquiries over 3 seconds.
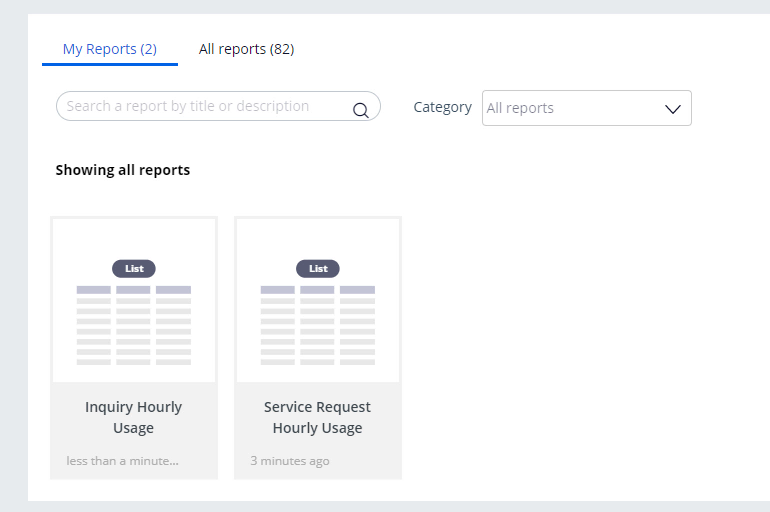
- In the My Reports tab, confirm that two new report tiles named Service Request Hourly Usage and Inquiry Hourly Usage are displayed.
4 Configure filters for new report
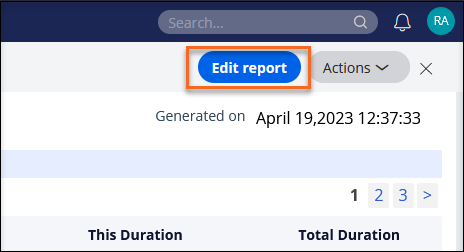
- On the Reports landing page, click the Service Request Hourly Usage report tile to open the report.
- In the upper-right corner of the report, click the Edit report button to open the Report Configuration page.
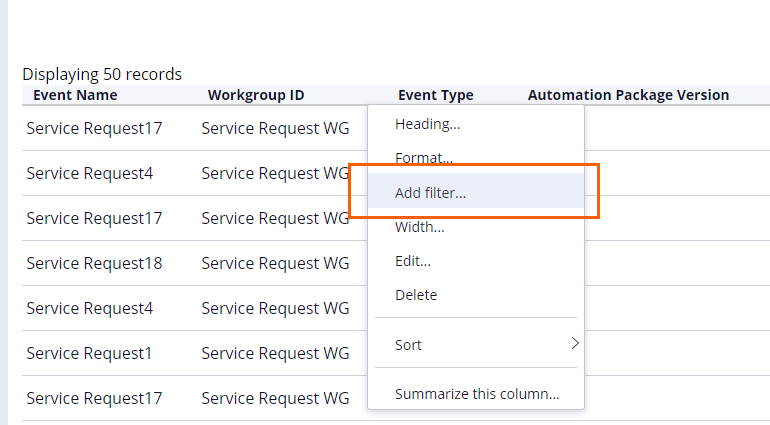
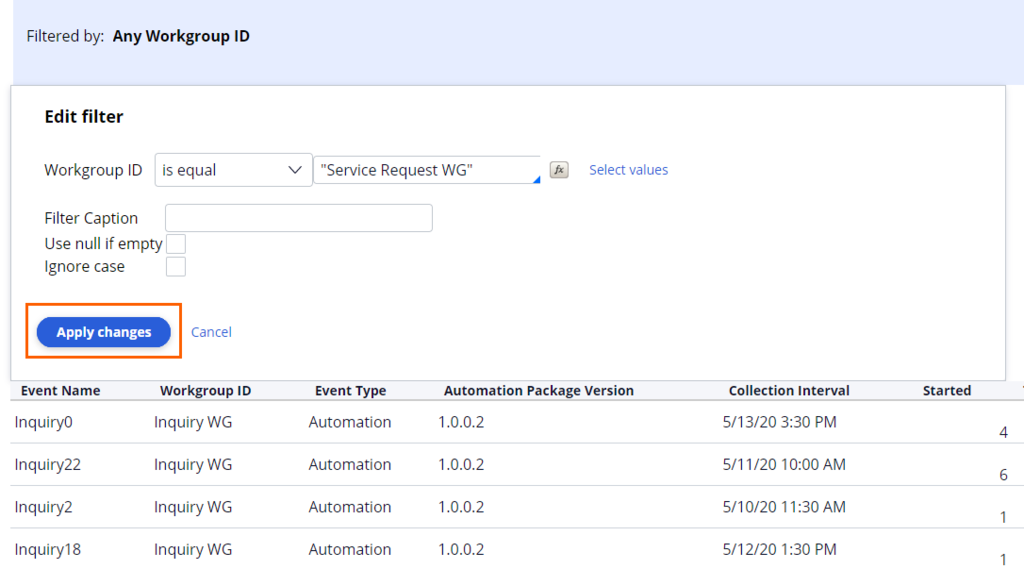
- On the Report Configuration page, hover over the Workgroup ID column and click the Open icon to display the column menu.
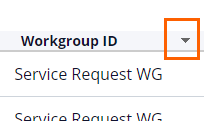
- On the column menu, click Add filter to open the Edit filter window.
- In the Edit filter window, click Select values to open the Select values dialog box.
- In the Select values dialog box, select the Service Request WG check box.
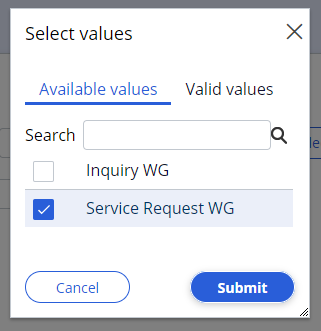
- Click Submit to close the Select values dialog box.
- In the Edit filter window, click Apply changes.
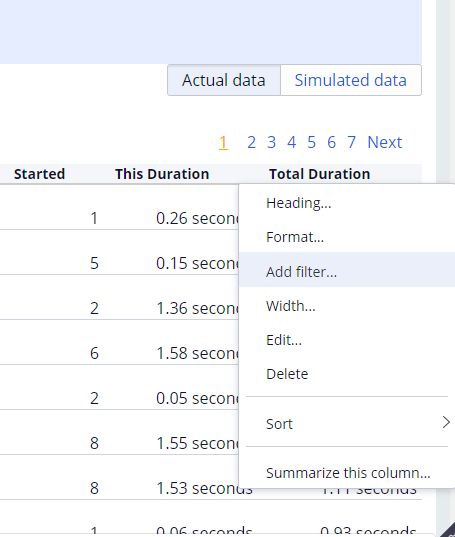
- On the Report Configuration page, hover over the This Duration column and click the Open icon to display the column menu.
- On the column menu, click Add filter to open the Edit filter window.
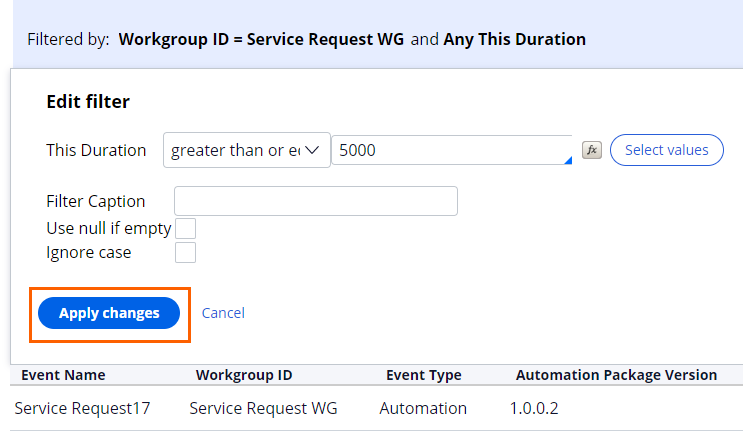
- In the Edit filter window, in the This duration filter list, select is greater than or equal to.
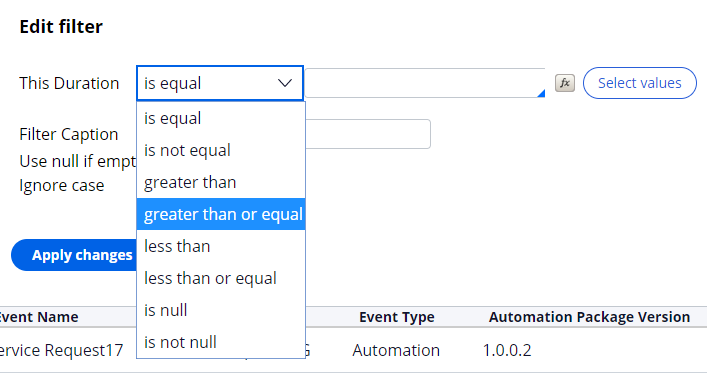
- On the right, enter 5000 as the value of the input box to filter for service requests taking longer than 5000 milliseconds or 5 seconds.
- Click Apply Changes to close the Edit filter dialog box.
- In the upper-right corner of the Report Configuration page, click Done editing.

- In the upper right, click the Close icon to close Report Configuration page.

- Repeat steps 1-14 to edit the Inquiry Hourly Usage Report to filter using the following information:
- Add filter on column using Inquiry WG
- Add filter on column using and enter 3000 as the value to filter for inquiries taking longer than 3000 milliseconds or 3 seconds
5 Make your custom reports Public
- On the Report landing page, click the Service Request Hourly Usage tile to open the report.
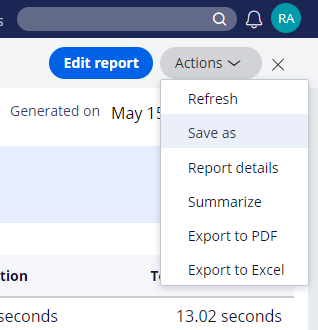
- Click Actions > Save as to open the Save report as dialog box.
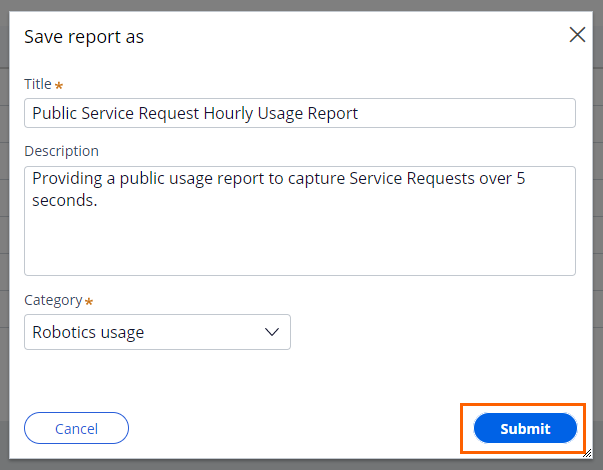
- In the Save report as dialog box, enter the following information:
- In the Title field, enter Public Service Request Hourly Usage.
- In the Description text box, enter Providing a public usage report to capture Service Requests over 5 seconds.
- In the Public section of the category list, select Robotics usage.
Note: As an administrator, you can also add a custom report category to your application. For detailed instructions about how to add custom categories to Pega Robot Manager, see Creating a report category.
- Click Submit to close the Save report as dialog box.
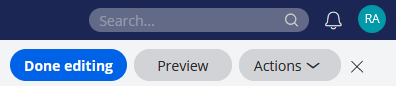
- Click Done editing to finish configuring the report.
- In the upper right, click the Close icon to close the report window.

- In the All reports tab, enter Robotics usage in the Category list to filter the category. Verify that the Public Service Request Hourly Usage tile is displayed.

- Repeat steps 1-6 to create the Public Inquiry Hourly Usage report.
Available in the following mission:
If you are having problems with your training, please review the Pega Academy Support FAQs.
Want to help us improve this content?