
Creating a new entity
5 Tasks
5 mins
Scenario
U+ Bank wants to improve the experience of its customers with personalized decisions that are driven by customer-centric engagement policies and predictive models. After an initial data mapping exercise, U+ Bank confirms that the Pega financial data model is a great match.
The project team sets up the implementation application of Pega Customer Decision Hub™ by using the setup wizard.
As a decisioning architect, your role is to review the data model that the wizard sets up and perform a gap analysis by leading a data mapping workshop with the stakeholders.
As the output of the gap analysis, the project team identified the need to make the following extension to the customer entity:
- A new offline scores entity and properties to hold U+ Banks offline model scores. This new entity has a one-to-one relationship with the customer class that the U+ Bank data science team maintains.
As the decisioning architect, first, capture the requirements into the Pega Financial Services xCAR data model and work with the system architects to extend the data model in Customer Decision Hub.
Use the following credentials to log in to the exercise system:
| Role | User name | Password |
|---|---|---|
| System architect | SystemArchitect | rules |
| Decisioning architect | DecisioningArchitect | rules |
Your assignment consists of the following tasks:
Task 1: Download the data model documentation
As a decisioning architect, download the Financial Services Customer Analytical Data Model documentation from Pega Marketplace.
Task 2: Review and extend the data model documentation (optional)
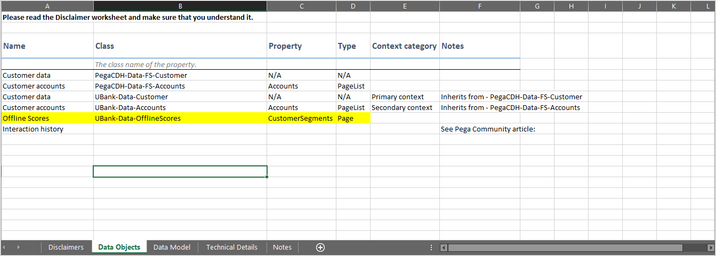
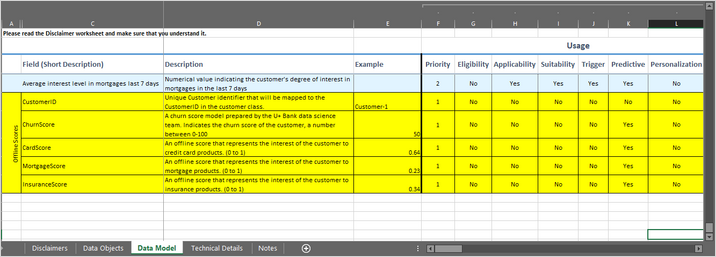
As a decisioning architect, review the downloaded data model and capture the following requirements to the Pega Financial Services xCAR data model XLSX file. Update the documentation and add a new OfflineScores entity and the following properties:
| Attribute | Description | Update frequency | Type | Notes |
|---|---|---|---|---|
|
CustomerID |
Unique Customer identifier that is mapped to the CustomerID in the customer class. |
Updated monthly |
Text |
The column name is CustID |
|
ChurnScore |
A churn score model that the U+ Bank data science team prepared. Indicates the churn score of the customer, a number between 0-100. |
Updated monthly |
Integer |
|
|
CardScore |
An offline score that represents the interest of the customer to credit card products (0 to 1). |
Updated monthly |
Decimal |
|
|
MortgageScore |
An offline score that represents the interest of the customer to mortgage products (0 to 1). |
Updated monthly |
Decimal |
|
|
InsuranceScore |
An offline score that represents the interest of the customer to insurance products (0 to 1). |
Updated monthly |
Decimal |
Caution: For the purposes of the exercise, this task is added to raise awareness. There is no integration between the XLSX file and the Pega data model. The changes made in the XLSX file are for documentation purposes and help you understand the existing data model.
Task 3: Add and map a new data class
As a system architect, create a new data class: UBank-Data-OfflineScores. Associate the new class with the OfflineScores database table and create the documented properties.
Note: In a real-life scenario, the database team typically creates the database. For the purposes of this exercise, the OfflineScores table already exists in the database for you.
Task 4: Create a new data set
As a decisioning architect, create a new OfflineScores data set to access the OfflineScores table.
Task 5: Add OfflineScores data source to allow list
As a decisioning architect, extend the customer data model with the newly defined offline model scores by using Customer Profile Designer.
Challenge Walkthrough
Detailed Tasks
1 Download the data model documentation
- In your browser, go to Pega Marketplace.
- In the search field, enter Financial Services Customer Analytical Data Model, then click the search icon.
- On the results page, click Financial Services Customer Analytical Data Model.
- On the Financial Services Customer Analytical Data Model page, in the Resources section, click Data model documentation to download the latest Pega Financial Services xCAR data model documentation file.
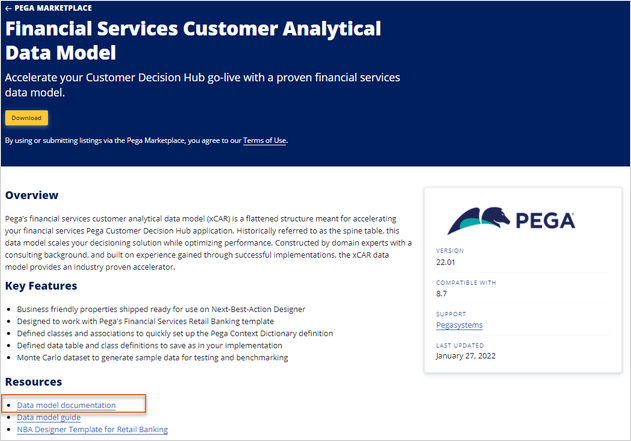
- Open the downloaded XLSX file to review the contents.
2 Review and extend the data model documentation
Caution: For the purposes of the exercise, this task is added to raise awareness. There is no integration between the XLSX file and the Pega data model. The changes made in the XLSX file are for documentation purposes and help you understand the existing data model.
- In the XLSX file, on the Data Objects tab, the new entity and class definition.
- In the XLSX file, on the Data Model tab, add the new properties and their details.
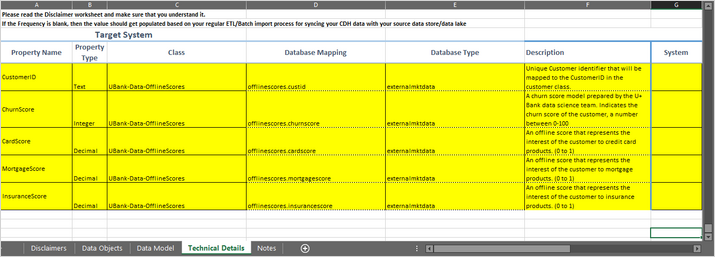
- In the XLSX file, on the Technical Details tab, add the new properties and their technical details.
3 Add and map a new data class
- On the exercise system landing page, click Pega CRM suite to log in to Customer Decision Hub.
- Log in as the system architect with User name SystemArchitect and Password rules to open Dev Studio.
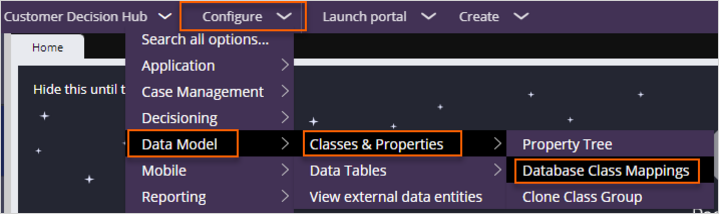
- In the header of Dev Studio, click Configure > Data Model > Classes & Properties > Database Class Mappings to create a new database table class mapping.
- On the Database Class Mappings tab, click New External Database Table Class Mapping to begin configuring the new mapping.

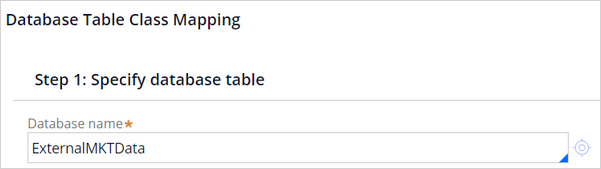
- In the Database Table Class Mapping configuration window, in the Step 1 : Specify database table section, configure the following settings:
- In the Database name field, enter or select ExternalMKTData.
 Note: A database rule defines the connection settings of Pega to a specific database. The ExternalMKTData database rule is configured as a precondition to the Customer Decision Hub installation. In this exercise environment, all customer tables reside in the externalmktdata database schema and are accessed through the ExternalMKTData database rule.
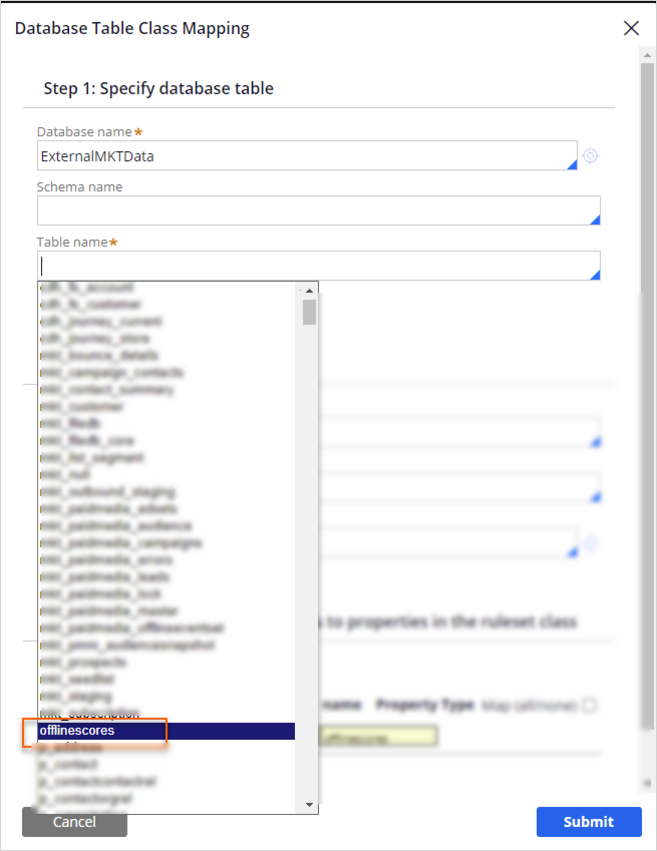
 - In the Table name field, enter or select offlinescores.
- In the Database name field, enter or select ExternalMKTData.
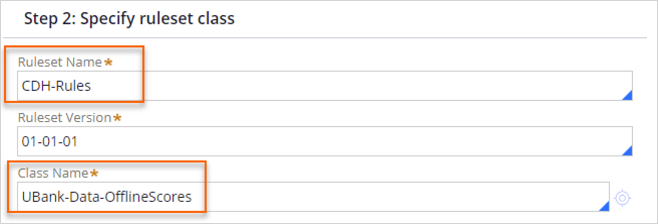
- In the Database Table Class Mapping configuration window, in the Step 2 : Specify ruleset class section, configure the following settings:
- In the Ruleset Name field, enter or select CDH-Rules.
- In the Class Name field, enter UBank-Data-OfflineScores.
- In the Database Table Class Mapping configuration window, in the Step 3: Map database table columns to properties in the ruleset class section, configure the following settings:
- In the Property name column, enter the following property names:
- CustomerID
- ChurnScore
- CardScore
- MortgageScore
- InsuranceScore
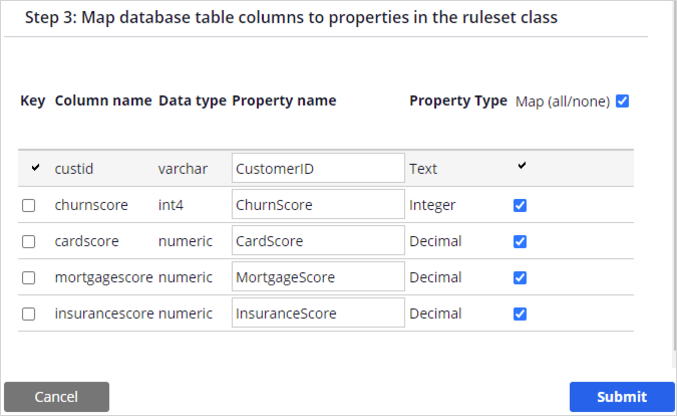
- Click Submit to create the UBank-Data-OfflineScores class.
Tip: This will create:
A new class UBank-Data-OfflineScores,
Create new properties with the given names and types,
Map the database columns to the new properties.
- In the Property name column, enter the following property names:
- In the navigation pane of Dev Studio, click App to open the App Explorer.
- In the search field, enter UBank-Data-OfflineScores.
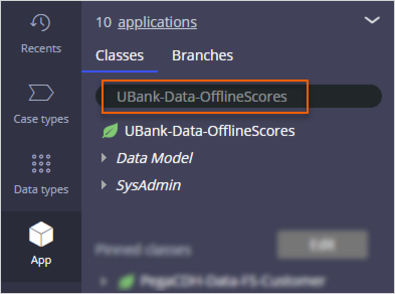
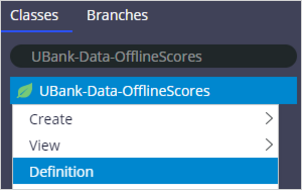
- Right-click the UBank-Data-OfflineScores class, and then select Definition to open the class definition.
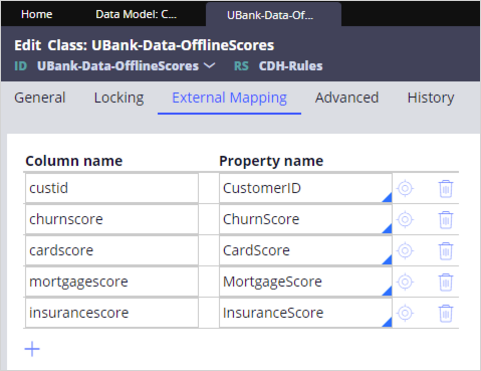
- Click the External Mapping tab to confirm the property mapping.
- In the search field, enter UBank-Data-OfflineScores.
- Click the General tab to test your connection and mappings.
- In the Test connection section, click Test connection to confirm that there are no issues regarding the GoPaperless mapping.
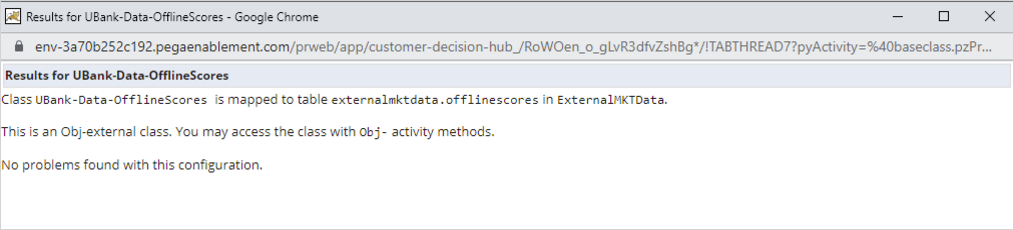
- Close the confirmation window.
- In the upper-right corner, click Save.
- In the Test connection section, click Test connection to confirm that there are no issues regarding the GoPaperless mapping.
4 Create a new data set
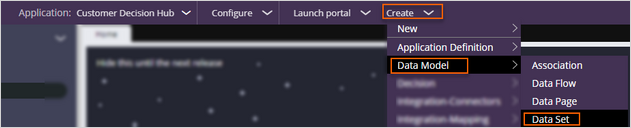
- In the header of Dev Studio, click Create > Data Model > Data Set to create a new data set.
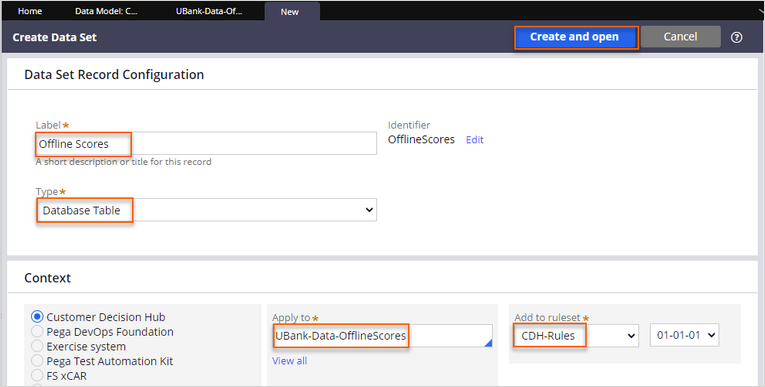
- On the Create Data Set tab, create a new data set:
- In the Label field, enter Offline Scores.
- In the Type list, confirm that Database Table is selected.
- In the Apply to field, enter or select UBank-Data-OfflineScores.
- In the Add to ruleset list, select CDH-Rules.
- In the upper-right corner, click Create and open to open the data set.
- In the upper-right corner, click Save.
- In the lower-left corner, click the SA icon, and then select Log off to log out of Dev Studio.
5 Add OfflineScores data source to allow list
- Log in to Customer Decision Hub as the decisioning architect with User name DecisioningArchitect and Password rules.
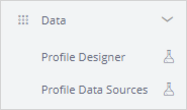
- In the navigation pane of Customer Decision Hub, click Data > Profile Data Sources.
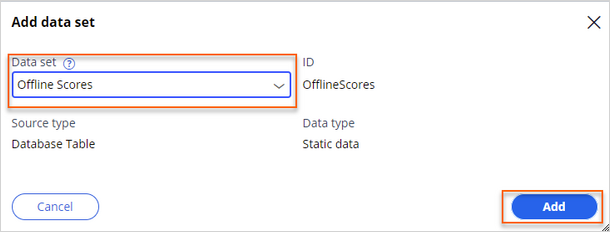
- On the Profile Data Sources landing page, click Add > Data set to display the Add data set dialog box.

- Configure the data set:
- In the Data set list, select Offline Scores.
- Click Add to include the data set in the allow list.
- In the navigation pane of Customer Decision Hub, click Data > Profile Designer to access the customer profile.

- In the upper-right corner, click Edit to modify the customer profile.
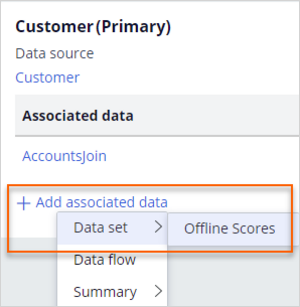
- In the Customer (Primary) section, click Add associated data > Data set > Offline Score to associate the data set with the customer.
- Click Add to define the mapping of Offline Scores to the primary context (Customer).
The mapping automatically creates a single page property (Offline Scores) in the customer class and an association rule for the join condition between the customer entity and the offline score entity.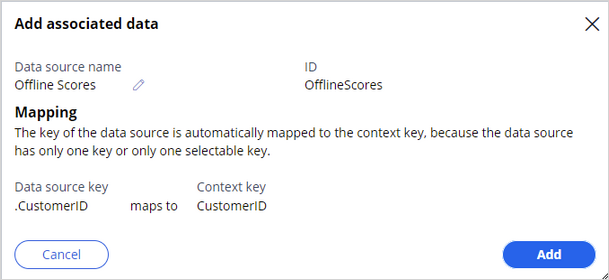
- In the upper-right corner, click Save to complete the data association.
Saving regenerates the data flows that populate the customer data in the clipboard.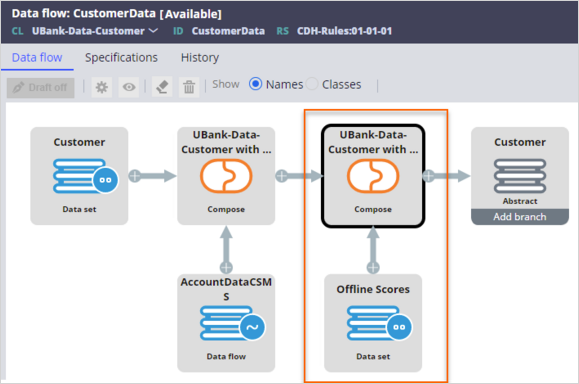
This Challenge is to practice what you learned in the following Module:
Available in the following mission:
If you are having problems with your training, please review the Pega Academy Support FAQs.
Want to help us improve this content?