Creating a Pega Email Bot
2 Tasks
15 mins
Scenario
The manager at U+ Bank wants to automate replies and notifications in the bank application as it reduces strain on the bank's customer experiences, employee productivity, and existing processes. In preparation, you have already created the email account for the bank. You are now expected to create an email bot to handle the incoming address change requests at U+ Bank.
Use the following credentials to log in to the exercise system:
| Role | User name | Password |
|---|---|---|
| System Architect | EmailBotDev | password123! |
Caution: To reuse the exercise system from a previous challenge, first complete the Creating an email account challenge. Otherwise, click Initialize Pega or Reset Instance in this challenge.
Your assignment consists of the following tasks:
Task 1: Create an email bot
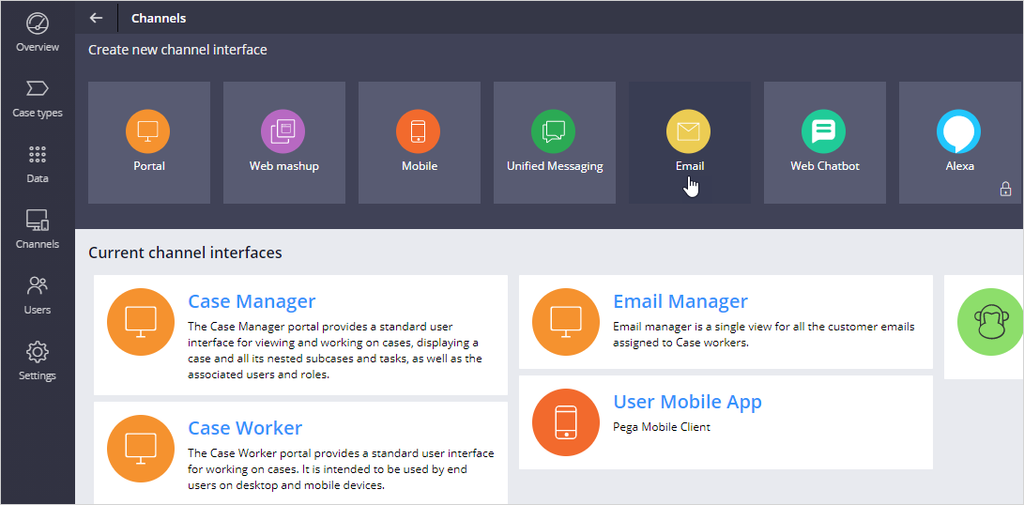
In the Create new channel interface area, click Email to create and open a new email bot instance
Task 2: Add cases and responses to the email bot
On the Behavior tab, in the Suggested cases section, click Add suggested case to add a new case.
Challenge Walkthrough
Detailed Tasks
1 Create an email bot
- Log in to App Studio as the System Architect with user name EmailBotDev using password password123!.
- In the navigation pane of App Studio, click Channels to create new channel interface.
- In the Create new channel interface area, click Email to create and open a new email bot instance.
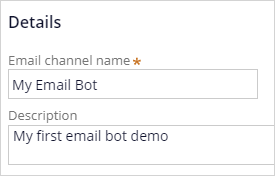
- In the Details section, enter the following information:
- Email channel name: My Email Bot
- Description: My first email bot demo
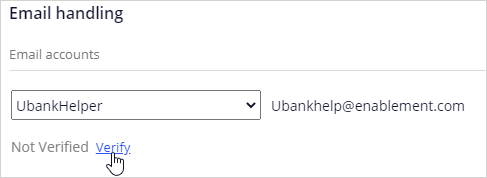
- In the Email handling section, click Add email account.
- In the Email accounts list, select UbankHelper.

- In the Additional settings section, in the Reference operator list, select Email bot dev. Any work that your email bot completes is performed in the context of this operator.
- In the upper right of the tab, click Save to establish a listener to the selected email account.
- Under the Email accounts list, click Verify to confirm that the email listener is successfully established.
2 Add cases and responses to the email bot
- On the Behavior tab, in the Suggested cases section, click Add suggested case to add a new case.
- In the Case type list, select Address Change.

- In the Add suggested case dialog box, on the Entity extraction tab, click Add mapping to ensure that entity values extracted from the inbound email are copied into the correct case properties.

- Map entities types to Address Change case model as follows:
Entity
Case property
Address
Home Address
From (name)
Full Name
From (email)
Email address
Note: You can find Address entity under NLP > Entities > Address and From (name) and From (email) entities under Header.
- Click Submit to close the dialog box.
- Save the channel.
Note: If the entity list is incorrectly populated, you may have to close and re-open the Channel and interfaces tab.
- On the Behavior tab, in the Text Analytics section, click Edit topics to open a dialog box that displays all of the topics available within your channel's text analyzer.
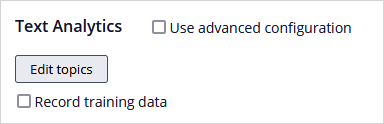
The Address Change topic is automatically created after you add the Address Change case. - Click Add item to add a new topic called Complaint.
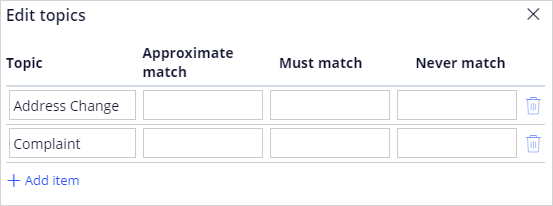 Note: Before a suggested reply is added to the channel, you must create a topic to associate to the response.
- Click Submit to close the dialog box,
- Click Save.
- On the Behavior tab, in the Suggested replies section, click Add suggested reply to add a new reply.
- In the Add suggested reply dialog box, in the Email template list, select Apology.
Optional: Click Edit to modify the Apology email template. - In the Associate topics list, select Complaint.
- In the Add suggested reply dialog box, in the Email template list, select Apology.
- Click Submit.
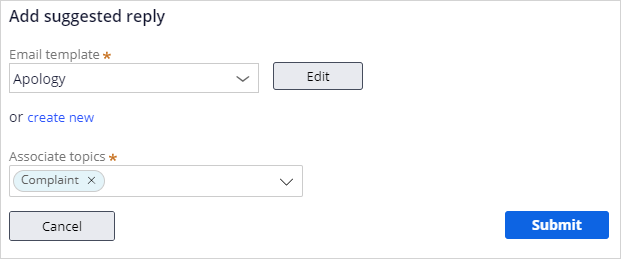
- Save your configuration.
Available in the following mission:
If you are having problems with your training, please review the Pega Academy Support FAQs.
Want to help us improve this content?