Defining and creating a Customer Journey
4 Tasks
25 mins
Scenario
U+ Bank wants to increase the number of mortgage applications from qualified customers. On top of that, the bank also wants to create a mental map of its mortgage offering that helps them better understand the customer experience. To do that, the bank designed the Discover and Apply for a Mortgage customer journey that guides customers through the process of first becoming familiar with the offering in the Awareness stage. Then in the Explore product stage, customers learn about each mortgage offer. Finally, customers can contact the mortgage advisor in the Talk to advisor stage. Before moving to each stage, customers pass the entry criteria that are defined with JourneyStages customer property. JourneyStages contains information about which customer journeys a customer is currently in.
U+ Bank wants to define and create that customer journey in Pega Customer Decision Hub™ to enhance the propensity calculation by encouraging eligible customers to get a new mortgage.
Use the following credentials to log in to the exercise system:
| Role | User name | Password |
|---|---|---|
| Decisioning Architect | DecisioningArchitect | rules |
Your assignment consists of the following tasks:
Task 1: Define the customer journey
Define the Discover and Apply for a Mortgage customer journey and the Awareness, Explore products, and Talk to advisor stages in the taxonomy.
Task 2: Add the actions to journey stages
Add appropriate actions to the respective stages. A list of actions is available in the Grow / Mortgage actions. Use the information in the following table to create the mapping between the actions and journeys:
|
Awareness |
Explore products |
Talk to advisor |
|
Pros and cons of fixed rate mortgages |
|
Talk to an advisor |
Task 3: Create and define entry criteria for journey stages
Define the entry criteria for each stage using the JourneyStages property and newly created conditions, using the following conditions:
Awareness stage:
- The customer property JourneyStages has a result count equal to 0.
Explore products stage:
- The customer property JourneyStages has one or more instances of a new condition:
|
Set conditions |
||
|
Journey Name |
Is equal to |
DiscoverAndApplyForAMortgage |
|
Journey Stage |
Is equal to |
Awareness |
Talk to advisor stage:
- The customer property JourneyStages has one or more instances of a new condition:
|
Set conditions |
||
|
Journey Name |
Is equal to |
DiscoverAndApplyForAMortgage |
|
Journey Stage |
Is equal to |
ExploreProducts |
Task 4: Confirm that Troy progresses through the customer journey
Log in as Troy to confirm that he can progress through the entire mortgage journey by clicking the consecutive web tiles that are presented on the U+ Bank website.
Challenge Walkthrough
Detailed Tasks
1 Define the customer journey
- On the exercise system landing page, click Pega CRM suite to log in to Pega Customer Decision Hub™.
- Log in as a decisioning architect:
- In the User name field, enter DecisioningArchitect.
- In the Password field, enter rules.
- In the navigation pane of Customer Decision Hub, click Next-Best-Action > Designer to open the Next-Best-Action Designer landing page.
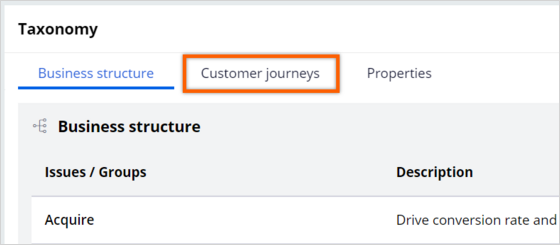
- On the Next-Best-Action Designer landing page, click Taxonomy.
- In the Taxonomy section, click the Customer journeys tab to view the customer journeys in your system.
Note: Currently, there are no customer journeys that are defined in your exercise system.
- Click Edit to add a customer journey.
- Click Add customer journey to define a new customer journey.
- In the Add customer journey window, in the Name field, enter Discover and Apply for a Mortgage.
- In the Issue / Group list, select Grow > Grow / Mortgages.
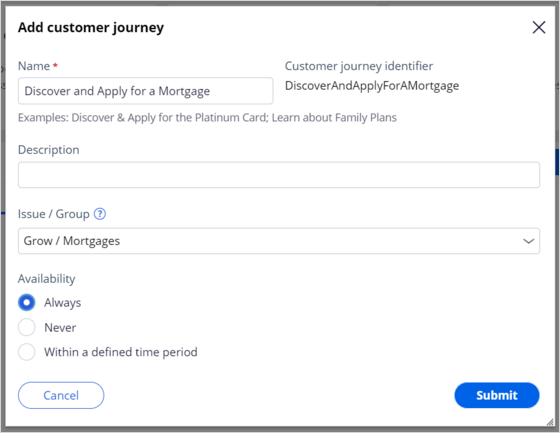
- Click Submit to define the customer journey.
- In the Discover and Apply for a Mortgage journey, click the empty field and enter Awareness to name the first stage.
- On the right, click Add stage to add another stage to the journey after Awareness.
- In the new stage field, enter Explore products.
- In the Complete stage, click More > Edit stage name.
- In the stage name field, enter Talk to advisor.
- Click Save.
Note: Saving might take up to two minutes because of the number of artifacts and strategies that the customer journey creates.
2 Add the actions to journey stages
- On the Next-Best-Action Designer landing page, click Engagement policy.
- In the Business structure pane, in the Grow > Mortgages section, click Discover and Apply for a Mortgage to view the journey.

- On the right side of the Business structure pane, click Edit.
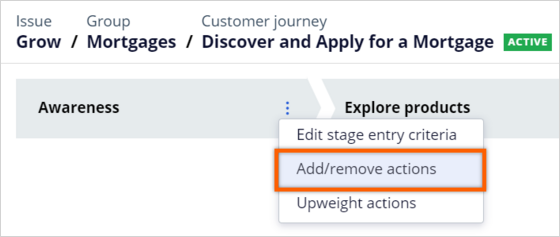
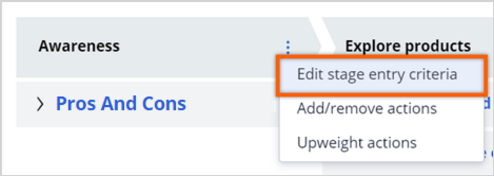
- In the Awareness stage, click More > Add/remove actions.
- On the right of the Pros And Cons action, click Add.
Note: For the purposes of this exercise, all the actions and treatments you need for this challenge are already loaded into your system.
- Click Apply to add the action to the stage.
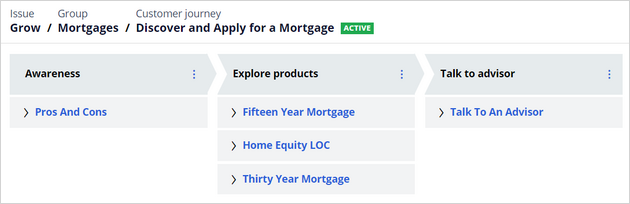
- Repeat steps 4-6 to add actions to the remaining stages:
- In the Explore products stage, add the following actions:
- Fifteen Year Mortgage
- Home Equity LOC
- Thirty Year Mortgage
- In the Talk to advisor stage, add the following action:
- Talk To An Advisor
- In the Explore products stage, add the following actions:
- Click Save.
- Click the Pros And Cons action to open the action details.
- Click the Engagement policy tab.
- In the upper-right corner, click Check out.
- Select the This action is only applicable when in a customer journey stage checkbox, and then, in the upper-right corner, click Check in.
Note: By selecting the This action is only applicable when in a customer journey stage checkbox, you tell the system that this action can be presented as only a part of this journey. If you leave the checkbox clear, the action might present itself on its own. Any interactions with the standalone action do not count toward the progress of the customer journey.
- In the Check-in comments field, enter a brief description of your changes, enter comment, and then click Check in to complete your edits to the action.
- Repeat steps 9-13 for all the other actions that you added to the customer journey.
3 Create and define entry criteria for journey stages
- On the right side of the Business structure pane, click Edit.
- In the Awareness stage, click More > Edit stage entry criteria.
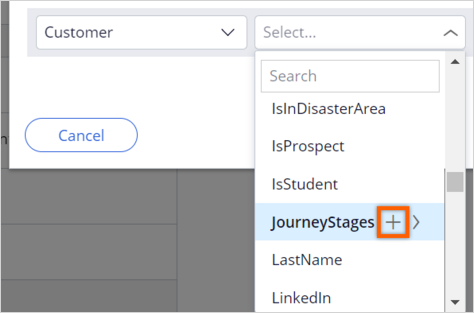
- In the Edit entry criteria: Awareness window, in the second list, select Fields, hover over JourneyStages, and then click the Add icon.
- In the third list, ensure the result count is equal to is selected.
- In the last field, enter 0.
Note: This condition means that any customer that is not in a journey will automatically be qualified for this one. Such customer will see actions from the Awareness stage when the next-best-action decision is made. Do note that such condition shouldn't be used in real implementation as it is easily blocked by other journeys the customer might already be in. It is used in this challenge only for educational purposes.
- Click Submit.
- In the Edit entry criteria: Awareness window, in the second list, select Fields, hover over JourneyStages, and then click the Add icon.
- In the Explore products stage, click the More > Edit stage entry criteria.
- In the Edit entry criteria: Explore products window, in the second list, select Fields, hover over JourneyStages, and then click the Add icon.
- In the third list, select instances include.
- In the last list, select [Create new condition], and then click the Gear icon.

- In the JourneyStages condition window, click the first list, and then select Fields > Journey Name.
- In the third field, enter DiscoverAndApplyForAMortgage.
- Click the Add icon to add another condition.
- In the first list, select Fields > Journey Stage.
- In the third field, enter Awareness.
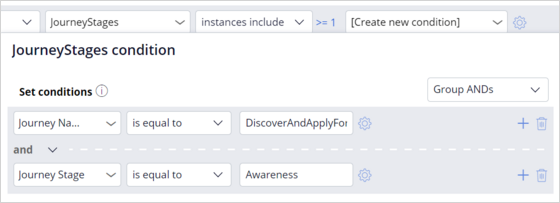
- Click Submit to complete the JourneyStages condition setup.
Note: This condition means that any customer that is in the previous stage of the journey will be eligible for the next stage. This means that the customer will be progressed through the journey once they see an action in Awareness stage.
- Click Submit to complete the entry criteria setup.
- In the Talk to advisor stage, click More > Edit stage entry criteria.
- In the Edit entry criteria: Talk to advisor window, in the second list, select Fields, hover over JourneyStages, and then click the Add icon.
- In the third list, select instances include.
- In the third list, select [Create new condition], and then click the Gear icon.
- In the JourneyStages condition window, click the first list, and then select Fields > Journey Name.
- In the third field, enter DiscoverAndApplyForAMortgage.
- Click the Add icon to add another condition.
- In the first list, select Fields > Journey Stage.
- In the third field, enter ExploreProducts.
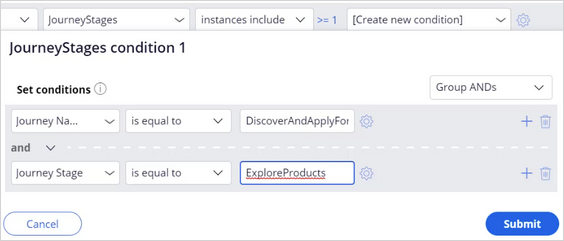
- Click Submit to complete the JourneyStages condition setup.
Note: This condition means that any customer that is in the previous stage of the journey will be eligible for the next stage. This means that the customer will be progressed through the journey once they see an action in Awareness stage.
- In the third list, select [Create new condition], and then click the Gear icon.
- Click Submit to complete the entry criteria setup.
- Click Save.
4 Confirm that Troy progresses through the customer journey
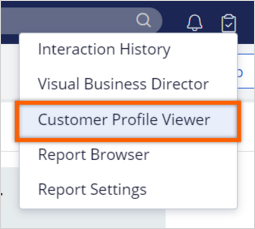
- In the upper-right corner of the Customer Decision Hub, click Reports > Customer Profile Viewer.
- In the Customer ID field, enter 14.
- Click View to view Troy's customer profile.
Note: You can inspect the customer's progress through the customer journey in the Customer journey section of the Overview tab.
- On the Exercise System landing page, click U+ Bank to open the website.
- On the main page of the website, in the upper right corner, click Log in to log in as a customer.
- In the Username field, ensure that Troy is selected, and then click Sign in to log in as Troy.
- On the right, in the web tile, click Learn more to record a positive interaction with the treatment that is displayed.
- Click the Customer Profile Viewer tab, and then click the Refresh icon.
- Confirm that Troy is now in the Awareness stage of the Discover and Apply for a Mortgage customer journey.
- In recorded in the Recent interactions section, confirm that the actions that you performed on the U+ Bank website are recorded.
- On the U+ Bank website, in the upper-right corner, click the user icon, and then click Log out.
- Repeat steps 4–10 twice to notice how Troy progresses through the customer journey.
This Challenge is to practice what you learned in the following Module:
Available in the following mission:
If you are having problems with your training, please review the Pega Academy Support FAQs.
Want to help us improve this content?