Exposing an application with a SOAP service
Archived
4 Tasks
15 mins
Scenario
The Human Resources (HR) department partners with several staffing services to expose open positions to a wider audience of potential job applicants. These staffing services have requested that TGB allow them to submit applicants for open positions directly from their own client management systems.
The following table provides the credentials you need to complete the exercise.
| Role | Operator ID | Password |
|---|---|---|
| Senior System Architect | SSA@TGB | rules |
Your assignment
Create a SOAP service. Configure the service to accept the following input for candidate cases:
- First name
- Last name
- Candidate comment
- Position applying for
- Experience (list with job title, company, start date, end date)
If the candidate case is created by the SOAP service, skip the steps in the Collect Candidate Details process.
Note: If you completed the Working with temporary cases exercise, go to the Candidate class and open the pyStartCase flow. Then, on the Process tab, deselect Temporary object before continuing with this exercise.
Detailed Tasks
1 Run the Service wizard
-
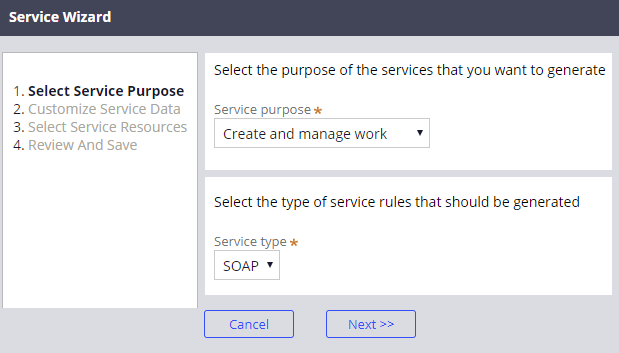
Select Dev Studio > Configure > Integration > Services > Service Wizard to start the Service wizard.
-
Set the Service Purpose to Create and manage work and the Service Type to SOAP, then click Next.
-
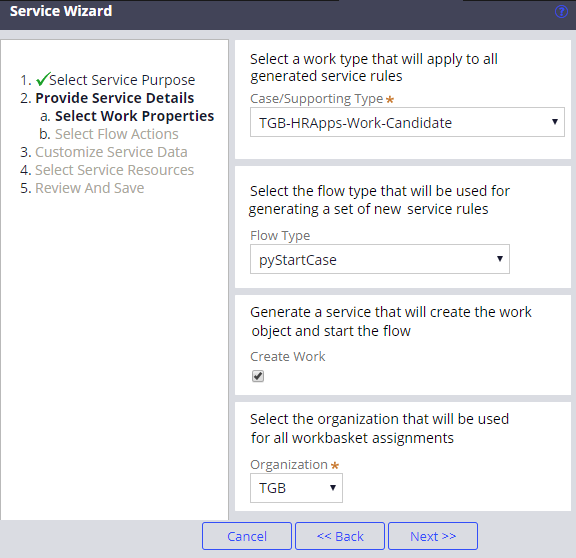
Set Case/Supporting Type to TGB-HRApps-Work-Candidate and Flow Type to pyStartCase, select Create Work and set the Organization to TGB, then click Next.
-
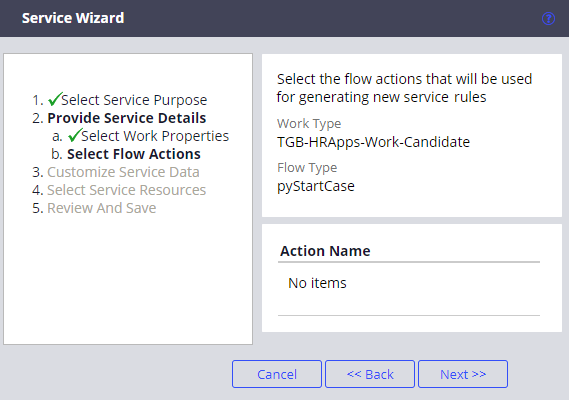
Click Next. (The pyStartCase flow does not have any flow actions that you want to consider a service to execute.)
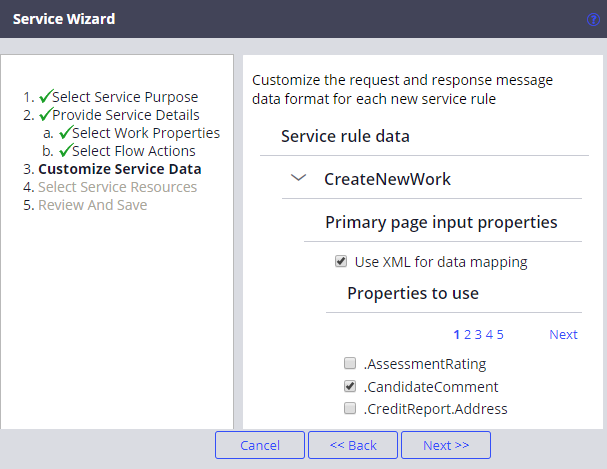
- Expand CreateNewWork to display the Primary Page Input Properties.
- Select Use XML for data mapping to allow list structures in the request.
Note: Only properties defined directly in the TGB-HRApps-Work-Candidate case type are shown. Inherited properties are not shown and need to be added manually after the wizard has been completed.
-
Select the following input properties:
- .CandidateComment
- .PositionAppliedFor
- .Experience().Company
- .Experience().EndDate
- .Experience().JobTitle
- .Experience().StartDate
Click Next.
-
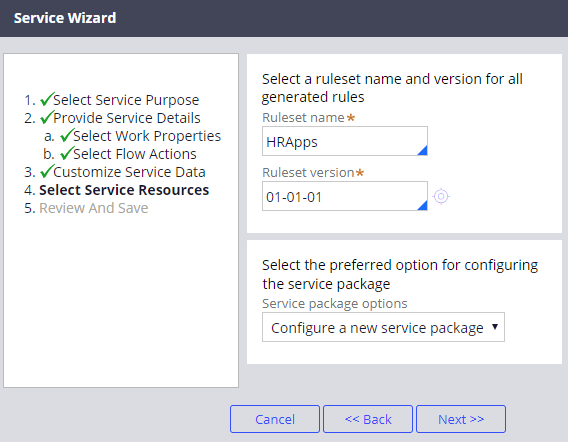
Set the Ruleset Name to HRApps and the Ruleset Version to the version in which you are working.
-
From the Service Package Options drop-down list, select Configure a new service package, then click Next.
-
Keep the default settings in the Configure Data Records screen. Click Next.
Note: Requires authentication is selected by default. This means that you need to provide an operator and password when you call your service.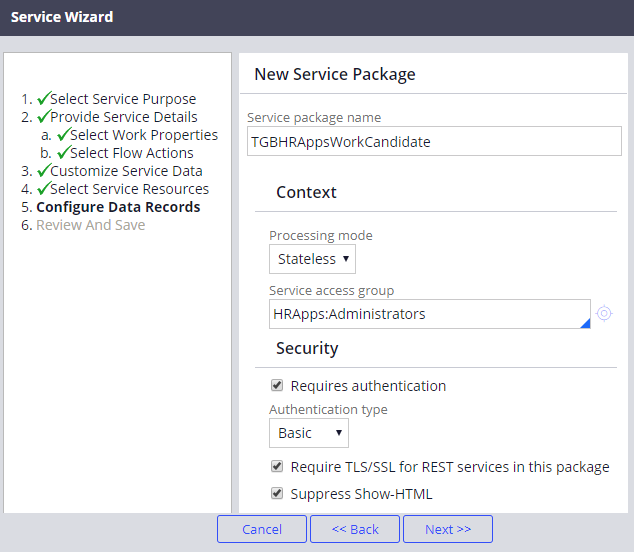
-
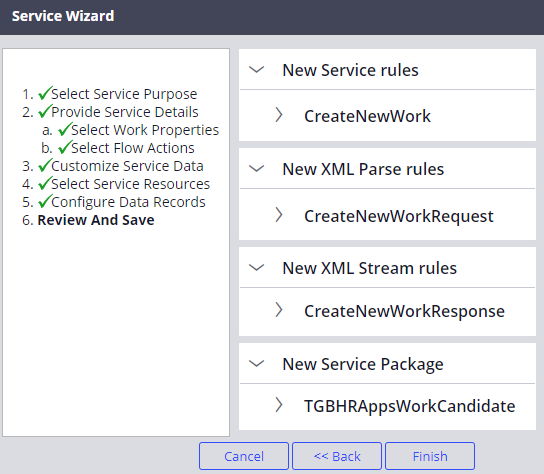
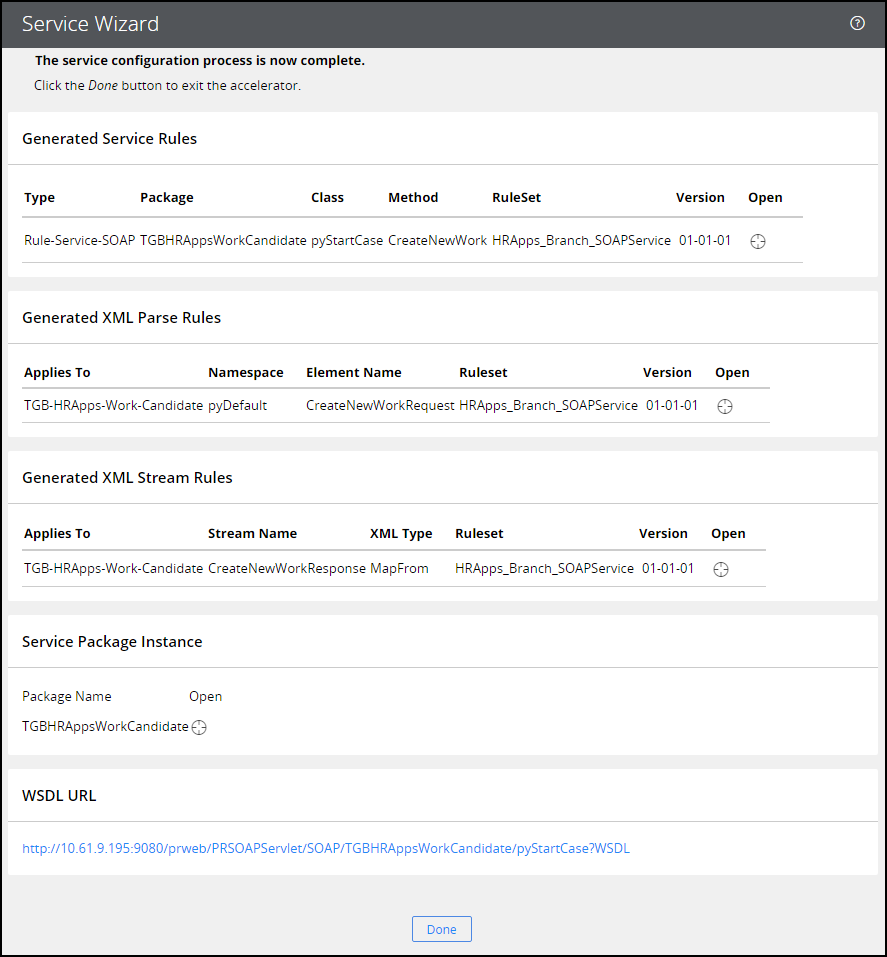
The Review and Save screen displays the records that are created by the wizard. Click Finish to create the records.
-
The final page displays the records created by the wizard.
2 Add missing input parameters
- Open the CreateNewWorkRequest XML parse rule generated by the wizard.
-
Click Add Element to add the required input parameters that were not available for selection in the wizard.
-
Click the new icon to open the User Data window to create the FirstName.Candidate.pyFirstName input property.
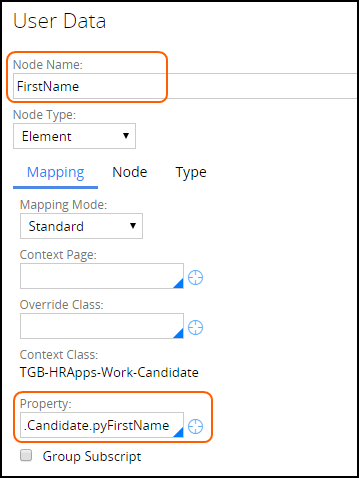
- Repeat steps 2-3 to create the following additional properties:
- LastName.Candidate.pyLastName
- Email.Candidate.pyEmail1
- Save your changes.
3 Configure the case to skip the Submission stage for cases submitted using the service
- Add a TrueFalse property named CreatedByService to the Candidate case type.
Tip: To add a property, in the Application Explorer, right-click the Candidate case type. select Create > Data model > Property to open the Create Property form in the case type class.
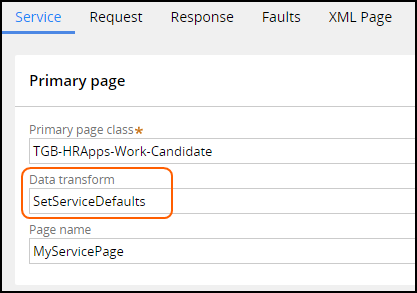
- Create a data transform named SetServiceDefaults that sets the property CreatedByService to true.
- On the Service tab of the service rule, in the Data transform field, add the data transform to invoke the data transform when the service primary page is created.
Tip: SOAP service records are in the Integration-Services category. From the Records Explorer, expand Integration-Services > Service SOAP to list available SOAP service records.
- In the Candidate case type, on the Workflow tab, select the Collect Candidate Details process.
- In the Start process field, use an expression to start the Collect Candidate Details process conditionally.
- Set the condition to evaluate the .CreatedByService property.
4 Confirm your work
-
Open the CreateNewWork SOAP service rule.
Note: Select the CreateNewWork instance of HRApps ruleset. -
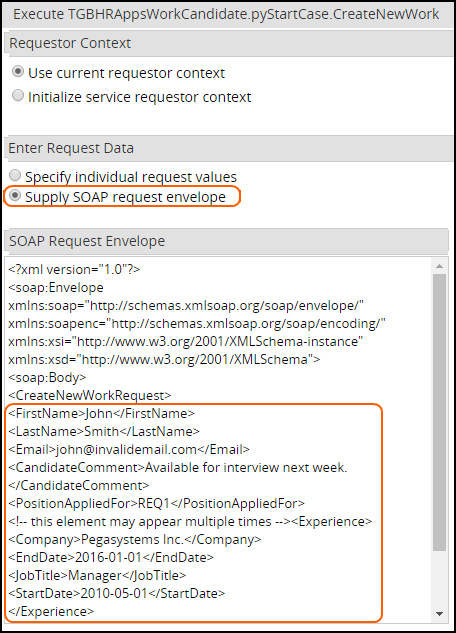
Select Actions > Run to test the service.
-
Select Supply SOAP request envelope and enter some test data, then click Execute. For the value of PositionAppliedFor, enter REQ1.
-
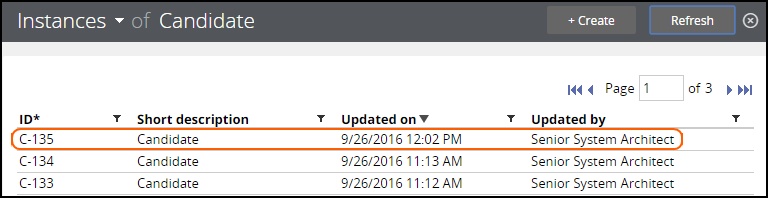
In the Application Explorer, right-click the Candidate case type and select View > Instances to verify that a new Candidate instance was created.
 Tip: If the instance was not created, start the Tracer and rerun the wizard to debug the service. To use the Tracer to debug a service, open the Tracer Settings dialog and under Event types to trace, select Services.
 -
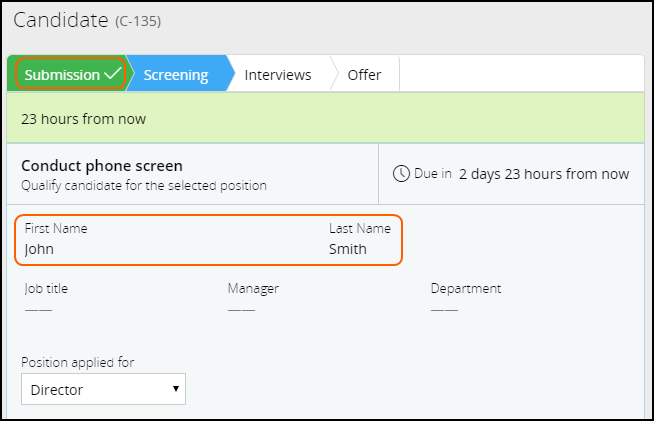
Open the Candidate case instance created by the service.
-
Verify that the Submission stage is completed and that the First name, Last name, and Position applied for fields are populated.