Managing data with Toolbox_1.zip
(411.06 KB)
Managing data with Toolbox
6 Tasks
30 mins
Scenario
The Robotic Banking company acquires the Pega Finance webpage that offers the Online Bill Pay system. All customer transactions in the Pega Finance system move to the Robot Banking company BankerInsight application for record consolidation.
The Robotic Banking company offers a discount to Pega Finance customers who have already signed up and created an account in BankerInsight before the system update. The automation adds a 20% discount to all Pega Finance invoices from the acquisition period and assigns the deal to the BankerInsight account.
Complete the following tasks:
- Create an automation that finds Pega Finance customers with the account number corresponding to the BankerInsight account.
- Create an automation that retrieves the invoice data.
- Compare the invoice data with the discount period.
- Concatenate invoice memo and invoice ID to use as a transaction description.
- Create an automation that applies a 20% discount with proper description to the BankerInsight application.
Challenge Walkthrough
Detailed Tasks
1 Create the Finance_CustomerSearch automation.
Create an automation that loops through the Pega Finance customer list and selects the customer of the given account number. The account number is an input parameter of the automation.
- Download the Robotic Banking project:
- Save the file to your desktop and unzip the file to extract the project folder to your C:\Users\<username>\Documents\Pega Robot Studio\Projects\.
- On the Home screen in Pega Robot Studio, click Open Project, and then navigate to the projects folder and open Robotic Banking.pegaproject.
Note: The starter project includes a configured BankerInsight application. The value of the Path field must match the location of BankerInsight on your local computer for the project to function properly. In the BankerInsight application, change the value of the Path to the location of your BankerInsight application.
- In the, click to open the Finance_CustomerSearch automation.
- Add the following design blocks to the automation surface:
Design block name Actions PerformClick method - On the Palette tab, click Applications > Pega Finance > PegaRoboticsTraining, and then drag the lnkCustomers control to the automation surface.
- In the Select action dialog box, click More.
- In the search field, enter PerformClick.
- On the Method tab, select the PerformClick (no parameters) method and then click Add.
WaitForCreate method - On the Palette tab, click Applications > Pega Finance > PegaRoboticsTraining, and then drag the tblAccounts control to the automation surface.
- In the Select action dialog box, click More.
- In the search field, enter WaitForCreate.
- On the Method tab, select the WaitForCreate (no parameters) method and then click Add.
GetClones method - On the Palette tab, click Applications > Pega Finance > PegaRoboticsTraining > tblAccounts, and then drag the trAccounts control to the automation surface.
- In the Select action dialog box, click More.
- In the search field, enter GetClones.
- On the Method tab, select the method and then click Add.
PerformClick method - On the Palette tab, click Applications > Pega Finance > PegaRoboticsTraining > tblAccounts > trAccounts, and then drag the lnkAccountName control to the automation surface.
- In the Select action dialog box, click More.
- In the search field, enter PerformClick.
- On the Method tab, select the method PerformClick (no parameters) and then click Add.
Text property - On the Palette tab, click Applications > Pega Finance > PegaRoboticsTraining > tblAccounts > trAccounts, and then drag the tdAccountNum control to the automation surface.
- In the Select action dialog box, click More.
- In the search field, enter Text.
- On the Property tab, select the checkbox for the Text property and then click Add(1).
- In the Toolbox search field, enter ListLoop.
- Drag the ListLoop component to the automation surface.
- On the Palette, expand the Locals section, and drag the ListLoop to the automation surface.
- In the Select action dialog box, click and in the search field enter Break.
- On the Method tab, select Break and then click Add.
- On the Palette, expand Locals > Run, and then drag the accountNumber variable to the automation surface.
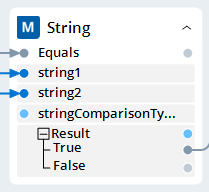
- In the Toolbox, expand the Data handling > Strings > Compare folder and then drag the Equals method to the automation surface.
- On the automation surface, add error handling design blocks:
Design block name Actions Jump To Success - Right-click the automation surface, and then select Jump To > Success.
Jump To Failure - Right-click the automation surface, and then select Jump To > Failure.
- Click msg, and then enter Record not found.
Jump To Failure - Right-click the automation surface, and then select Jump To > Failure.
- Click msg, and then enter Application timeout.
- Connect the design blocks as shown in the following figure:

- On the toolbar, click Save to save the automation.
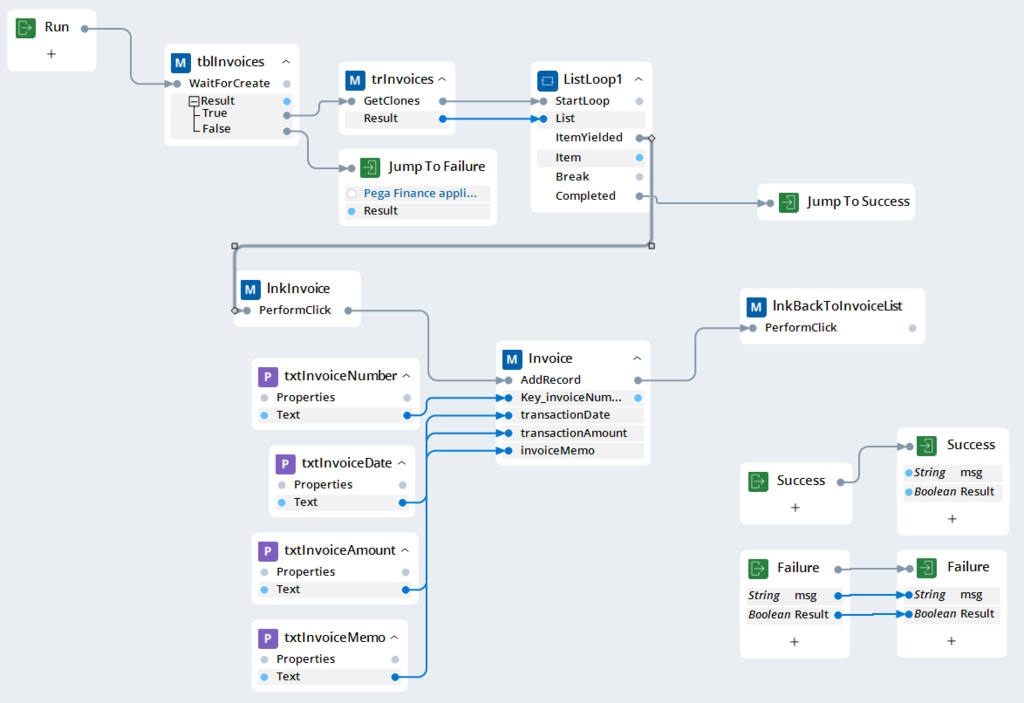
2 Create the Finance_GetInvoiceData automation.
Create an automation that selects the customer's invoice, retrieves invoice data (invoice number, date, amount, and memo), and adds it as a Lookup Table record.
- In the , click and open Finance_GetInvoiceData automation.
- On the Palette, click Applications, and then select Show hidden items.
- Add the following design blocks to the automation surface:
Design block name Action WaitForCreate method - On the tab, click Applications > Pega Finance > PegaRoboticsTraining > cntrInvoices, and then drag the tblInvoices control to the automation surface.
- In the Select action dialog box, click More.
- In the search field, enter WaitForCreate.
- On the Method tab, select the WaitForCreate (no parameters) method and then click Add.
GetClones method - On the Palette tab, click Applications > Pega Finance > PegaRoboticsTraining > cntrInvoices> tblInvoices, and then drag the trInvoices control to the automation surface.
- In the Select action dialog box, click More.
- In the search field, enter GetClones.
- On the Method tab, select the method and then click Add.
PerformClick method - On the Palette tab, click Applications > Pega Finance > PegaRoboticsTraining > cntrInvoices> tblInvoices > trInvoices and then drag the lnkInvoice control to the automation surface.
- In the Select action dialog box, click More.
- In the search field, enter PerformClick.
- On the Method tab, select the PerformClick (no parameters) method and then click Add.
Text property - On the Palette tab, click Applications > Pega Finance > PegaRoboticsTraining > frmInvoices, and then drag the txtInvoiceNumber control to the automation surface.
- In the Select action dialog box, click More.
- In the search field, enter Text.
- On the Property tab, select the checkbox for Text property and then click Add.
- Repeat steps a-d to add text property for the following controls: txtInvoiceDate, txtInvoiceAmount, txtInvoiceMemo.
AddRecord method - On the Palette tab, expand the Globals section and then drag the Invoice Lookup Table to the automation surface.
- In the Select action dialog box, click More.
- In the search field, enter AddRecord.
- On the Method tab, select the method and then click Add.
- In the Toolbox search field, enter ListLoop.
- Drag the ListLoop component to the automation surface.
- On the Palette, expand Pega Finance > PegaRoboticsTraining > frmInvoices and drag lnkBackToInvoiceList to the automation surface.
- In the Select action dialog box, select PerformClick, and then click Add.
- On the automation surface, add automation labels and error handling:
Design block name Action Jump To Success Right-click the automation surface, and then select Jump To > Success. Jump To Failure - Right-click the automation surface, and then select Jump To > Failure.
- Click msg, and then enter Pega Finance application timeout.
- Connect the design blocks as shown in the following figure:
- On the toolbar, click Save to save the automation.
3 Verify the system move date
Create an automation that retrieves the invoice date and compares it with the discount deadline date. The discount deadline is a global variable that determines the invoices needed to proceed.
- In the , select and open CompareDate automation.
- Add the following design blocks to the automation surface:
Design block name Action GetRecord method - On the Palette tab, under the Globals folder, drag the Invoice lookup table to the automation surface.
- In the Select action dialog box, select the GetRecord method, and click Add.
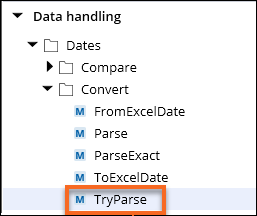
TryParse method - In the Toolbox, navigate to the Data Handling > Dates > Convert folder.
- In the Convert folder, drag the TryParse method onto the automation surface.
Compare method - In the Toolbox, expand the Data Handling > Dates > Compare folder.
- Drag the Compare method to the automation surface.

Value property - In the Palette, expand Globals and drag invoiceNumber variable to the automation surface.
- In the Select action window, select Value property and then click Add.
- In the Toolbox, expand Variables, and drag the DateTime variable to the automation surface.
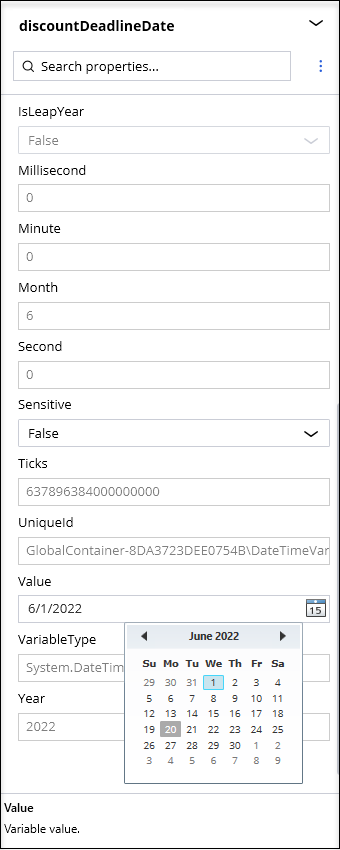
- Click the DateTime1 design block name and enter discountDeadlineDate.
- On the Palette, expand the Locals section and then select discountDeadlineDate.
- In the upper-right corner of the Pega Robot Studio, click an arrow to expand the Property Grid.
- On the discountDeadlineDate property grid, click the calendar icon next to the Value property.
- Select 06/01/2022 as the discount deadline date.
- On the Palette, expand Locals, right-click discountDeadlineDate , and then select Move to Globals.

- In the Pega Robot Studio popup window click Yes, to save changes in the automation and in the Globals section.
- On the automation surface, add error handling design blocks:
Design block name Action Jump To Success Right-click the automation surface, and then select Jump To > Success. Jump To Success Right-click the automation surface, and then select Jump To > Success. Jump To Failure - Right-click the automation surface, and then select Jump To > Failure.
- Click msg, and then enter Get record failure.
Jump To Failure - Right-click the automation surface, and then select Jump To > Failure.
- Click msg, and then enter Invoice date parsing failure.
Jump To Failure - Right-click the automation surface, and then select Jump To > Failure.
- Click msg, and then enter Invoice date is after deadline.
- On the automation surface, connect the links, as shown in the following image:
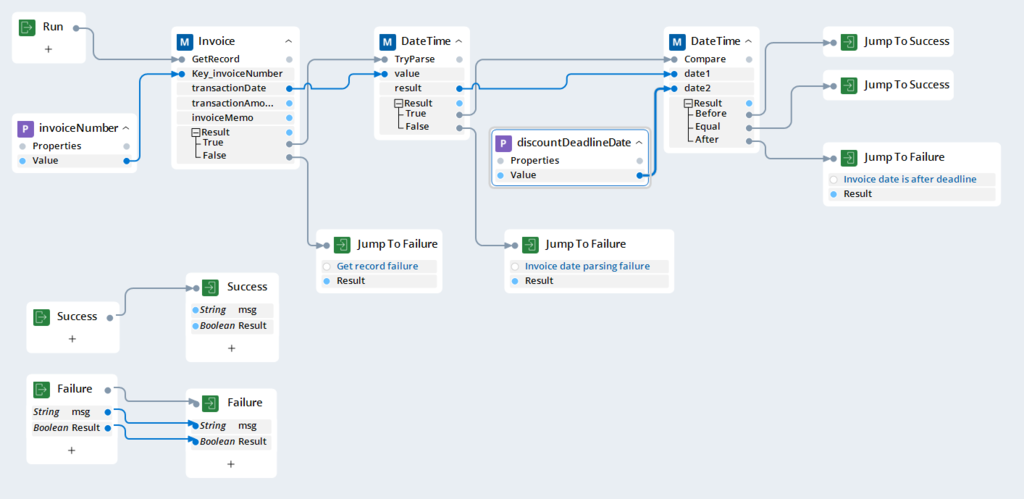
- On the toolbar, click Save to save the automation.
4 Update the invoice description
Create an automation that concatenates the invoice's number and memo and saves it in a global variable to be used as a bonus transaction description.
- In the Project Explorer, click and open the ConcatenateInvoice automation.
- Add the following design blocks to the automation surface:
Design block name Action GetRecord method - On the Palette tab, under the Globals folder, drag the Invoice lookup table to the automation surface.
- In the Select action dialog box, select the GetRecord method, and click Add.
String variable - In the Toolbox, expand the Variables section and drag a String variable to the automation surface.
- Click the String1 design block name and enter invoiceMemo.
Two invoiceNumber Value properties - In the Palette, expand Globals and drag invoiceNumber variable to the automation surface.
- In the Select action window, select Value property and then click Add.
- Repeat steps a-b to add another invoiceNumber Value property.
invoiceMemo Value property - In the Palette, expand the Locals section and drag the invoiceMemo value property to the automation surface.
- In the Select action window, select Value property and then click Add.
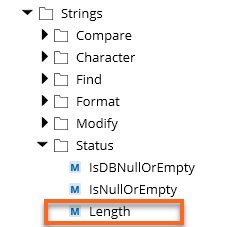
Length method - In the Toolbox, expand the, and drag the Length method to the automation surface.
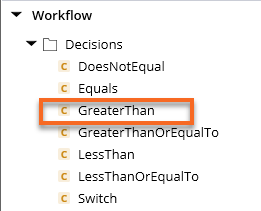
GreaterThan component - In the Toolbox, expand the section and then drag the GreaterThan component to the automation surface.
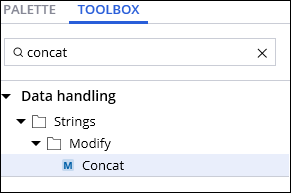
Concat method - In the Toolbox, in the search box, enter Concat, and then drag the Concat method onto the automation surface.
- In the Toolbox, add another string variable to the automation surface and name it invoiceDesc.
- On the Palette tab, right-click the invoiceDesc variable, and then select Move to Globals.
- On the automation surface, add automation labels and error handling:
Design block name Action Jump To Success Right-click the automation surface, and then select Jump To > Success. Jump To Failure - Right-click the automation surface, and then select Jump To > Failure.
- Click msg, and then enter Invoice memo is empty.
Jump To Failure - Right-click the automation surface, and then select Jump To > Failure.
- Click msg, and then enter GetRecord failure.
- On the automation surface, connect the links, as shown in the following image:
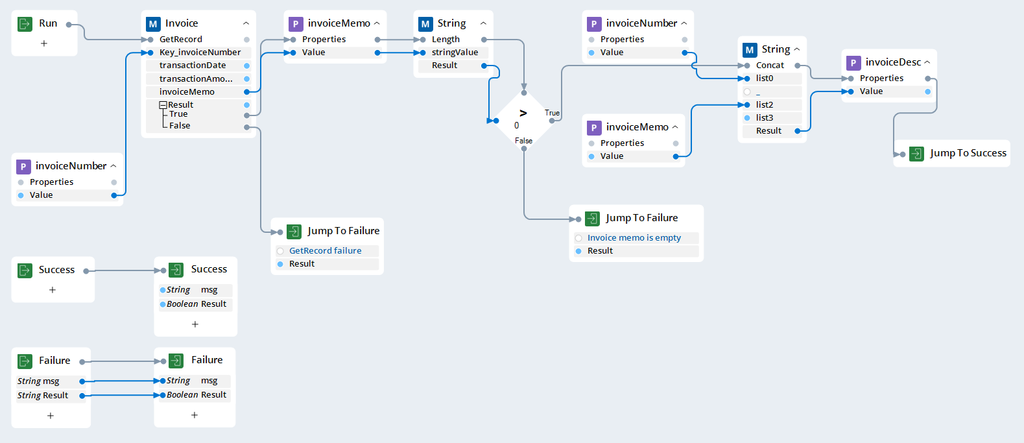
- On the toolbar, click Save to save the automation.
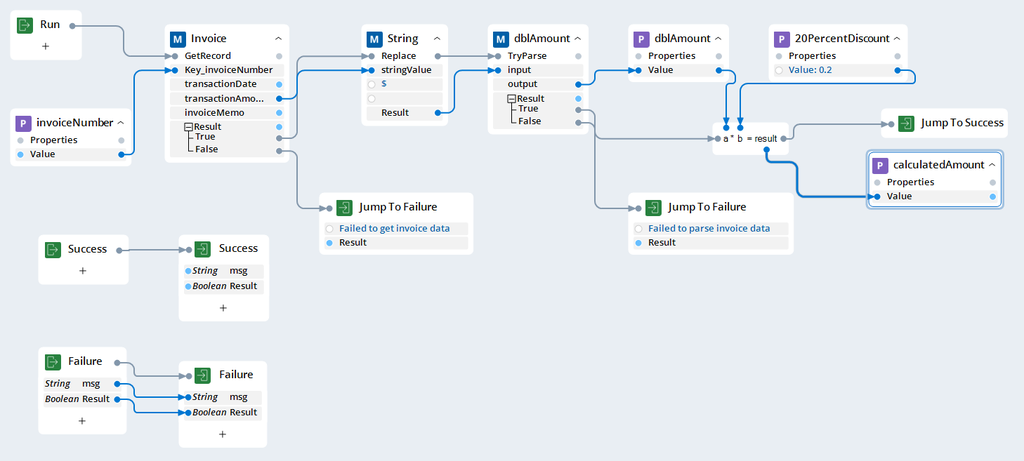
5 Calculate discount
Create an automation that calculates a bonus of 20% of a customer's invoice amount for a user that signed up for the BankerInsight account.
- In the Project Explorer, click and open CalculateInvoiceDicount automation.
- Add the following design blocks to the automation surface:
Design block name Action GetRecord method - On the Palette tab, under the Globals folder, drag the Invoice lookup table to the automation surface.
- In the Select action dialog box, select the GetRecord method, and click Add.
Value property - In the Palette, expand Globals and drag invoiceNumber variable to the automation surface.
- In the Select action window, select Value property and then click Add.
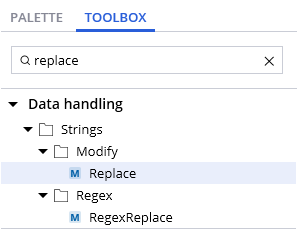
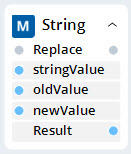
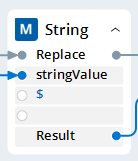
Replace method - In the Toolbox, in the search box, enter Replace, and then drag the Replace method of the string category onto the automation surface.
- Hard code the oldValue parameter by clicking on it and typing a $ symbol. Click on the newValue and then click on the automation surface which will hard code the newValue as a blank string.
dblAmount variable - On the Toolbox, open the Variables folder, and then drag double variable onto the automation surface.
- On the design block, click Double1 and change the name of variable to dblAmount.
TryParse method - Drag the dblAmount variable from the Locals section of the Palette tab onto the automation surface again.
- In the Select action dialog box, click More, enter try in the search box, and then select the TryParse method and click Add.
- In the Toolbox, open the Variable folder and drag two double variables onto the automation surface.
- Click the Double1 and change the variable name to calculatedAmount.
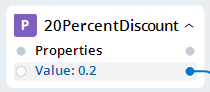
- Click the Double2 and change the variable name to 20PercentDiscount.
- On the 20PercentDiscount design block, Click the Value field, and enter 0.2.
- In the Toolbox, open the Workflow folder, and then open the Expressions folder.
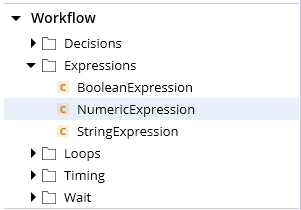
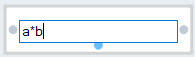
- Drag the NumericExpression component onto the automation surface.
- Click inside the NumericExpression block, and then enter a*b.
- On the Palette tab, in the Locals section, right-click the calculatedAmount variable, and then select Move to Globals.
- On the automation surface, add design blocks for error handling:
Design block name Action Jump To Success Right-click the automation surface, and then select Jump To > Success. Jump To Failure - Right-click the automation surface, and then select Jump To > Failure.
- Click msg, and then enter Failed to get invoice data.
Jump To Failure - Right-click the automation surface, and then select Jump To > Failure.
- Click msg, and then enter Failed to parse invoice data.
- On the automation surface, connect the links, as shown in the following image:
- On the toolbar, click Save to save the automation.
6 Create an automation that applies the discount to the BankerInsight application.
Create an automation that logs in to the BankerInsight, searches for the concerning customer account, and then adds the calculated amount and description transaction to the BankerInsight account. The transaction amount and description are global variables that are calculated in the previous steps.
- In Project Explorer, click and open AddDiscountToBI automation.
- Add the following design blocks to the automation surface:
Design block name Actions SelectIndex property
- In the Palette, expand Applications > BankerInsight > frmBankerInsight and drag tabCustomerAccount control to the automation surface.
- In the Select action dialog box, click More.
- In the search field, enter SelectedIndex.
- On the Property tab, select the property and then click Add.
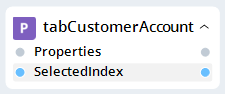
- On the newly created design block, click the selectedIndex parameter and enter 1.
Text property
- In the Palette, expand Applications > BankerInsight > frmBankerInsight > tabCustomerAccount > tabAccountTransactions and drag txtTransAmt control to the automation surface.
- In the Select action dialog box, select pinned Text property and then click .
Text property
- In the Palette, expand Applications > BankerInsight > frmBankerInsight > tabCustomerAccount > tabAccountTransactions and drag txtTransNotes control to the automation surface.
- In the Select action dialog box, select pinned Text property and then click .
PerformClick method
- In the Palette, expand Applications > BankerInsight > frmBankerInsight > tabCustomerAccount > tabAccountTransactions and drag btnSubmit control to the automation surface.
- In the Select action dialog box, select pinned PerformClick method and then click .
PerformClick method - In the Palette, expand Applications > BankerInsight > frmBankerInsight > tabCustomerAccount > tabAccountTransactions and drag btnTransClear control to the automation surface.
- In the Select action dialog box, select pinned PerformClick method and then click .
- On the Palette tab, expand the Globals section and add the calculatedAmount variable to the automation surface.
- In the dialog box, select the Value property and then click Add.
- On the Palette tab, expand the Globals section and add the invoiceDesc variable to the automation surface.
- In the dialog box, select the Value property and then click Add.
- On the automation surface, Right-click the automation surface, and then select Jump To > Success.
- Connect the design blocks, as shown in the following figure:
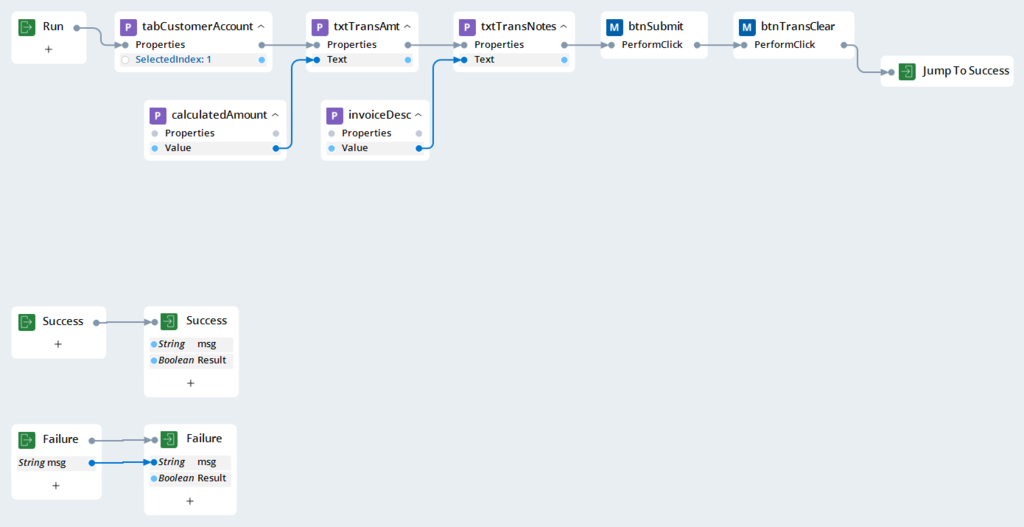
- In the toolbar, click Save to save the automation.
Confirm your work
- In the Project Explorer, click and open BillPaySystemDiscount.
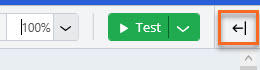
- On the right-upper corner of Pega Robot Studio, click the Test button to run the automation test.
- In the Testing automation dialog box, enter 40932 and then click Test.
- Wait till automation completes, and a Test complete dialog box will be displayed.
- On the Test complete dialog box, verify that automation ends with a Success status.
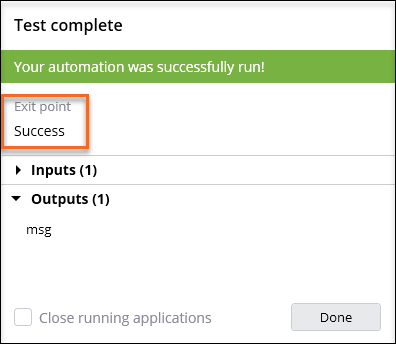
- On the dialog box, click Done.
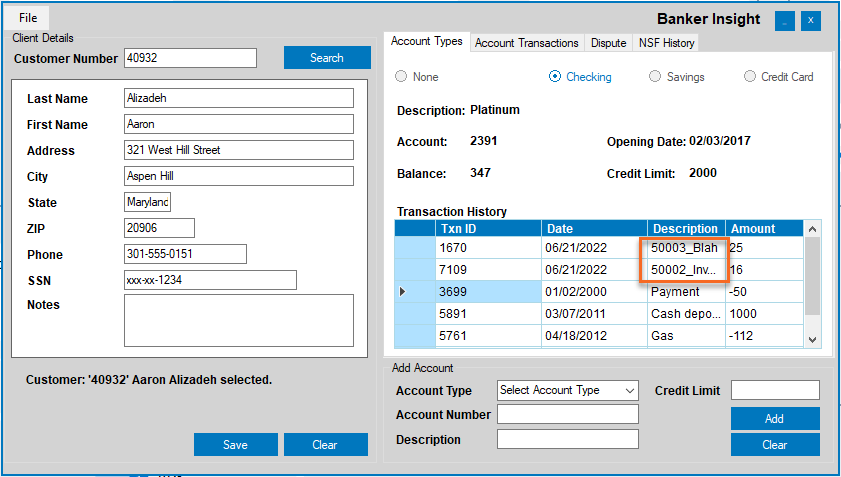
- Display the BankerInsight application.
- Click the Account Types tab.
- Verify that new transactions are added in the Transaction History section.
This Challenge is to practice what you learned in the following Module:
If you are having problems with your training, please review the Pega Academy Support FAQs.
Want to help us improve this content?