Merging rule branches using the Merge pipeline
7 Tasks
15 mins
Scenario
You are the PegaGP Release Manager and an Application Developer for the PegaGP application.
As the Release Manager, you are responsible for managing the application merge and deployment pipelines with the help of the Deployment Manager. You have an Orchestrator instance on which you manage the pipelines.
As a PegaGP application developer, you are responsible for addressing feature requests and bug fixes while practicing continuous integration (CI).
As the Release Manager, you must address the following tasks:
- Create a Merge pipeline for PegaGP developers to submit the branch for merge and receive early feedback.
- Set up the Development system for the PegaGP Application Developer.
- Configure the Merge pipeline to continuously deploy application changes to a Release pipeline on every successful merge.
As the PegaGP Application Developer, you must address the following tasks:
- Complete the assigned feature request by creating a branch and then developing the changes on the branch.
- Submit a branch for merge and track the progress of the merge.
The following table provides the credentials you need to complete the challenge.
|
Role |
User name |
Password |
| PGP Application Developer | PGPDeveloper | rules123! |
|
Release Administrator |
DMReleaseAdmin |
rules123! |
Follow the instructions to complete the process of creating a Merge pipeline and interacting with the Merge wizard.
Detailed Tasks
1 Set up your development system for a merge
As the PegaGP Application Developer, you have a new Development system to support development activities on the PegaGP application. The PegaGP Release Manager must configure the system to set up the development system with Continuous Integration (CI) features.
To complete the task as the PegaGP Release Manager, perform the following steps:
- Log in to Deployment Manager Studio as the PegaGP Release Manager with User name DMReleaseAdmin and Password rules123!
- In the navigation pane of Deployment Manager, click the user icon, and then select Switch to Dev Studio to access Dev Studio.
- In the header of Dev Studio, in the search text field, enter OrchestratorURL.
- In the list of search results, click Dynamic System Settings (DSS) to open the OrchestratorURL Dynamic System Setting.
- In the OrchestratorURL DSS, on the Settings tab, in the Value field, enter the Deployment Manager URL (use the current instance URL on your browser).
- Click to save the changes to the OrchestratorURL DSS.
- In the lower left, click the user icon, and then select Log off to exit Dev Studio.
Your development system now has the configuration that is required to enable merge with a Merge pipeline.
2 Create a merge pipeline
To support the development of a minor feature enhancement on version 8 of the PegaGP application, as the PegaGP Release Manager, you need to create a Merge pipeline to merge Development branches into the system of record (SOR).
To create the new Merge pipeline, perform the following steps:
- Log in to Deployment Manager as Release Manager with User name DMReleaseAdmin and Password rules123!
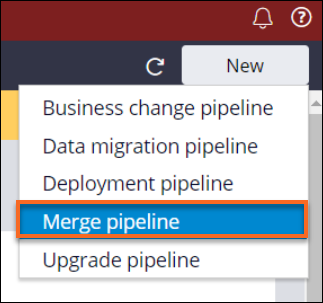
- In the upper right, click to create a Merge pipeline for PegaGP application development.
- On the Application Details tab, in the Application details section, specify the environment from where the application is packaged.
- In the Application packaging environment field, enter the URL instance from your browser (for example, https://tumqbidx.pegacea.net/prweb).
- In the Authentication profile list, enter or select DMAppAdmin.

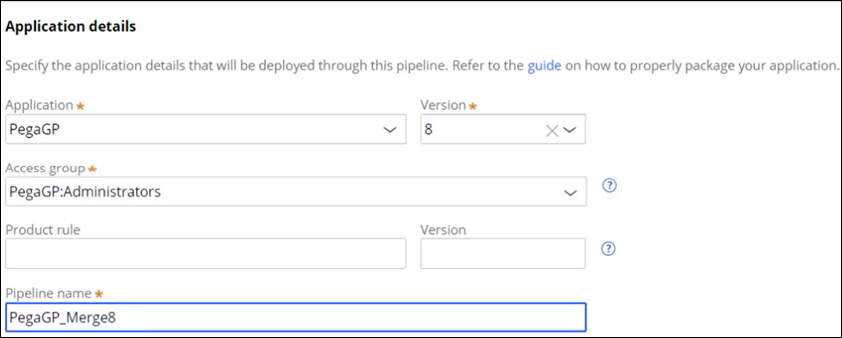
- In the Application details, specify the application details for the PegaGP application.
- In the Application field, enter PegaGP.
- In the Version field, enter 8.
- In the Access group field, enter PegaGP:Administrators.
- In the Pipeline name field, enter PegaGP_Merge8.
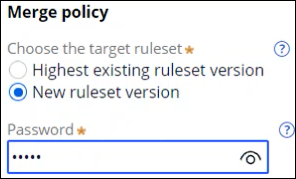
- In Merge policy section, select New ruleset version as the target ruleset.
- In the password field, enter rules123!
- Click to proceed to the Environment Details tab.
- In the Artifact management section, in the Development repository, enter or select DMFilesystem.
- Click to view and review the details in the Model Pipeline tab.
- On the Run pega units on branch task, click the More icon, and then select Delete to remove the task.
Note: Running a PegaUnits test is out of scope of this challenge
- Click to create the Merge pipeline and display the Run Diagnostics prompt.
- Click to validate the health of the new merge pipeline.
Note: Information for the product rule is unnecessary. You can ignore the error that occurs due to the product rule.
- In the lower left, click the user icon, and then select Log off to exit Deployment Manager.
3 Create a branch and complete the development assignment
As the PegaGP Application Developer, you need to add a property that represents whether a person is dependent. For this task, you create a branch to manage the Development work.
To create a branch, perform the following steps:
- Log in to the Dev Studio as the Developer with User name PGPDeveloper and Password rules123!
The PGPDevLayer application is displayed, which is the Development application that is built to follow the recommended Application layer structure. - In the navigation pane of Dev Studio, click App to open the App Explorer.
- In the App Explorer, click the Branches tab to access the branch list.
- On the Branches tab, right-click PGPDevLayer,and then select Create branch to open the Create branch dialog box.

- In the Create branch dialog box, in the Branch name field, enter TaskforChallenge.
- Click to create the branch.
The branch is now ready to proceed with the required change.
As the PegaGP Application Developer, you must create an IsPersonDependent property in the PGPDevLayer class.
- In the App Explorer, click the down arrow to access the menu.
- Click to create a property to hold the information if the current person is dependent.

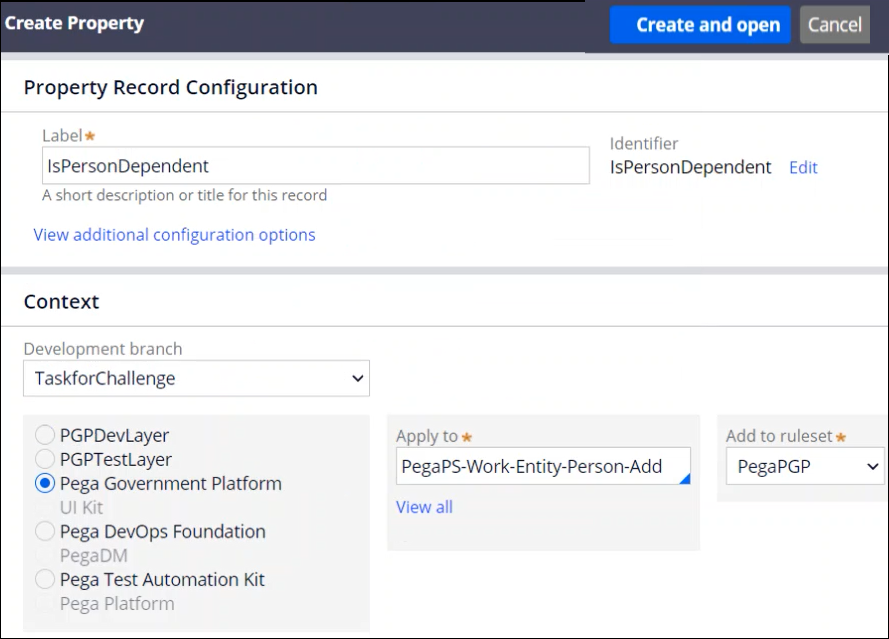
- In the Label field, enter IsPersonDependent.
- In the Context section, complete the following details:
- Ensure that the points to TaskforChallenge.
- Select Pega Government Platform.
- In the Apply to field, enter or select PegaPS-Work-Entity-Person-Add.
- In the Add to ruleset field, select PegaPGP.
- Click to define the property.
- Click to save the property.
- In the App Explorer, on the Branches tab, click TaskforChallenge to view the branch.
- In the upper right, click to view the property on the Branch: TaskforChallenge page.
4 Merge a branch with the Merge Branch wizard
As the PegaGP Application Developer, you need to submit the TaskforChallenge development rule branch for merge. You use the Merge Branches wizard to review the changes in a branch and merge the branch to the target PegaGP application.
- On the Branch: TaskforChallenge page, in the upper right, click > to open the Merge branch dialog box.
- In the Merge branch dialog box, click to access the Merge Branch wizard.
- In the Merge Branch wizard, click to display the status of the merge.

- In the lower left, click the user icon, and then select Log off to exit Deployment Manager.
5 Optional: View status of merge as the Release Manager
You can also view the status of the Merge in Deployment Manager, log in to the Deployment Manager as the Release Manager.
- Log in to Deployment Manager as the Release Manager with User name DMReleaseAdmin and Password rules123!
- In the navigation pane of Deployment Manager, click Pipelines to open the Application Pipelines dashboard.
- On the Application Pipelines dashboard, click PegaGP_Merge8 to open the pipeline.
- On the pipeline dashboard, expand the Deployment History section.
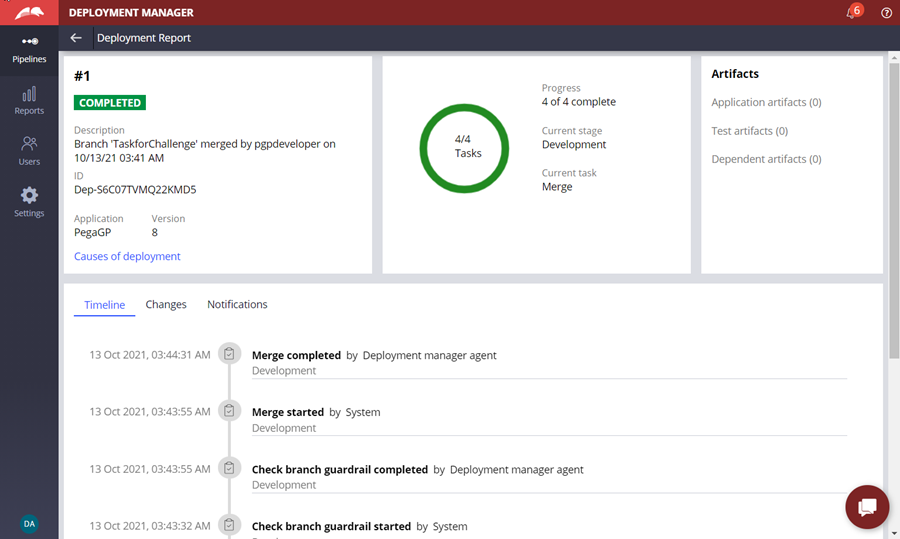
- In the Deployment History section, click View Report to open the Deployment Report.
- On the Deployment Report, review the deployment timeline.
6 Release your changes on a successful merge
As a PegaGP Release Manager, you are required to enable the deployment of every successful merge to a Deployment pipeline. The Merge pipeline needs to configure the trigger of a Deployment pipeline after the completion of the Merge task.
Note: Ensure that you obtain the Pipeline ID from the target pipeline and use it in the Trigger deployment task.
- Log in to Deployment Manager as the Release Manager with User name DMReleaseAdmin and Password rules123!
- In the navigation pane of Deployment Manager, click Pipelines to open the Application Pipelines dashboard.
- On the Application Pipelines dashboard, click PegaGP_Release_85 to open the Deployment pipeline: PegaGP_Release_85 status page.
- On the Deployment pipeline: PegaGP_Release_85 status page, in the upper right, in the PipelineID field, copy Pipeline-RV19H.
- On the status page, click the Back arrow to return to the Application Pipelines dashboard.
- Click PegaGP_Merge8 to open the pipeline.
- On the upper right, click> to edit the pipeline.
- On the Pipeline model tab, in the Development stage, click > to add a new task.
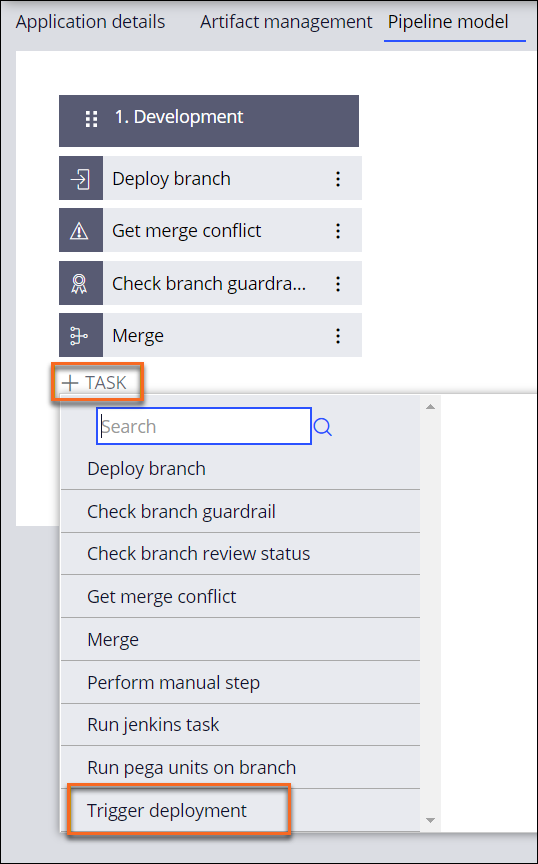
- Click .
- In the Pipeline ID field, enter Pipeline-RV19H.

- Click .
Now, any successful merge request triggers a Deployment pipeline.
7 Validate continuous deployment triggered due to branch merge
As a PegaGP Application Developer, you need to submit the rule branch (ValidateContinuousDeployment) for the merge with the Merge Branch wizard. Review the application changes before the merge. On a successful merge, a Deployment pipeline is triggered.
Note: Complete task 3 and task 4 before proceeding with the validation.
As the PegaGP Release Manager, you need to validate if a Continuous Deployment (CD) is triggered due to the branch merge by the PegaGP Application Developer. You can also view the Merge status. Perform the following steps to complete this task:
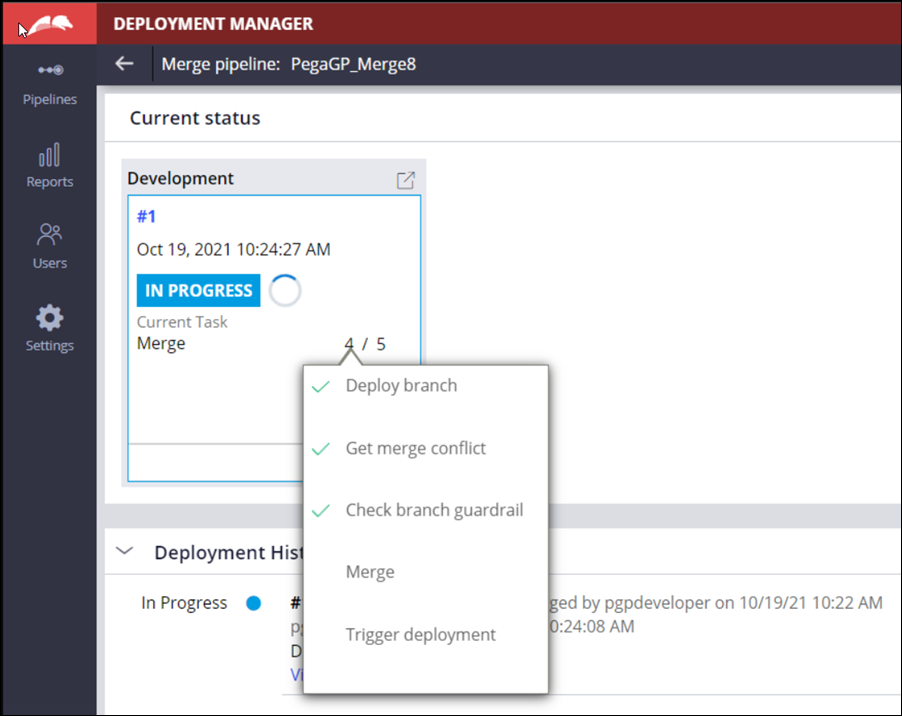
- On the Application Pipelines dashboard, click the PegaGP_Merge8 pipeline.
- Confirm that the Trigger deployment task is displayed in the list of tasks that are executing.
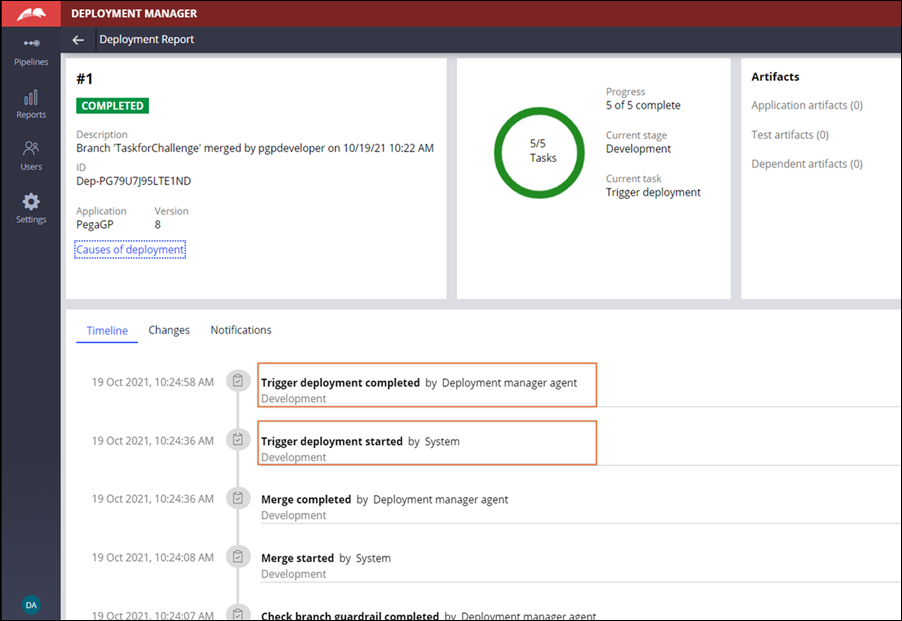
- In the Deployment History section, click View Report to open the Deployment Report.
- In the Deployment Report, on the Timeline tab, confirm that the Trigger deployment task completed.
- In the navigation pane of Deployment Manager, click Pipelines to open the Application Pipelines dashboard.
- On the Application Pipelines dashboard, click PegaGP_Release_85 to open the Deployment pipeline: PegaGP_Release_85 status page.
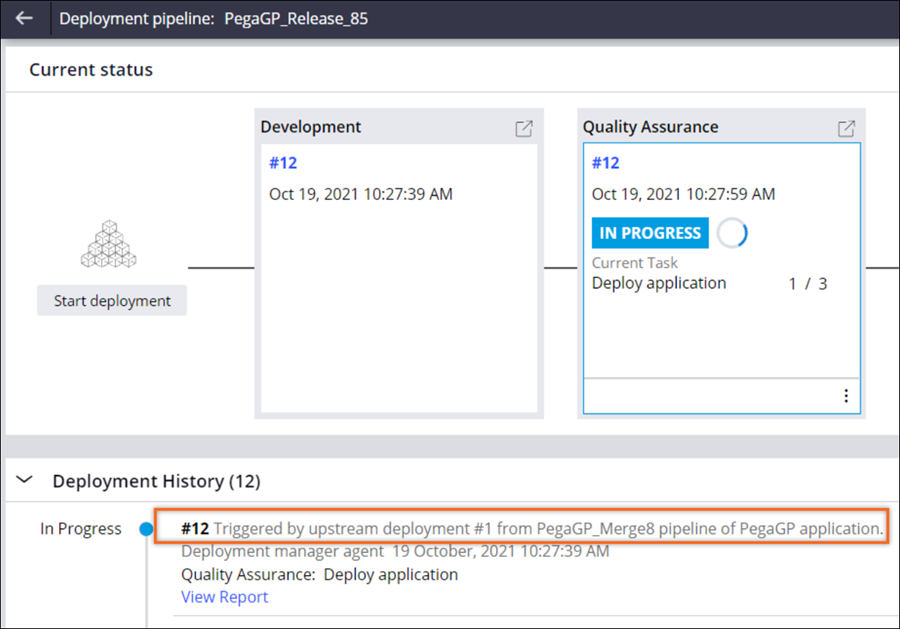
- On the Deployment pipeline: PegaGP_Release_85 status page, in the Deployment History section, confirm that the description of the latest deployment indicates that the Merge pipeline (PegaGP_Merge8) triggered the most recent deployment.
This Challenge is to practice what you learned in the following Module:
Available in the following mission:
If you are having problems with your training, please review the Pega Academy Support FAQs.
Want to help us improve this content?