Prioritizing actions using AI
Archived
4 Tasks
20 mins
Scenario
When customers log in to the U+ Bank website, they see the credit card offers for which they qualify based on the engagement policy defined by business.
When customers qualify for multiple credit card offers, artificial intelligence (AI) decides which best offer to show.
The business understands how the Pega Customer Decision Hub™ AI works in the context of web channel. When a customer sees an offer, but doesn’t click on it, the AI considers this as a negative behavior and lowers the propensity of the offer. When the customer clicks on the offer, the propensity is increased.
To complete the assignment, use the following credentials:
|
Role |
User Name |
Password |
|---|---|---|
|
Decisioning Analyst |
CDHAnalyst |
rules |
Your assignment consists of the following tasks:
Task 1: Enable propensity in arbitration.
In the Arbitration section of Next-Best-Action Designer, keep only the Propensity enabled to ensure that only AI is used in arbitration process to select the top action.
Task 2: Verify the negative behavior.
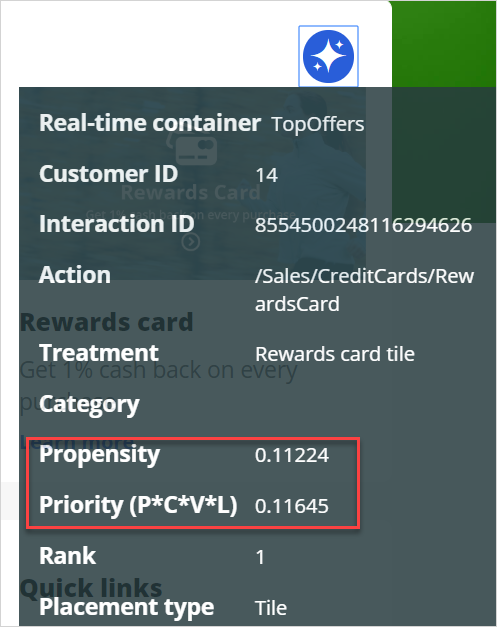
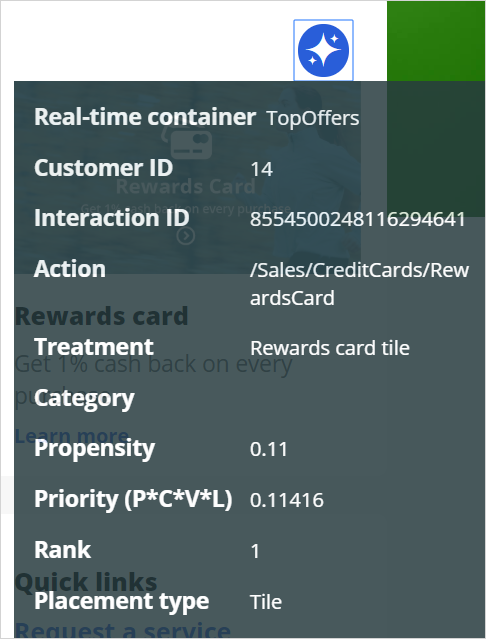
Successively log in to the U+ Bank website as Troy, but do not click the offer. Notice that after multiple logins, the propensity of an offer decreases when you do not click. Use the Polaris icon next to offer to examine the propensity value.
Note: The Priority value is used to prioritize actions and select the top action. Because you enabled only Propensity, the Priority is equal to Propensity. The negligible difference is due to the smoothed propensity calculation, which is not in scope for this exercise.
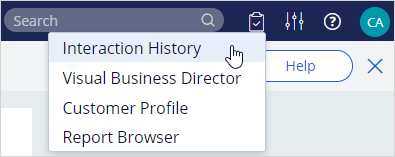
Tip: You can also see the propensity of actions previously made to a customer in the Interaction History report. Troy’s subject ID is 14.
Task 3: Verify the positive behavior.
Log back in multiple times, and click an offer each time to record a positive behavior and to prove that the AI learns, and the propensity of the offer is increased for customers with a similar profile.
Note: The system decides when the actual learning happens. As a result, you might see some slight variations in the propensity and not a continuous increase after each click. However, multiple clicks lead to an increased propensity after a while.
Task 4: Examine the AI model.
Finally, in Pega Customer Decision Hub, examine the AI model behind the action / treatment.
Challenge Walkthrough
Detailed Tasks
1 Enable propensity in arbitration
- Log in to Customer Decision Hub as Decisioning Analyst with Operator ID CDHAnalyst using password rules.
- From the navigation pane on the left, click Next-Best-Action > Designer.
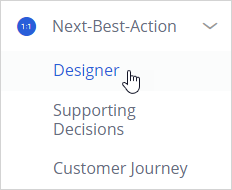
- In the Next-Best-Action Designer, click Arbitration.
- In the Arbitration landing page, click Edit to modify arbitration settings.
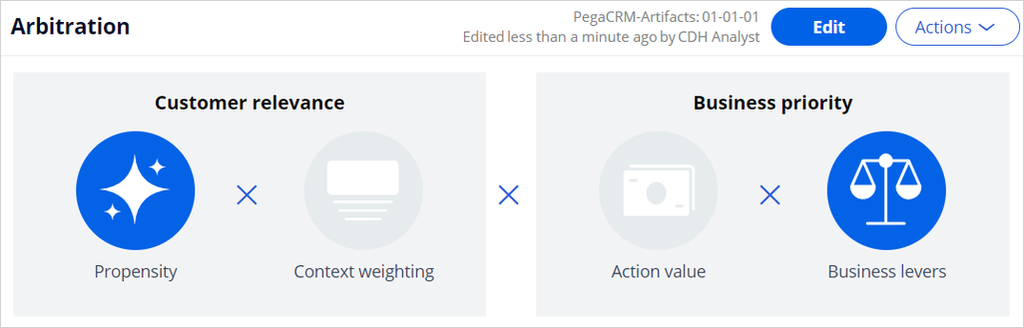
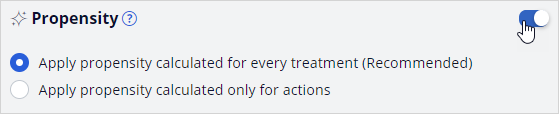
- In the Propensity section, ensure that the switch on the right is turned on.
- Scroll down to the Business levers section.

- To the right of Business levers, turn off the switch.
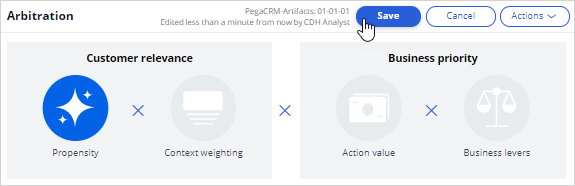
- At the top of the Arbitration landing page, click Save to save the changes to arbitration settings so that only the propensity, calculated by AI, is involved in action arbitration
2 Verify the negative behavior
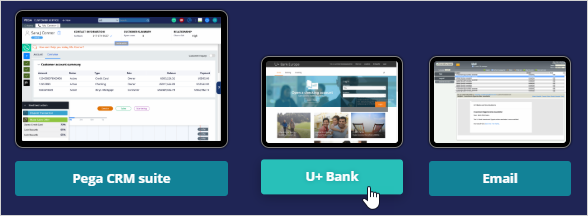
- From the exercise system landing page, click U+ Bank to launch the U+ Bank website.
- In the U+ Bank website, in the upper-right corner, click Log in to log-in as a customer.
- In the Username drop-down list, ensure Troy is selected, and then click Sign in. An offer is displayed.
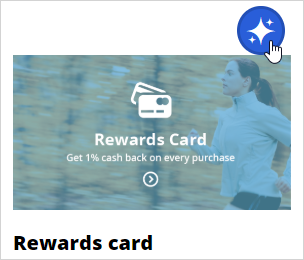 Note: Do not click the offer. Each time you log out and then log in, Troy is presented with an offer but do not click on it.
- On the next offer, click the Polaris icon to view the Propensity and Priority values.
 Note: The values you see in your system can be different depending on the number of times you log in to U+ Bank app.
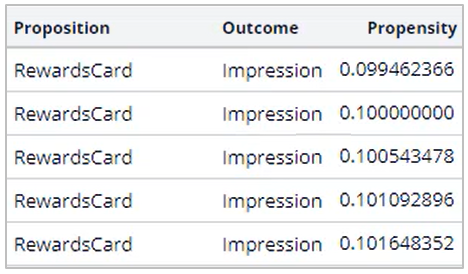
- Perform successive logins without clicking the offer. Notice how the propensity decreases.
- You can also see the propensity of actions previously made to a customer in the Interaction History > Recent interactions report. The subject ID for Troy is 14.


- Notice how the impression is decreasing with every customer interaction.
 Note: The values you see in your system vary depending on the number of times you log in to U+ Bank app.
3 Verify the positive behavior
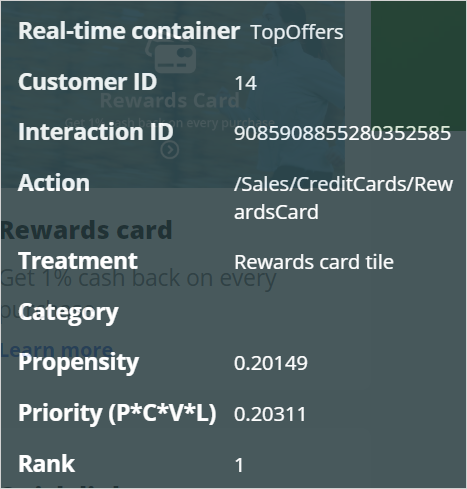
- After you have tested the effects of negative behavior, click on Learn more link below the offer. Do multiple log-ins and every time click on the Learn more. This will increase the propensity of the offer. After 3 log-ins and clicks on Learn more the propensity has increased:
- In Interaction History:
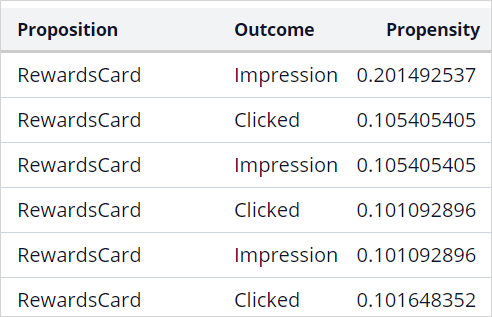 Note: The system decides when the actual learning happens. Therefore, you might see some slight variations in the propensity, and not a continuous increase after every single click. However multiple clicks will lead to an increased propensity after a while.
4 Examine the AI model
- Log-in to Customer Decision Hub portal as Decisioning Analyst.
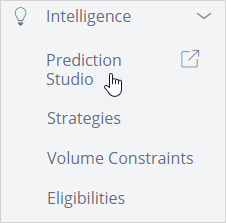
- From the menu on the left, navigate to Intelligence -> Prediction Studio to view the AI models. This will open the Prediction Studio.
- Click Models to view the AI models.
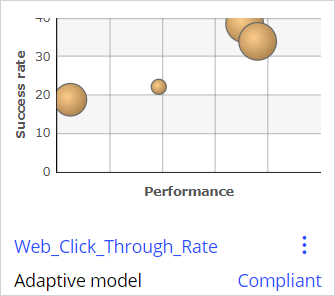
- Scroll down, locate the Web_Click_Through_Rate and click to open the treatment level model.
 Note: Analyzing the AI models in detail is beyond the current scope. For now, just examine the list of predictors and the outcomes already configured by a Data Scientist.
- The main monitoring screen shows an overview of all the models in a given channel:

- You can see for e.g. that the best performing model is the Rewards Plus card, with a performance of 88.01%. And that the model with the least responses, 484, is the Rewards Card
- The Predictors tab contains the list of predictors configured at the time of creation this model. Not all of them may be used by the AI.

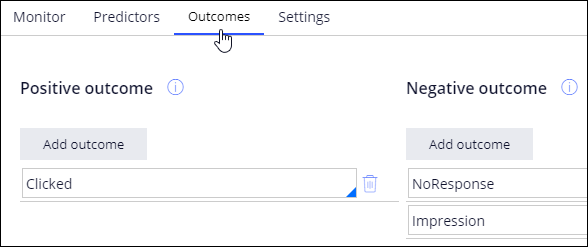
- The Outcomes tab contains the action outcomes mapped to positive and negative behaviors. Notice that Clicked is mapped to positive and Impression to negative.
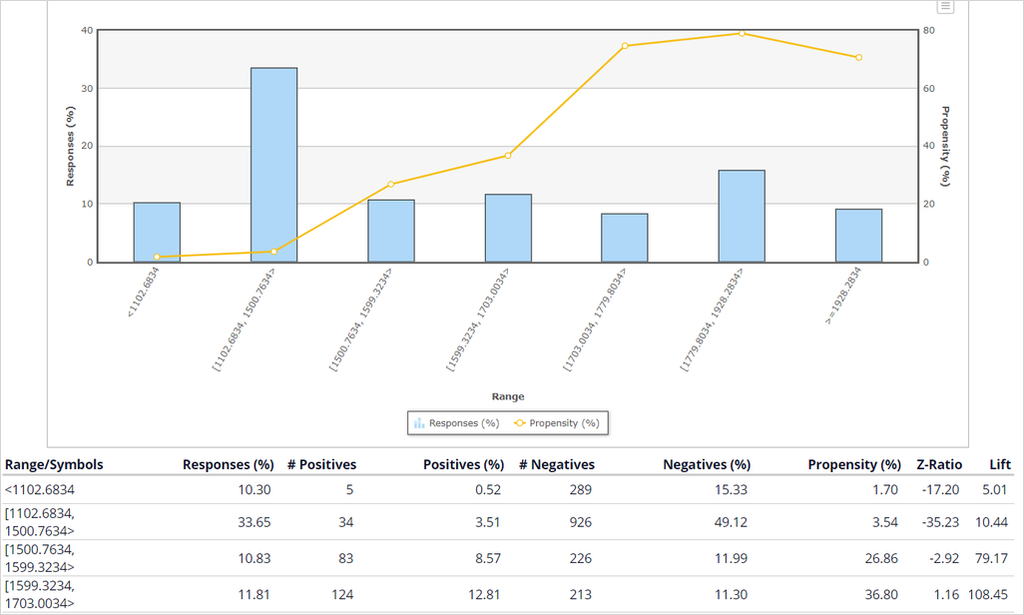
- In the Monitor tab, open the Model Report for one of the models. For example, the Rewards Plus model:

- In the Predictors tab, click on a predictor to open it. Examine the unique values or number ranges in the predictor and value or range with the highest propensity.
- At the top left, use the back button to navigate back.

- In the main Prediction Studio page, open and refresh the Omni_Adaptive_Model as well. This is the action level model.

- At the bottom left corner, click Back to Customer Decision Hub to return to the Customer Decision Hub portal.

- From Content -> Actions, open any of the credit card actions. In the Details tab of the action, on the right, notice that a list of predictors used by the AI model is displayed. This AI model, OmniAdaptiveModel, is an action level model. This means that the model predicts the customer behavior not considering any particular treatment.
Example for the Rewards Plus card: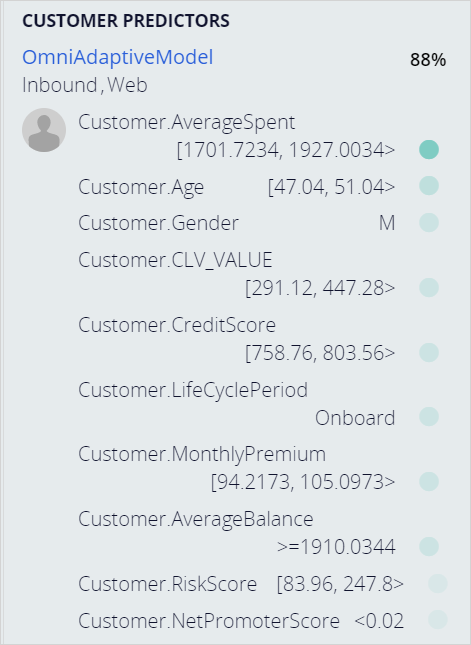
- In the action, click on the Treatments to see the treatment level AI model
- Next to the web treatment, click on the Polaris icon to view the details of treatment level AI model.

- The pop-up window gives you a snapshot of the treatment level AI model. You can see the current confidence level in predicting customer behavior and the predictors used to do the predictions.
