Sharing action details with a third-party email service provider
6 Tasks
15 mins
Scenario
U+ Bank, a retail bank, is currently promoting multiple credit card offers by sending emails to qualified customers.
However, to comply with the security and spamming regulations, the bank decides to use a third-party email delivery service instead of using the in-house email server. As a result, the offer details must be written to the database, and an external email treatment is associated with the file or database template. The action details are then to be shared with a third-party email distributor.
Use the following credentials to log in to the exercise system:
| Role | User name | Password |
|---|---|---|
| Decisioning Architect | DecisioningArchitect | rules |
Your assignment consists of the following tasks:
Task 1: Create and configure an external email template for Rewards card
Create the Rewards card external email treatment and configure the Rewards card action with the new Rewards card external email treatment:
|
Field |
Value |
|
Name |
Rewards card external email |
|
Description |
Rewards card external email |
|
Keycode |
EXTREWARDSEMAIL |
|
Template type |
DB |
|
DB template |
GenericDBTemplate |
Task 2: Configure additional actions for the outbound run
Associate the remaining actions for the outbound run with email treatments by using the information in the following table:
|
Action |
Email treatment |
|
Standard card |
Standard card external email |
|
Rewards Plus card |
Rewards Plus card external email |
|
Premier Rewards card |
Premier Rewards card external email |
Task 3: Configure the Email flow template action
On the Actions landing page, configure the Email flow template action to write action details to a database table by using the Generic DB Template.
Note: As the Email flow template action flow is used in all the credit card actions, the actions will automatically be updated to use the DB template.
Task 4: Examine the referred database template
In the Standard card external email, open and examine the referred database template to understand and explain the configurations.
Task 5: Configure schedule run
On the Channels tab of Next-Best-Action Designer, configure and run a schedule run to write action details to the database template.
Note: In the Recurrence section, ensure that the Refresh the audience checkbox is selected. Also, ensure that the All outbound customers segment is selected as starting population.
You clear the added volume constraints before running the outbound schedule.
You clear the added volume constraints before running the outbound schedule.
Task 6: Verify that the action details are written to the database table
On the Templates landing page, preview the Generic DB Template to confirm that the action details are written to the database table.
Note: The Preview option will download a .CSV file with actions details in it.
Challenge Walkthrough
Detailed Tasks
1 Create and configure an external email treatment for Rewards card
- On the exercise system landing page, click Pega InfinityTM to log in to Customer Decision Hub.
- Log in to Customer Decision Hub as a Decisioning Architect:
- In the User name field, enter DecisioningArchitect.
- In the Password field, enter rules.
- In the navigation pane of Customer Decision Hub, click Content > Actions.
- On the Actions landing page, click Rewards card to open the action.
- Click Check out to make changes to the action.
- Click the Treatments tab, and then click Add channel > Outbound > Email to add a new email treatment.
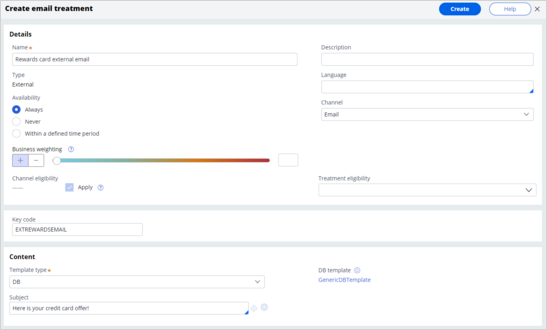
- In the Configure Email Treatment window, click Create > External to configure a new external email treatment:
- In the Name field, enter Rewards card external email.
- In the Description field, enter Rewards card external email.
- In the Key code field, enter EXTREWARDSEMAIL.
- In the Content section, in the Template type list, select DB.
- Next to DB template, click the Gear icon.
- In the Configure DB Template window, in the GenericDBTemplate row, click Add, and then click Apply to select the template.
- In the Subject field, enter Here is your credit card offer!.
- In the upper-right corner, click Create.
- Close the treatment.
- Refresh the Configure Email Treatment window.
- In the Rewards card external email row, click Add to add the external treatment to the action.
- Click Apply to confirm the treatment selection and close the window.
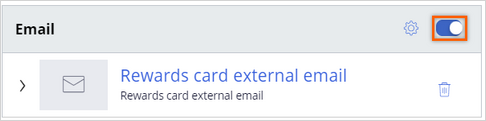
The treatment is now associated with the action. - In the Email section, ensure that the switch for the external email treatment is on.
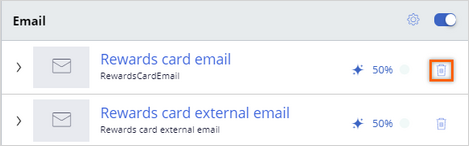
- To remove an existing email treatment that you created in an earlier challenge, click the Delete icon.
Note: If you have an existing email treatment that you created in an earlier challenge, ensure you delete it.
- Click Check in to save the changes to the action.
- In the Check-in comments text box, enter External email treatment added, and then click Check in.
2 Configure additional actions for outbound run
- In the navigation pane of Customer Decision Hub, click Content > Actions
- On the Actions landing page, click Standard card to open the action details.
- Click Check out.
- Click the Treatments tab, and then click Add channel > Outbound > Email to add a new email treatment.
- In the Configure Email Treatment window, in the Standard card external email row, click Add to add the treatment to the action.
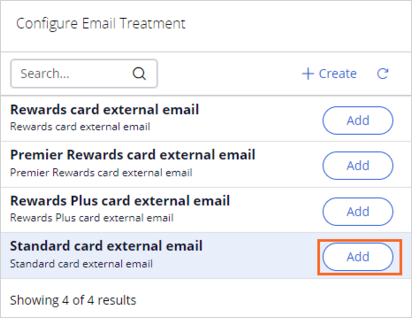
- Click Apply to confirm the treatment selection and close the window.
The treatment is now added to the action. - In the Email section, ensure that the switch for the email treatment is on.
- Click icon against the existing email treatment to remove it.
- Click Check in to save the changes and add a check-in comment.
- Close the Standard card action.
- Repeat steps 1-10 to associate the Rewards Plus card external email with the Rewards Plus card action.
- Repeat steps 1-10 to associate the Premier Rewards card external email with the Premier Rewards action.
3 Confirm the Email flow template action
- In the navigation pane of Customer Decision Hub, click Content > Actions.
- On the Actions landing page, click Email flow template to open the action details.
- Click the Flow tab.
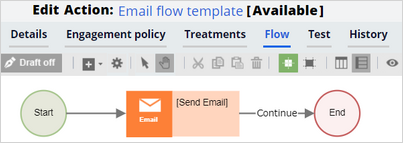
- Right-click the Send Email shape, and then select Properties to open the properties of the flow.
- In the Treatment section, confirm that Use associated Treatment option is the default selection.
Note: Because all the credit card actoins use the Email flow template action flow, the actions automatically update to use the DB template.
- Close the action.
4 Examine the referred database template
- In the navigation pane of Customer Decision Hub, click Content > Treatments.
- Click the Email tab.
- Click Standard card external email to open the email treatment.
- In the Content section of the email treatment, click GenericDBTemplate to open the database template.
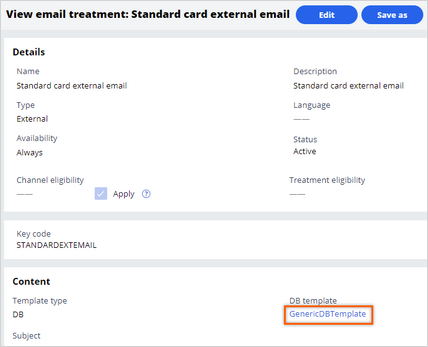
- Examine the database details that are in the database template.
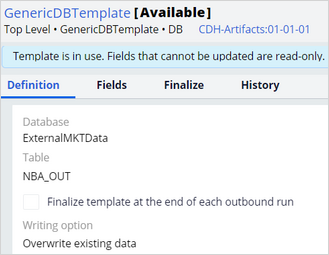
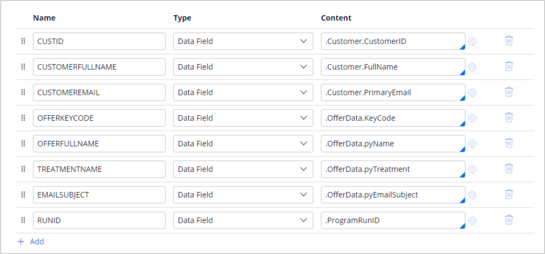
- Click the Fields tab to view the added customer and action details.
5 Configure a schedule run
- In the navigation pane of Customer Decision Hub, click Next-Best-Action > Designer, and then click Channels.
- In the Primary Schedule section, click the More icon, and then select Suspend to suspend the current scheduled run.
 Note: If the status of the primary schedule is Draft, skip step 2.
- In the header of the Channels section, click Edit to make changes to the run.
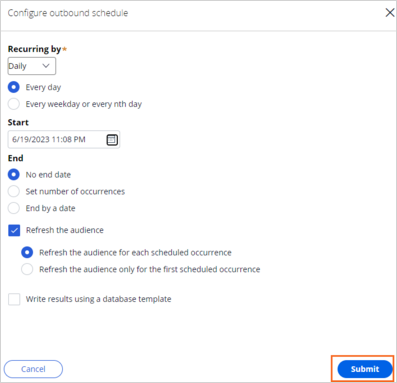
- In the Primary Schedule section, in the Recurrence column, click the Gear icon to configure a schedule run frequency in the Configure outbound schedule window.
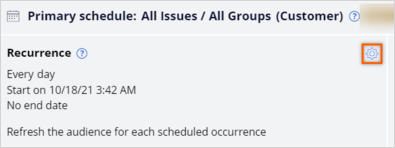
- In the Start field, enter today's date and use the current time and the US EST time zone.
- In the End section, confirm that the following items are the default selections:
- No end date
- Refresh the audience
- Click Submit to save outbound schedule and close the Configure outbound schedule window.
- Ensure that the value in the Starting population column is All outbound customers.
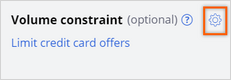
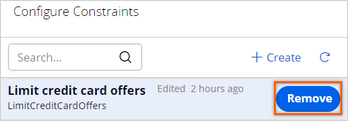
- Optional: To remove the added volume constraints, in the Volume constraints column, click the Gear icon, remove the Limit credit card offers restraint, and then click Apply.
- Click Save to save the changes on the Channels tab.
- On the Channels tab, in the Primary Schedule section, click More > Run to run the outbound schedule.
- Refresh the tab to view the latest status of the run.
- Once the run is complete, click COMPLETED to view the results.
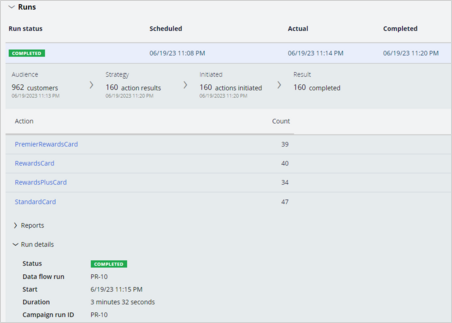 Note: Your run results number might not match the numbers shown in the exercise steps because the segment in the exercise system selects a random sample of customers.
6 Verify that the action details are written to the database table
- After test completion, navigate to Contents > Treatments.
- Click the Database tab.
- Optional: Click Refresh to view the database template.
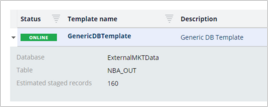
- On the Database landing page, expand the Generic DB Template row to view the number of staging records. The records match the number of actions shown in the run statistics.
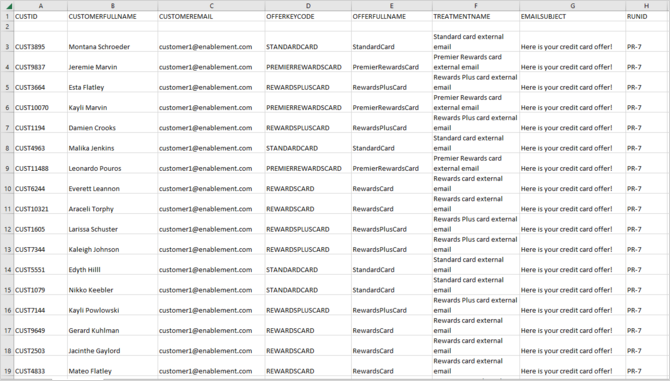
- In the Generic DB Template row, click More > Preview to download the CSV file.

- When prompted, open the output file; you might have to enable pop-ups on your browser.
Note: You can verify that the Run_ID in the downloaded file matches the one that is displayed in the run details.
Available in the following mission:
If you are having problems with your training, please review the Pega Academy Support FAQs.
Want to help us improve this content?