Replacing a predictive model
3 Tasks
10 mins
Scenario
U+ Bank uses Pega Customer Decision Hub™ to personalize the credit card offers that a customer receives on its website. The bank makes a proactive retention offer instead of a credit card offer for customers that are likely to leave the bank soon. The bank has recorded historical churn data for its customer base. As a data scientist, use the historical data to create a churn model using an external machine learning service, and then replace the active model with the new one.
Use the following credentials to log in to the exercise system:
| Role | User name | Password |
|---|---|---|
| Data scientist | DataScientist | rules |
Caution: This challenge requires specific artifacts. Ensure that you click Initialize (Launch) Pega instance for this challenge to retrieve the correct exercise system.
Your assignment consists of the following tasks:
Task 1: Create a validation data set
Use ValidationData to create a data set for model validation.
Task 2: Place the new model in shadow mode
Place the ChurnH20 model in shadow mode in the Predict churn propensity prediction.
Task 3: Promote the new model to the active state
As a data scientist, replace the active model with the candidate model in the prediction.
Challenge Walkthrough
Detailed Tasks
1 Create a validation data set
- On the exercise system landing page, click Pega CRM suite to log in to Customer Decision Hub.
- Log in as a data scientist with User name DataScientist and Password rules.
- In the navigation pane of Prediction Studio, click Data > Data sets to view the list of data sets.
- On the Data sets page, in the upper right, click New to add a new data set.
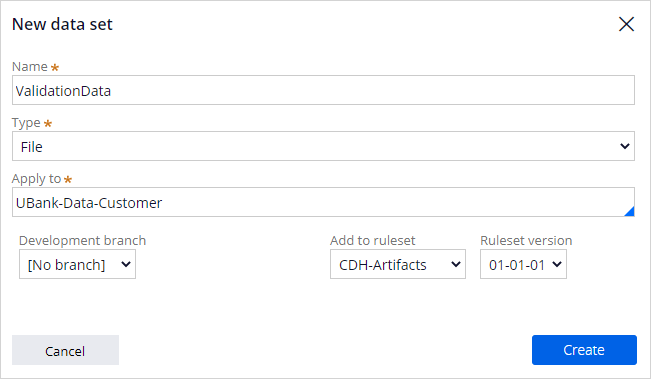
- Configure the new data set with the following information:
- In the Name field, enter ValidationData.
- In the Type list, select File.
- In the Apply to field, enter or select UBank-Data-Customer.
- In the Development branch list, keep the default No branch.
- In the Add to ruleset list, select CDH-Artifacts.
- In the Ruleset version list, select 01-01-01.
- Click Create to build the data set.
- On the File tab of the data set, in the File location section, select Embedded file.
- Download the ValidationData data set to your local machine, and then extract the .csv file
- In the File Management section, click Upload file.
- In the Upload file dialog box, click Choose File.
- Select the ValidationData.csv file.
- In the Upload file dialog box, click Upload.
- In the upper right, click Save.
2 Place the new model in shadow mode
- Download the ChurnH20 model to your local machine.
- In the navigation pane of Prediction Studio, click Predictions to open the Predictions work area.
- Click the Predict Churn Propensity tile to open the prediction.

- On the Models tab, in the ChurnPML row, click the More icon, and then select Replace model.

- In the Replace model dialog box, ensure that Model is selected, and then click Next.
- On the Upload tab, in the Select a PMML, H2O MOJO or Pega OXL file section, click Choose File.
- Select the ChurnH20_0.zip file, and then click Next.
- In the Dataset list, select ValidationData.
- In the Outcome column list, select Outcome.

- Click Next.
- In the Model name field, enter ChurnH20.
- Click Replace.
Note: During the process of replacing the model, the status changes to CONFIGURATION IN PROGRESS, VALIDATION IN PROGRESS, and then READY FOR REVIEW.
- On the Models tab, when the status of the ChurnH20 model changes to READY FOR REVIEW, click ChurnH20 (M-2001).

- On the Analysis tab, inspect the model comparison.

- In the upper right, click Evaluate.
- In the Evaluate ChurnH20 dialog box, confirm that Approve new candidate model and start shadowing (recommended) is selected.
- In the Reason field, enter The new model outperforms the active model, and then click Save to return to the prediction strategy.

3 Promote the new model to the active state
- On the Models tab, in the ChurnH20 row, click the More icon, and then select Promote model.
- In the Promote ChurnH20 dialog box, click Promote model to confirm that you want to promote the model.
- On the Models tab, confirm that the ChurnH20 model is now the active model.

- In the upper right, click Save.
Available in the following missions:
If you are having problems with your training, please review the Pega Academy Support FAQs.
Want to help us improve this content?