Using design templates to maintain consistent UI
Archived
4 Tasks
30 mins
Scenario
When designing a complex application, it is important to use consistent design patterns throughout the application. As such, it is important to convert your full section to use a design template. In this challenge, you look at a UI built with the full section editor and go through the process of upgrading a section to use a design template.
The following table provides the credentials you need to complete the challenge.
| Role | User name | Password |
|---|---|---|
| Application Developer | author@mytown | pega123! |
Challenge Walkthrough
Detailed Tasks
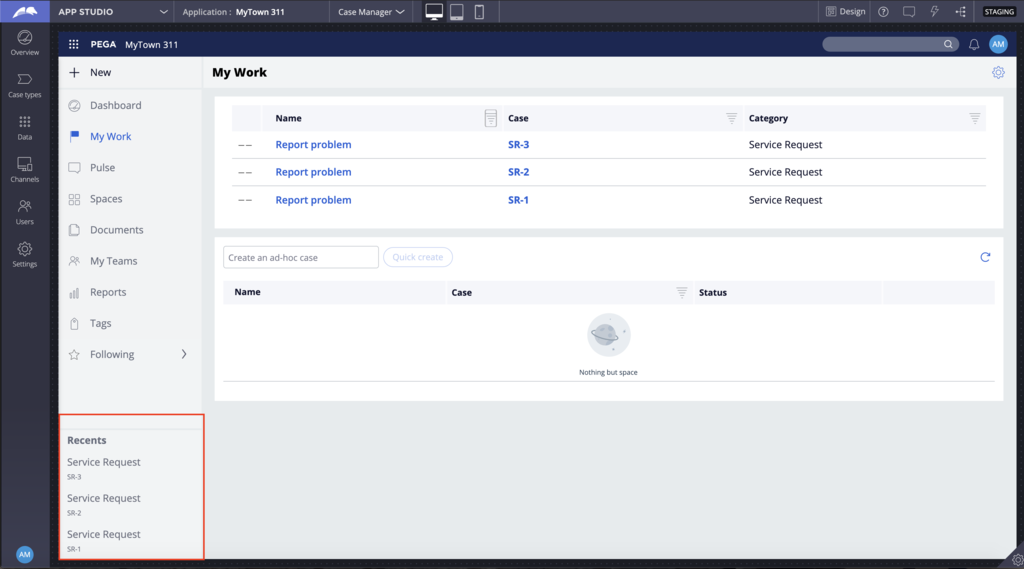
1 Open the case manager portal and review recent lists
- In the App Studio navigation pane, click Preview application to access the Case Manager portal.
- Click New > Service Request to create a couple of Service Request cases.
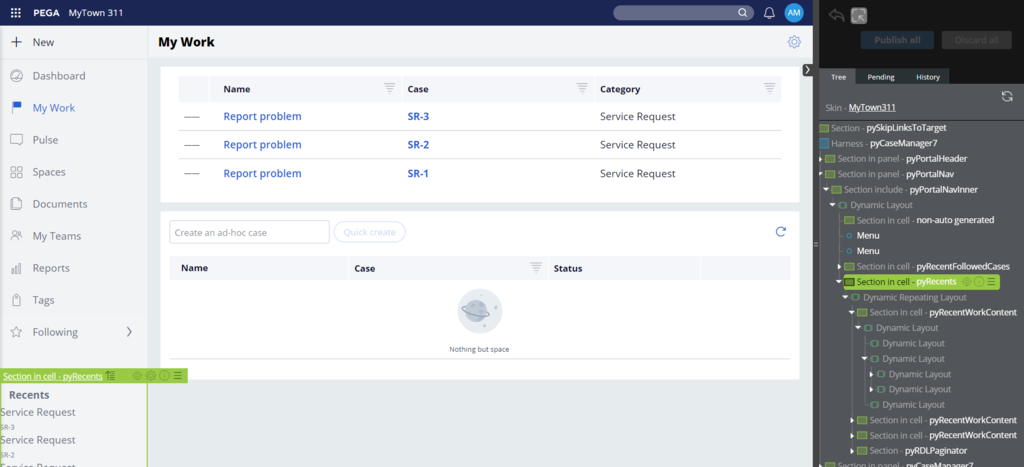
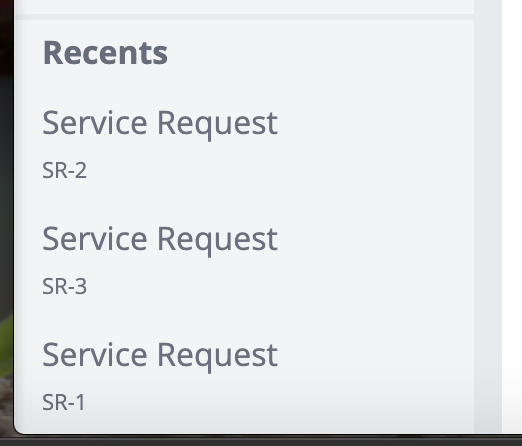
- View the recent lists present in the lower-left corner of the Case Manager portal. The recent list uses a repeat dynamic layout and renders a list of recent items.
2 Convert the list item to use a design template
Because the section is not using a design template, it is not possible to edit the section in App Studio. As a front-end developer, it is better to access the end-user portal from Dev Studio by opening the portal as a secondary portal and use liveUI to find the section that is used to render the list of recent items.
- Switch to Dev Studio and open the case manager portal as a secondary portal.
- Click the Toggle runtime toolbar icon and then click the Toggle Live UI icon to open the section.
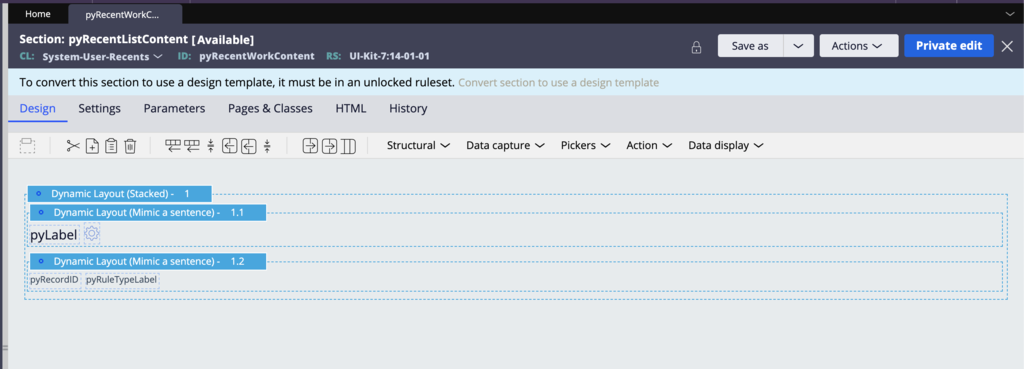
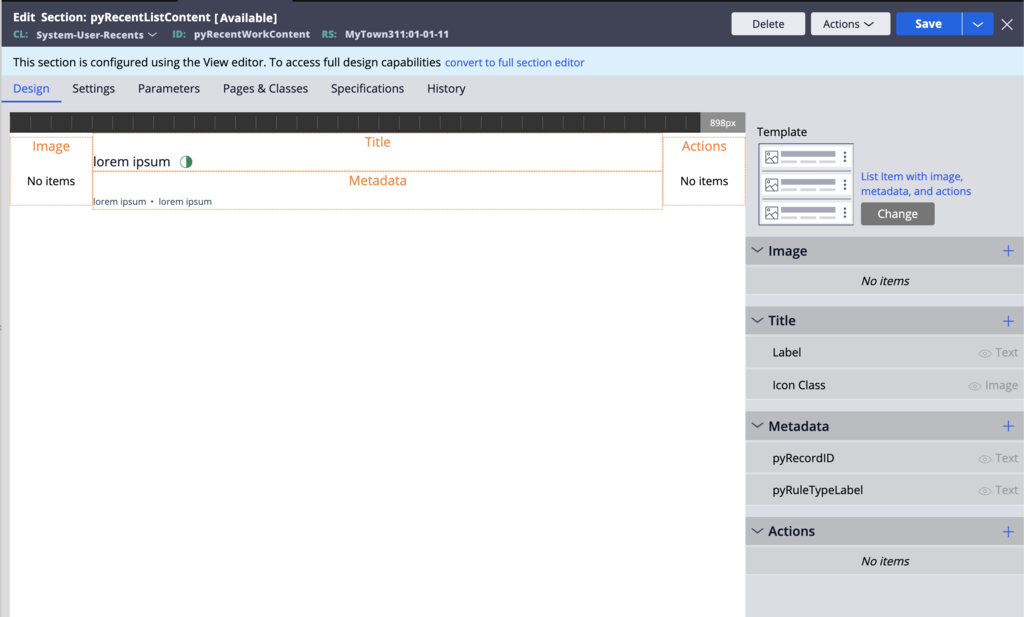
- Open the section that is used to render the recent list item – pyRecentWorkContent.
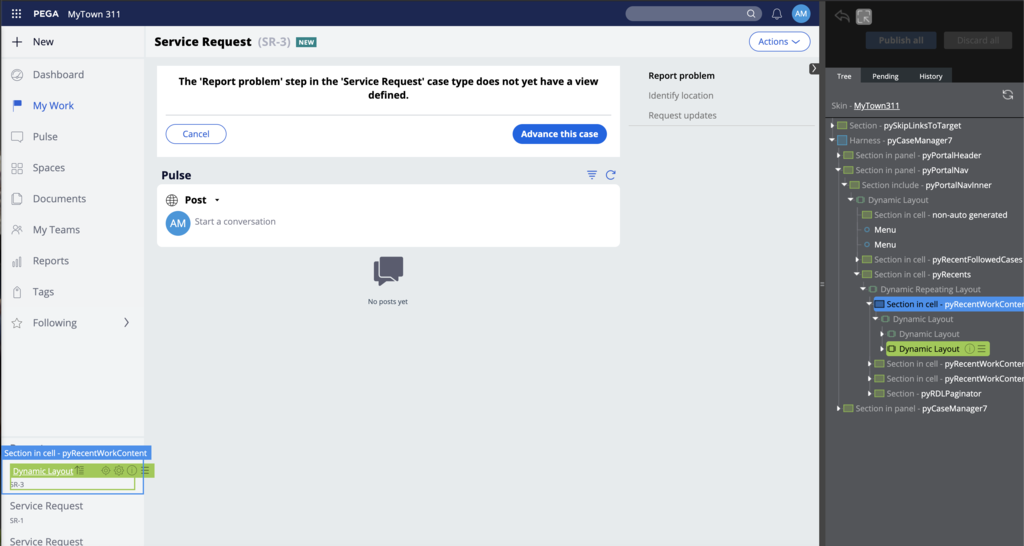
- Navigate to the Dev Studio portal. This section uses a full section editor but can easily be converted to use the List Item with image, metadata, and action out-of-the-box template. Because this section is in a locked ruleset, the action to convert to a design template is being disabled.
- Do a Save As of the section to save this section into the application stack. Save the section in an unlocked ruleset of MyTown311:01-01-11 with the same Name and Apply to class.
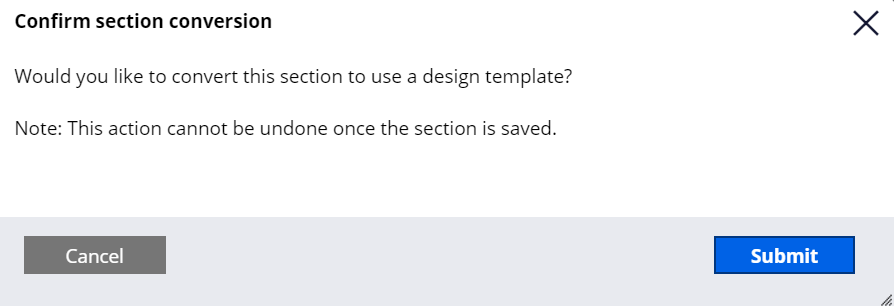
- Click Create and open to open the section. Because the section is now in an unlocked ruleset, it is possible to click on the banner to convert the section to use a design template.
- Click Convert section to use a design template to convert the section. Confirm the action in the modal dialog. The section rule form will reload to render the UI used for managing the section using the design template.
- Click Save to save your rule changes.
- Click the Design tab.
- Click Change to select the right template.
- By default, the section will always use a One column design template.
The conversion to design template does not automatically upgrade the section to use the right design template. It is the responsibility of the front end developer to convert the section and switch to the right design template (if it exists) or to create a new one.
- For this use case, use the List Item with image, metadata, and action template.
- Move the fields to the right regions and save the rule
- Go back to the Case Manager portal, refresh the browser, and review the changes made to see how the updated recent list looks like after these changes. While the list correctly renders the title and meta list, some items are missing padding on the left. Also, the highlighting of the row that occurred before is no longer working.
3 Fix spacing issues
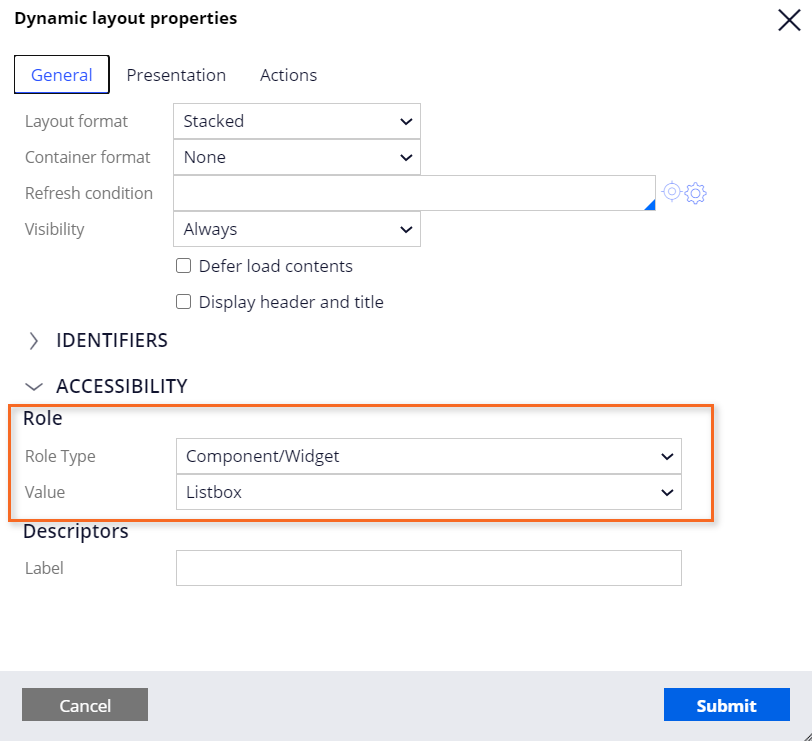
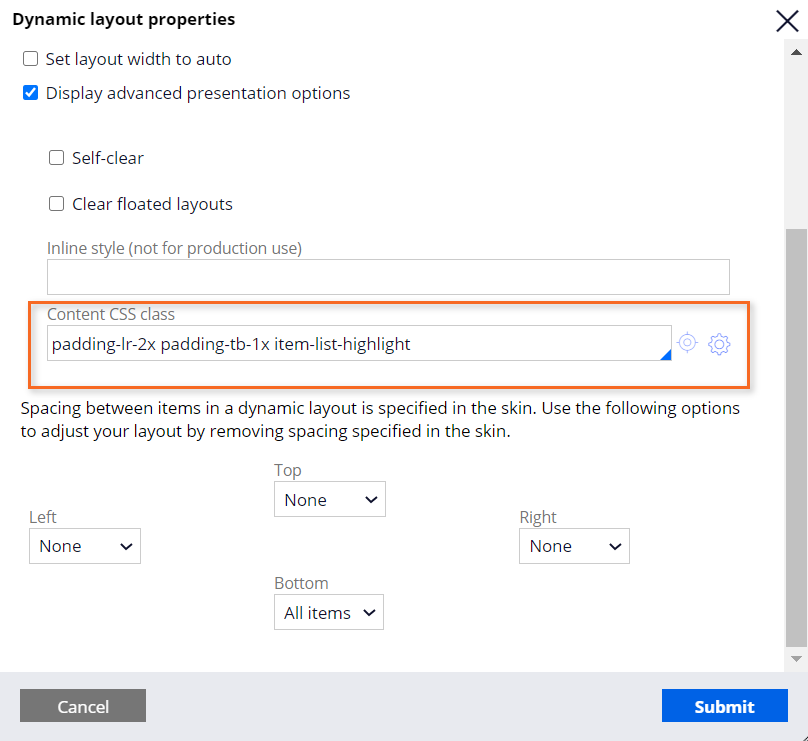
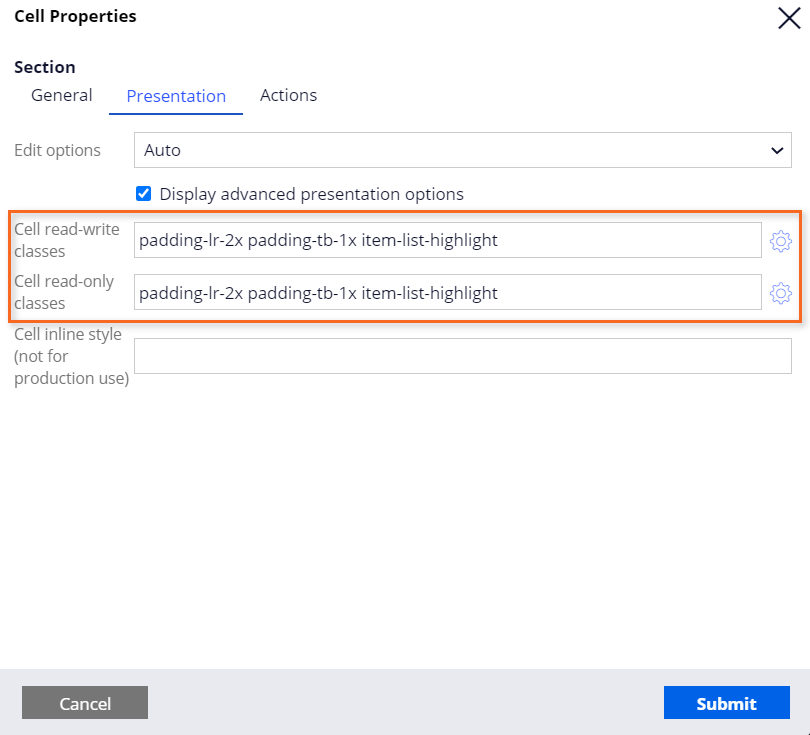
- Click View Properties on Dynamic Layout(Stacked) - 1 in the original section pyRecentWorkContent from UI-Kit ruleset. An aria role is set on the layout to be marked as a list widget and helper classes padding-lr-2x padding-tb-1x item-list-highlight are present under the Presentation tab of Content CSS class; it adds padding for top, bottom, and left.
- The out-of-the-box list item design template is a generic template that does not provide any inner spacing for the content inside the list. To fix this spacing issue, click the Toggle runtime toolbar icon.
- Click the Toggle Live UI icon to open the section called pyRecents at class Data-Portal.
- Do Save As of the section to save this section into the application stack.
- Save the section in an unlocked ruleset of MyTown311:01-01-11 with the same Name and Apply to class.
- Click Create and open to open the section.
- Click View Properties for the section included inside the Repeating dynamic layout-1.
- Click the Presentation tab.
- Select the Display advanced presentation options check box.
- Copy and paste the helper class padding-lr-2x padding-tb-1x item-list-highlight in both the Cell read-write classes and Cell read-only classes fields.
- Click Save.
- Go back to the Case Manager portal, refresh the case manager portal, and confirm that the recent lists are now correctly rendered, and the row is highlighted on hover.
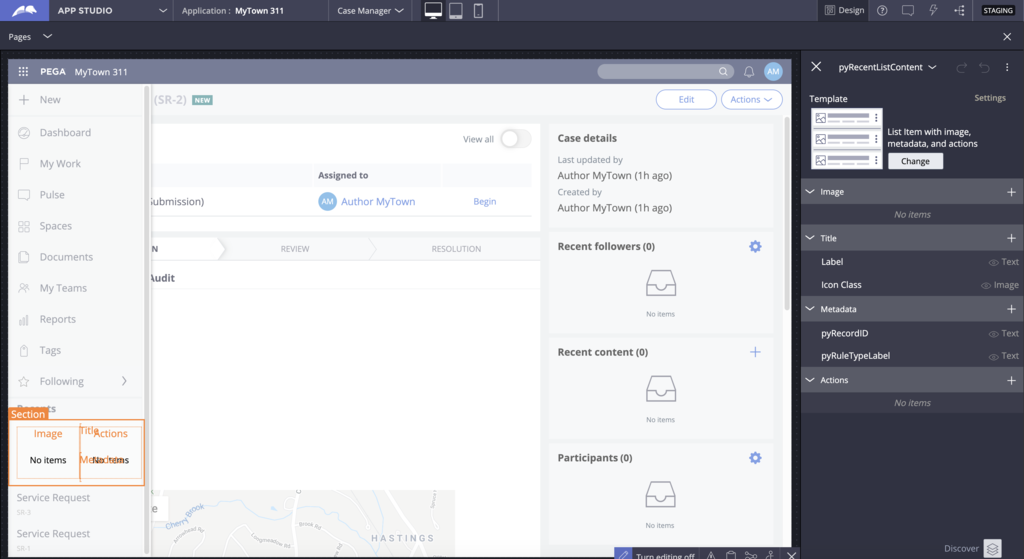
- Switch to App Studio and click the Case Manager portal by selecting the portal in the dropdown at the top. The new recent list based on the design template is rendered.
- In the header, click Design to highlight sections editable at runtime. The recent list item is now editable. It is possible to edit the properties inside the design template and add new properties if needed in App Studio.
4 Create a new design template
The out of the box template list item with image, title, metadata, and actions is a good starting point, but for your design system, you might need a new generic template called List item with primary and secondary data. Doing so avoids exposing regions like Image and Actions that are not applicable for the recent list items and other lists.
While you can customize the out of the box list item template, you might want to convert an existing section to be a design template. If you review the pyRecentWorkContent section, you see that this section can use a design template with two regions.

Note: The two regions use Mimic a sentence; this format is used so that different properties render like a sentence with a spacing between word of 0.7rem. This is usually not the best approach for rendering properties of different types. A better approach is to use the inline middle format and use the item-separator helper class.
- Perform a Save As on the original section pyRecentWorkContent from the UI-Kit into your application stack.
- Change the rule Name to List item with primary and secondary data.
- Change the Apply To class to @baseclass so that this template is available to all sections and not just the ones under System-User-Recents.

- Click Create and open. Errors are reported because you are changing the Apply To class of the section.
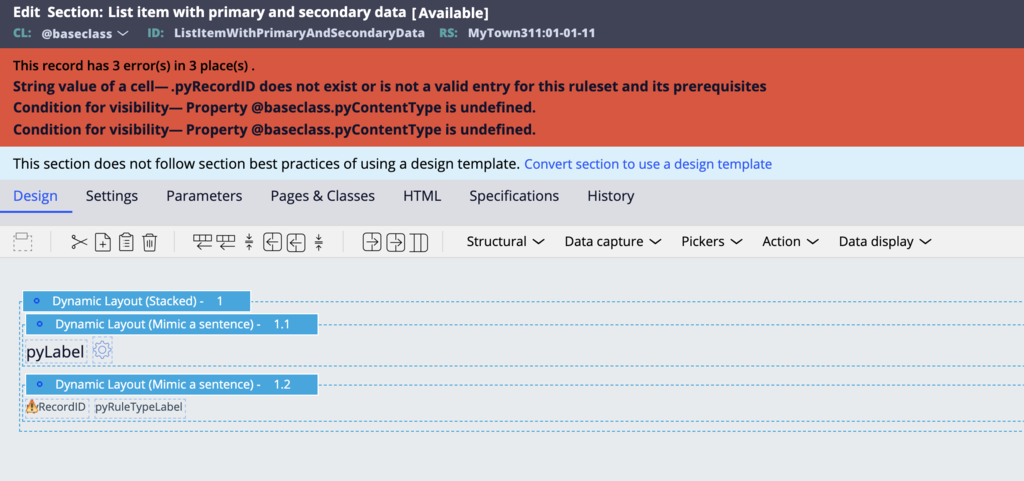
- Remove the four fields inside the two Dynamic Layouts (Mimic a sentence) – 1.1 and 1.2 and click Save. The errors should disappear.
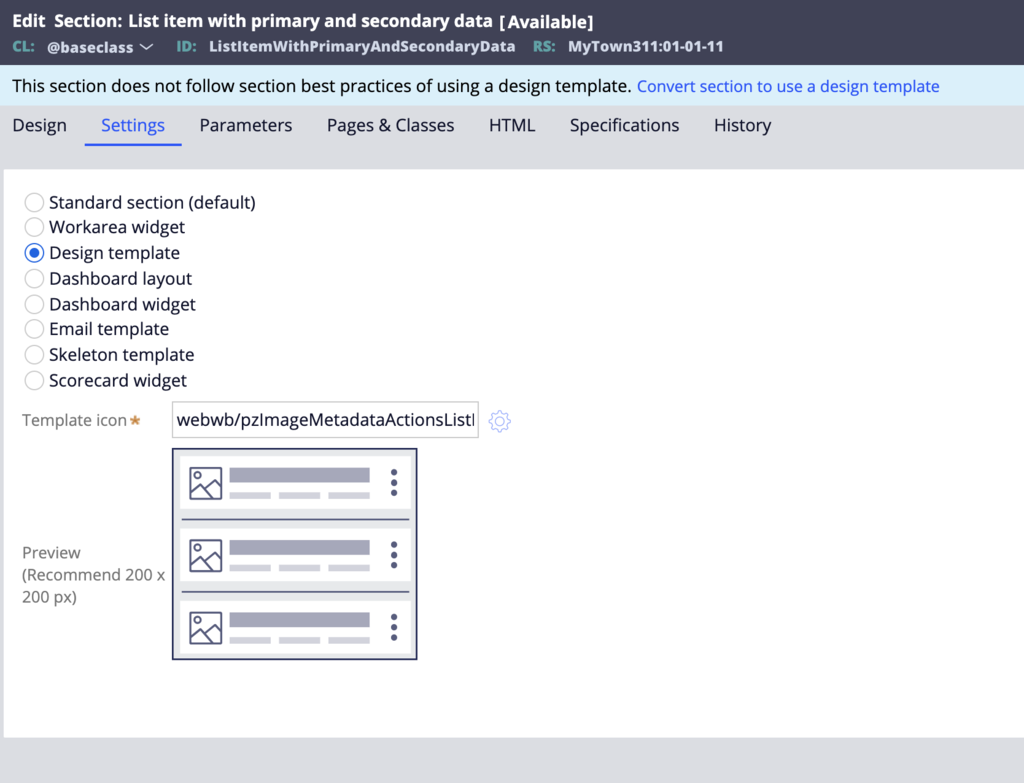
- Click on the Settings tab.
- Select Design template.
- Select an icon image by searching as list and select webwb/pzImageMetadataActionsListIcon.svg.
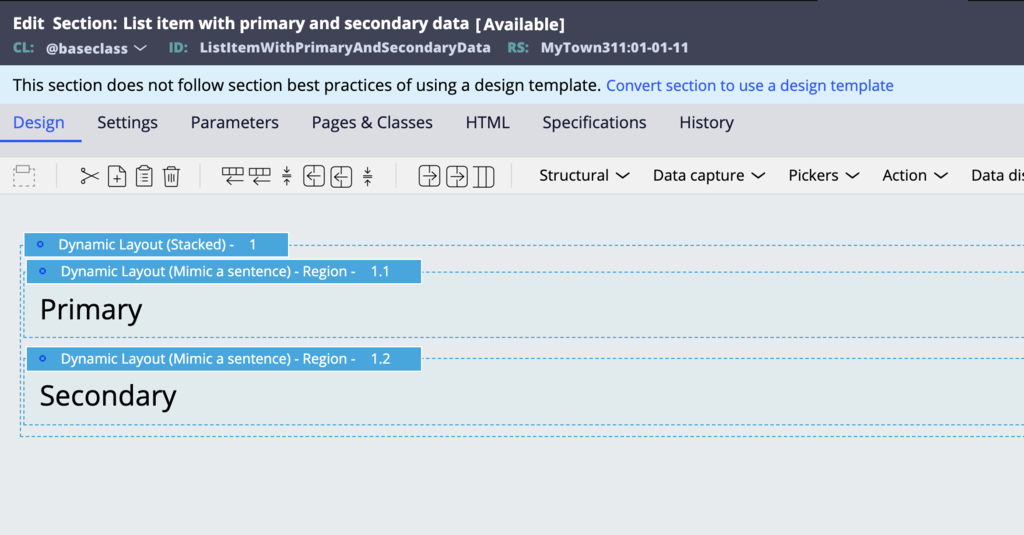
- Go back to the Design tab, open the property panel of the Dynamic Layout(Mimic a sentence) – 1.1.
- Select Use as template region.
- In the Region Name field, enter Primary.
- Open the property panel of the Dynamic Layout(Mimic a sentence) – 1.2.
- Check the setting Use as template region.
- In the Region Name field, enter Secondary.
- In the top-level Dynamic Layout(Stacked) – 1, remove the helper class under the Presentation tab because you moved them into the parent layout.
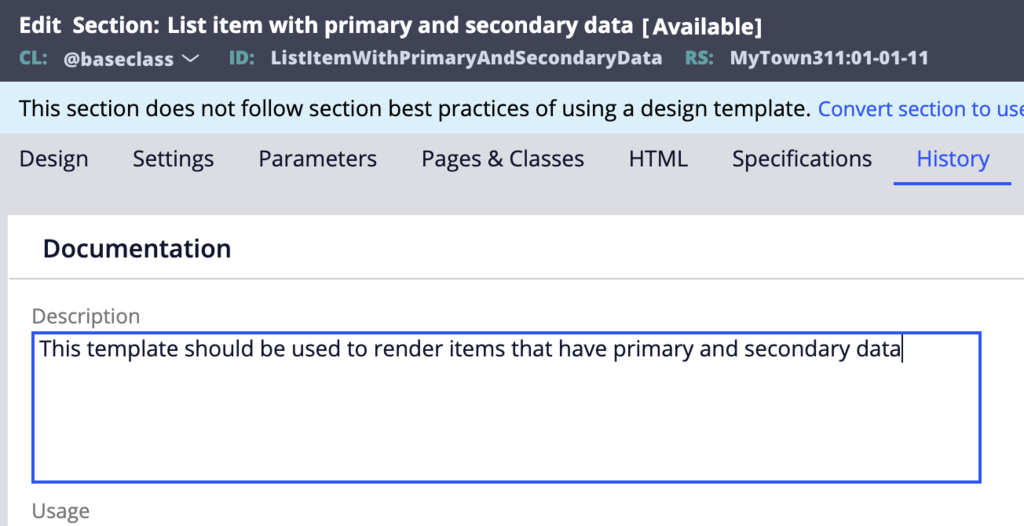
- Click the History tab and enter the description for the design template.
- Save the section.
- Switch to the section pyRecentWorkContent and change the template to use this new template; move the different properties to the correct region
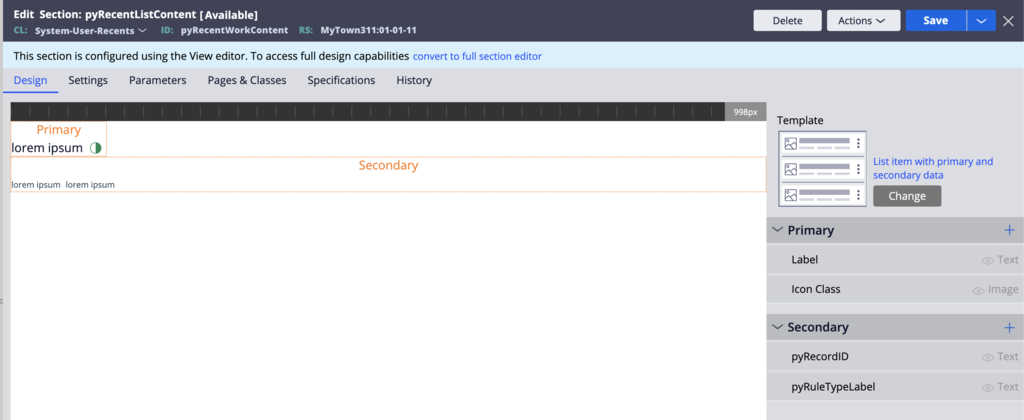
- In App Studio, reload the Case Manager portal and confirm that the new recent item uses the new template.