Temporäre Cases erstellen und permanent machen
2 Aufgaben
10 Min.
Szenario
InsCorp erfährt, dass viele Kunden mit Serviceanfragen beginnen und ihre Informationen teilweise eingeben, bevor sie den Case abbrechen. Um zu vermeiden, dass sich abgebrochene Cases zu Serviceanfragen im System ansammeln, möchte InsCorp, dass Kunden ihre Informationen, ihren Standort und ihr Fahrzeug angeben, bevor dem Case eine ID zugewiesen wird. Die Cases werden nach ihrer Erstellung nicht dauerhaft in der Datenbank beibehalten. Die Cases werden erst dann dauerhaft beibehalten, nachdem die Informationen zum Fahrzeug im Mehrschritt-Formular „Submission“ erfasst wurden.
In der folgenden Tabelle finden Sie die Anmeldedaten, die Sie zur Durchführung der Challenge benötigen.
| Rolle | Operator ID | Kennwort |
|---|---|---|
| Application Developer | author@gogoroad | pega123! |
Challenge-Schritte
Genaue Übungsschritte
1 Create and persist a temporary case
- In App Studio, from the navigation pane, click Case types > Assistance Request to open the Assistance Request case type.
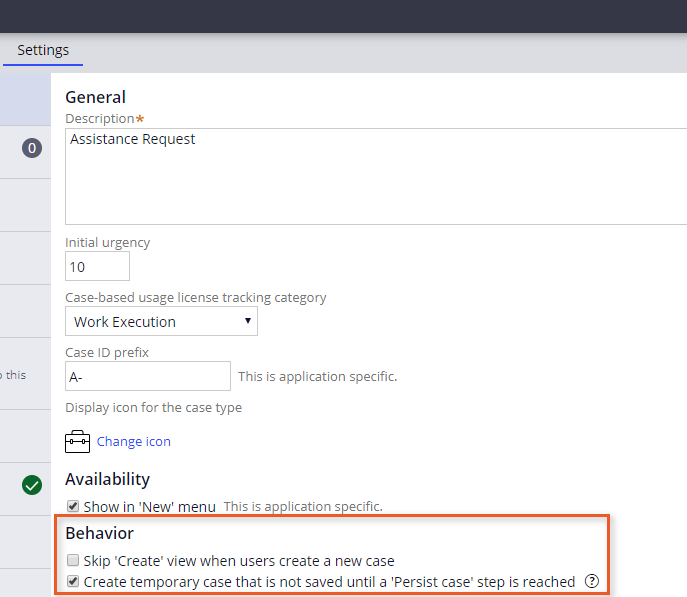
- Click the Settings tab to open the Assistance Request case type properties.
- In the General section, under Behavior, select the Create temporary case that is not saved until a 'Persist case' step is reached check box.
- Click to save the Assistance Request case type. A new case does not persist to the database.
- Click the Workflow tab to open the Assistance Request case life cycle.
- Hover over the Submit request multi-step process and click Configure process to open the Process modeler.
Hinweis: From the case life cycle, you can only add Collect information steps to a multi-step form. To add other types of steps to a multi-step form, open the process.
- In the Process modeler, click Add flow shape > Automations > Persist case.

- Drag the Identify vehicle connector to the Persist case step.
- Hover over the Persist case step and drag the connector to the end step.
 Hinweis: By default, flow shapes are added to the center of the process modeler and may overlap. Move shapes as necessary to make the process easier to interpret.
 - Click to return to the case life cycle.
- Click .
2 Confirm your work
- In the Assistance Request case type, click Save and run to run a new instance of the Assistance Request case type.
- Advance the case to one of the steps in the multi-step form.
- From the lower-right corner, click the Toggle r icon.
- On the toolbar, click the icon to open the Clipboard tool.

- In the Threaddrop-down, select New to view the New thread.
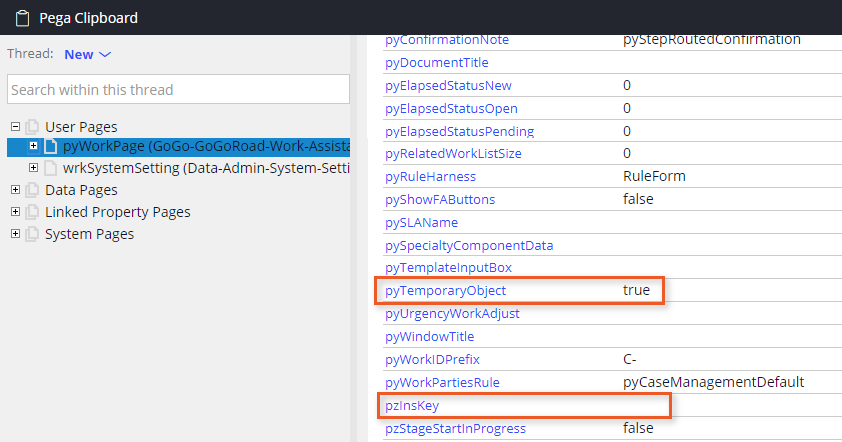
- Click pyWorkPage and confirm that pyTemporaryObject is set to true and the pzInsKey value is blank. These values indicate that a case does not persist to the database.
- Close the clipboard dialog.
- Advance the same case to the Enter payment information view.
- Open the clipboard and confirm that there is a thread with the case ID for the current case instance.
- Confirm that pyTemporaryObject is blank and the pzInsKey value shows the case ID.

In der folgenden Mission verfügbar:
If you are having problems with your training, please review the Pega Academy Support FAQs.
Möchten Sie uns dabei helfen, diesen Inhalt zu verbessern?