ビジネスコンテキストに基づいたワークフローのコントロール
3 タスク
10 分
シナリオ
顧客がInsCorpにロードサイド アシスタンスをリクエストすると、カスタマーサービスの担当者(CSR)は、その顧客がロードサイド サポート保障に登録しているかどうかを手動で確認します。 この効率を上げるため、InsCorpの利害関係者はこのステップを自動化すべきだと考えました。 既存の承認/却下ステップを自動意思決定に変更します。
以下の表は、チャレンジに必要なログイン情報をまとめたものです。
| ロール | オペレータ ID | パスワード |
|---|---|---|
| アプリケーションデベロッパー | author@gogoroad | pega123! |
チャレンジ ウォークスルー
詳細なタスク
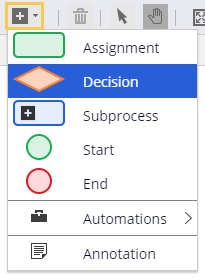
1 Add a decision shape to the Validate request process
- In the App Studio navigation pane, click Case types > Assistance Request to open the Assistance Request case type.
- Hover over the Validate request process and click Configure process to open the process modeler.
- Click Add a flow shape > Decision to add a decision shape.
- Rename the decision shape Validate request.
- Click Add a flow shape > Automations > Change to a stage to add a change stage automation.
補足: By default, flow shapes are added to the center of the process modeler and may overlap. Move shapes as necessary to make the process easier to interpret.
- Rename the Change to a specific stage automation Change to rejection stage.
- In the properties pane of the Change to rejection stage shape, in the Stage drop-down, select Approval Rejection.
- Click the Validate request Approve/Reject shape, and then click the Trash icon in the process modeler toolbar to delete the shape.
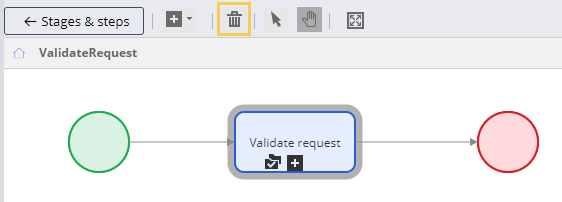
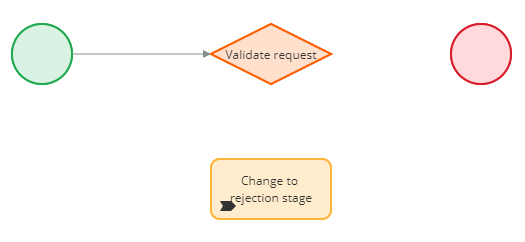
- Drag the connector from the start shape to the Validate request decision shape.
- Delete the connector to the end shape.
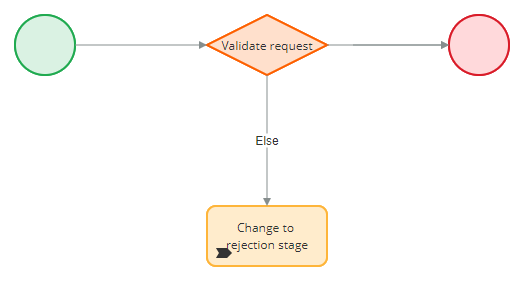
2 Validate requestデシジョン シェープを設定する
- Validate requestデシジョンシェープのプロパティパネルで、Whenドロップダウンの「Custom condition」が選択されていることを確認します。
- Custom conditionの右にある歯車アイコンをクリックして、Configure conditionダイアログボックスを表示します。
- 最初のドロップダウンリストで、Customer IDデータオブジェクトの「Enrollment」フィールドを選択します。 2番目のドロップダウンリストはデフォルトで「true」になります。
- 「Submit」をクリックします。
- 「Go to」ドロップダウンで「End」を選択します。
- Otherwise go toドロップダウンで「Change to rejection stage」を選択します。

- 「Save」をクリックして、変更内容を適用します。
3 作業の確認
- Assistance Requestケースタイプで、「Save and run」をクリックして、Assistance Requestケースタイプの新しいインスタンスを実行します。
- ケースを「Create」ビューの先まで進めます。
- 「Enter customer information」ビューで、ロードサイド アシスタンス保障に未加入の顧客のアカウントIDを選択します。

- ケースを「Enter payment information」ビューよりも先に進めます。 「Prompt for enrollment」ビューが表示されます。

- 2番目のAssistance Requestケースインスタンスを作成します。
- 「Enter customer information」ビューで、ロードサイド アシスタンス保障に加入している顧客のアカウントIDを選択します。
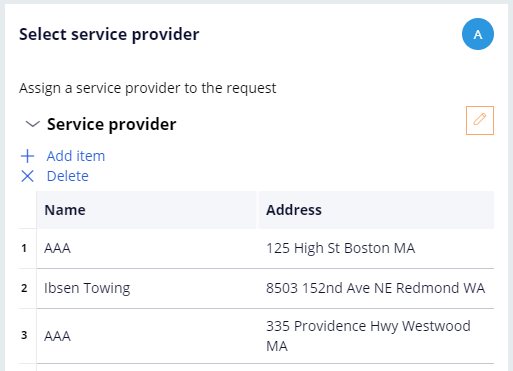
- ケースを「Enter payment information」ビューよりも先に進めます。 「Select service provider」ビューが表示されます。
このモジュールは、下記のミッションにも含まれています。
If you are having problems with your training, please review the Pega Academy Support FAQs.