
ケース処理中にメールを送信する
2 タスク
20 分
シナリオ
MyTownの市長は、報告された問題が解決されたとき、ユーザーにメール通知を送信したいと考えています。
以下の表は、チャレンジに必要なログイン情報をまとめたものです。
| ロール | ユーザー名 | パスワード |
|---|---|---|
| アプリケーションデベロッパー | author@mytown | pega123! |
チャレンジ ウォークスルー
詳細なタスク
1 Configure the Send email step
- In the App Studio navigation pane, click Case types > Service Request to display the case life cycle.
- In the Resolution stage, select the Send repair confirmation step to display the configuration pane on the right.
- In the configuration pane, from the first Send to drop-down, select Field.
- From the second Send to drop-down, select Requestor Email to set the Send to value.
- In the Subject field, enter "Your service request has been completed!"
補足: To display punctuation in text labels and fields such as the email subject line, enclose the text and punctuation in quotes.
- Under Message content, click Compose to display the Compose message window.
- In the rich text editor, enter the following text to compose the email message:
Hello!
We have addressed the issue <<.pyID>> that you logged on <<.pxCreateDateTime>>. Thank you for using the MyTown 311 app!Office of the Mayor,
MyTown
ヒント: You can click the Insert property icon to select a property from a list. Select CaseID for .pyID and CreateDate/Time for .pxCreateDateTime.
- Click Done to complete the message composition and display a message preview.
- Click Save to complete the step configuration.
2 Confirm your work (section not graded)
- In the Service Request case type, click Save and Run to run a new case.
- In the New: Service Request view, complete the required fields and click Done to record the information and display the next view.
- From the step list on the right, click Request updates to display the Request updates view.

- Select the Request updates check box to receive an email notification when the issue is resolved.
- In the Requestor email field, enter your email address.
- Click to submit the service request.
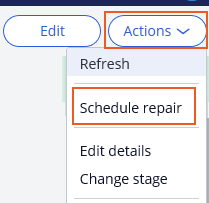
- Advance the case to the Schedule Repair step, enter values for all required fields, then click Submit.
ヒント: Use the Actions menu to advance through the case. Click Actions, and then select the next view with required fields.
- Advance the case to the Perform Repair step, enter values for all required fields, then click Submit.
- Advance the case to the Approval step, and click Approve to approve the repair and send the email to the requestor.
- To the right, under Recent content, verify that the email is displayed.
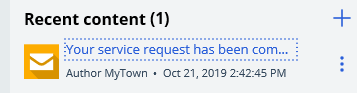
- Click Your service request has been com… to display the email message.

- Verify the email address matches the email you entered in the Request updates view, and that the content of the email matches the text you entered in the Send email step configuration.
補足: Pega automatically sets values for .pyID and .pxCreateDateTime when a case starts.
このモジュールは、下記のミッションにも含まれています。
If you are having problems with your training, please review the Pega Academy Support FAQs.