Creating a procedure automation
Creating a procedure automation
Creating an automation as a procedure has two steps. First, you configure the automation, and then you execute the automation.
Configure the automation
Follow these steps to configure an automation as a procedure. The process assumes an automation project item exists in a project.
- In the Solution Explorer, double-clicking on an automation to open it in the designer window.
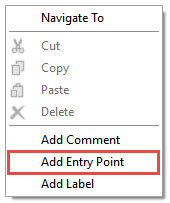
- In the automation designer window, right-click to access the context menu.
- From the context menu, select Add Entry Point. An Execute design block displays.
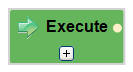
- If required for the automation, click the + on the design block to add parameters to pass into the automation. A parameter displays in the design block.
- Click the data type to change the data type.

- Click param1 text and enter a name of the parameter.
- Repeat steps 4-6, to add and configure the required automation parameters.
- In the automation designer window, right-click to access the context menu.
- From the context menu, select Add Exit Point. An Exit1 design block displays with an exit parameter added. You cannot delete this exit parameter. You can change the data type and its name. You can also change the name of the Exit1 block by clicking on the Exit1 text.
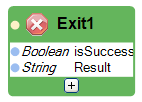
- If required for the automation, click the Plus on the Exit1 design block to add more exit parameters. A parameter displays in the design block. You can change the data type and name of the parameter.
- Complete the automation logic as needed.
- From the menu, select File > Save All.
Execute the automation
Follow these steps to execute an automation as a procedure. The process assumes a procedure automation exists in a project.
- From the Solution Explorer, right-click on the project and select Add > New Automation.
- In the Add New Item window, enter the name of the automation.
- Click Add. The automation appears in the Solution Explorer and the automation designer window opens.
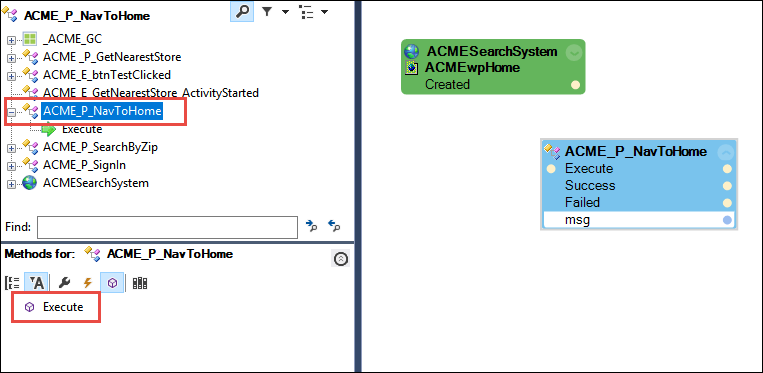
- From the Object Hierarchy, select the function automation to highlight it.
- In the Object Inspector, select the Box icon to display the methods. An Execute method appears.
- From the Object Inspector, click and drag the Execute method to the automation. The Execute design block appears. If you added entry and exit parameters to the procedure automation, they appear on the Execute design block. Blue data ports for the parameters display for data links.
- Complete the automation logic as needed.
- From the menu, select File > Save All to save the changes.
This Topic is available in the following Module:
If you are having problems with your training, please review the Pega Academy Support FAQs.
Want to help us improve this content?