Interrogating a single-page application
7 Tasks
45 mins
Scenario
Your project contains the Pega Finance web application and login automation. You are about to interrogate the application. The Pega Finance site is a single-page application. As a manual process, users log in to the site, navigate to the Customers page, view the open invoices from a list of customers, and edit an invoice for a chosen customer. The project documentation requires the interrogation of controls necessary to automate the process of logging in to the web application and accessing the Customers link to search for the customer using their account number.
Interrogate the necessary menu items, customer account information, invoice information, and tables in the Finance web application by using the three methods: Interrogation target, Select Element, and Create Control. Rename the controls as necessary in the Interrogation form during the interrogation process. At the end of this phase of the project, the project will contain all controls required to automate the search process.
In this part of the project, complete the following tasks:
- Interrogate the web application and the controls that are required for menu links, customer information, invoice information, and editable fields.
- Rename the web application controls as necessary.
- Create containers for the parent controls and set the UseKeys property for repeated child controls.
- Edit match rules for repeated child controls and to ensure unique matches on all controls.
Detailed Tasks
1 Open the project and log in to the web application
- On the Pega Robot Studio home page, click File > Open project to open the Select Project File window.
- In the Select Project File window, browse to the location where you extracted the starter project ZIP file.
- Select Robotic Banking.pegaProject, and then click Open to open the project.

- In the Project Explorer, click Finance to open the Pega Finance web application.
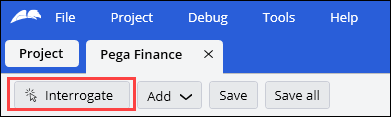
- On the toolbar, click Interrogate to open Google Chrome and display the Interrogation Form.
- On the Pega Finance login screen, sign in to the application:
- In the User Name field, enter pega.
- In the Password field, enter pega.
- Click Sign In to display the home page of the Pega Finance site.
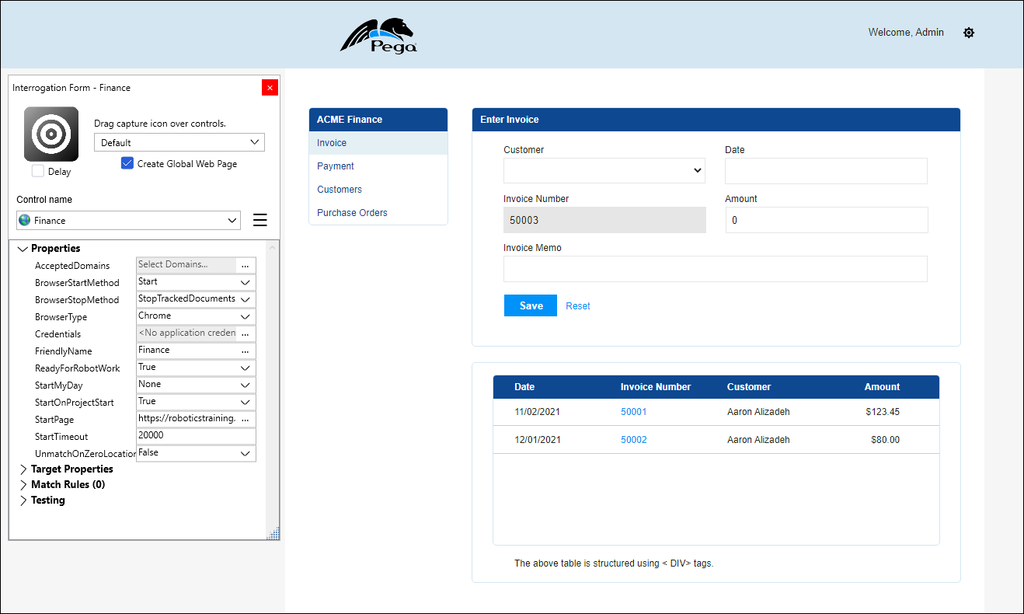
- In the upper-right corner of the Pega Finance home page, click the Gear icon, and then select Reset data to display a confirmation dialog box.
Note: For the purposes of this challenge, the Finance site is prepopulated with a set of data. Resetting the data ensures that you are working from a known state while completing this challenge. If at any point you make edits to any customer or invoice data, you can reset the data to the starting point from the Gear icon.
- On the confirmation dialog, click OK to reset site data.
2 Interrogate the Customers link and adjust match rules
- On the Interrogation Form, drag the Target icon to the Customers link in the navigation menu of the web application, and then release the target to interrogate the control.
The interrogation form displays an error:Unable to uniquely identify the control Customers.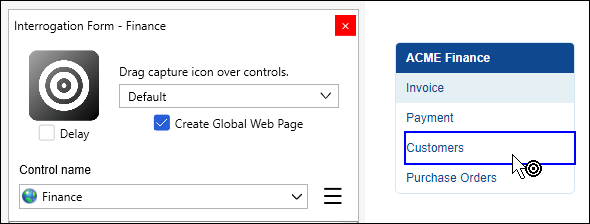
- Click the Control name field, and then enter lnkCustomers to rename the control.

- In the Match Rules section of the Interrogation Form, click View match rules.
Pega Robot Studio displays the Targets tab for the control. - In the Targets section, double-click the Customers row to select that target.
The Selected badge moves to the selected target row.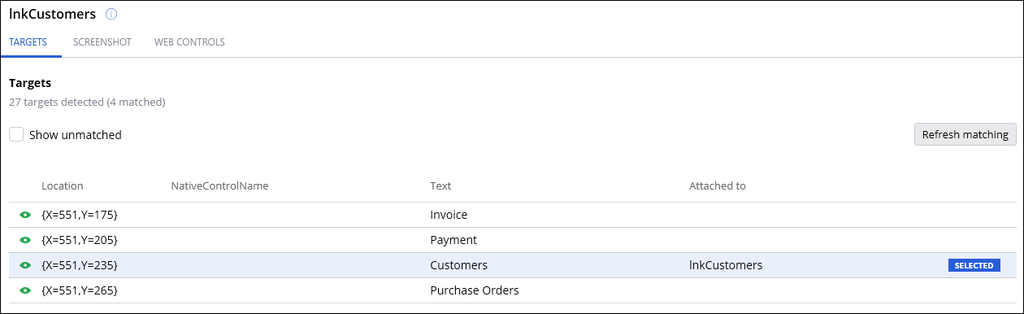
- In the Match rules section, click the Add rule menu, then select Property Match Rule to open the Match Rule Designer window.
- In the Match Rule Designer window, select the innertext checkbox.
- Confirm that Customers is displayed in the Value column.
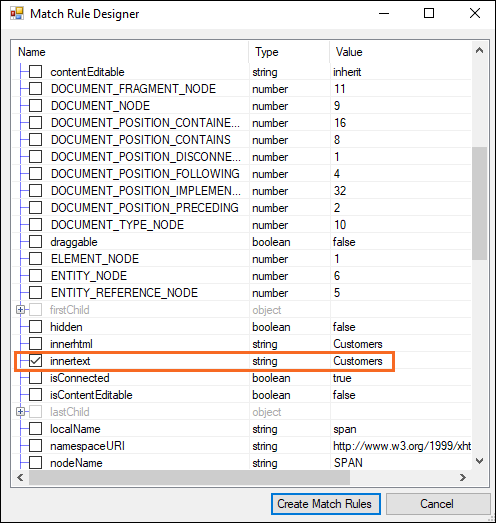
- Click Create Match Rules to add the match rule to the control.
- On the Targets tab, click Refresh matching to display only one matched target.
- On the Interrogation form, click Clear Errors to remove the error messages in the text box.
- On the toolbar, click Save to save the project.
3 Interrogate the Customers table
- In the Pega Finance web application, in the navigation pane, click Customers to display the list of customers.
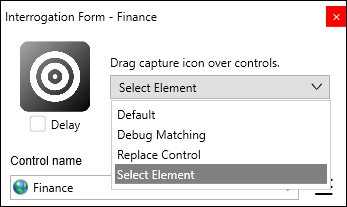
- On the Interrogation Form, in the Interrogation mode list, select Select Element.
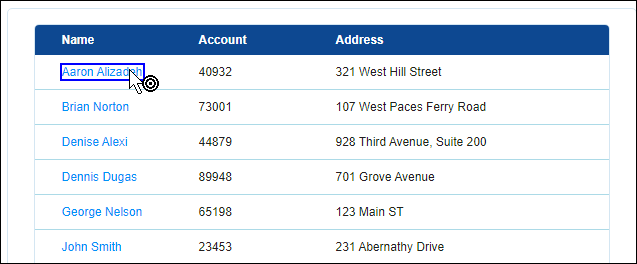
- In the Customers table, in the Name column, drag the Target icon to the first name until the smallest area is highlighted.
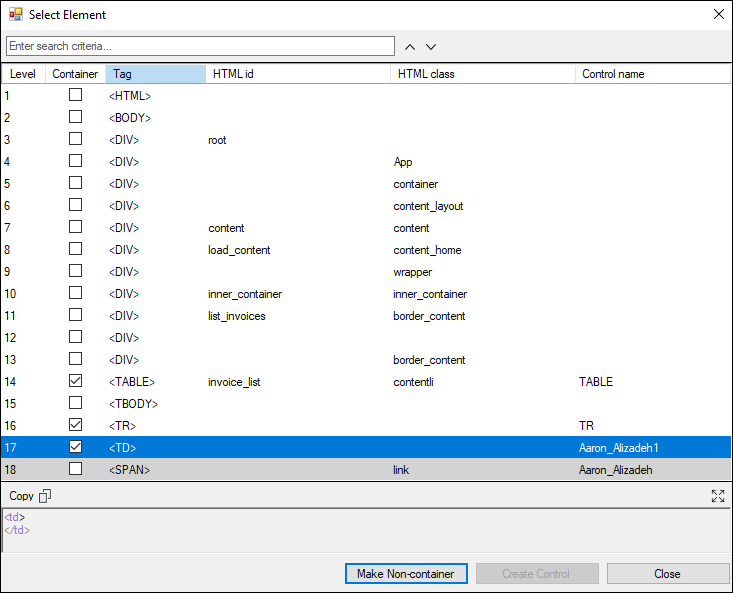
- Release the target to display the Select Element window.
- In the Select Element window, click the <SPAN> row, and then click Create Control.
- Click the <TABLE> row, and then click Create Container.
- Repeat step 6 for the following rows:
- <TR>
- <TD>
- Click Close to close the Select Element window.
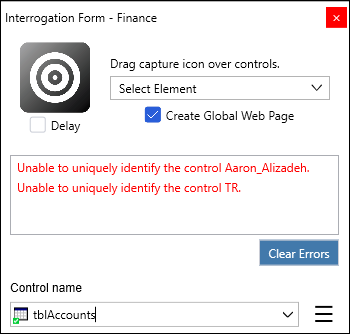
- On the Interrogation Form, in the Control name menu, select the TABLE control.
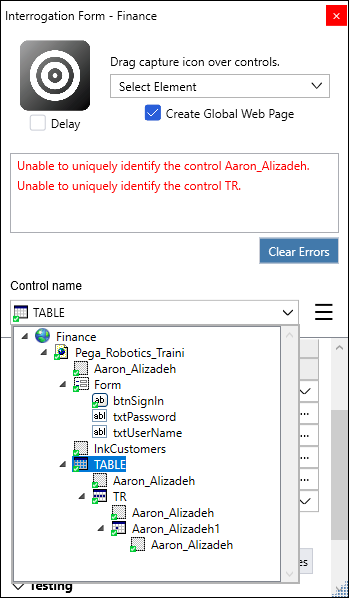
- In the Control name field, enter tblAccounts to rename the control.
- Repeat steps 9 and 10 for the following controls:
Control
New name
TR
trAccounts
Aaron_Alizadeh1
tdAccount
Aaron_Alizadeh
lnkAccountName
Note: After you interrogate the table, the Interrogation Form displays errors about the interrogated the controls. You adjust the match rules for these controls in the next task. - In the Customers table, in the Account column, drag the Target icon to the first value, and then release the target to display the Select Element window.
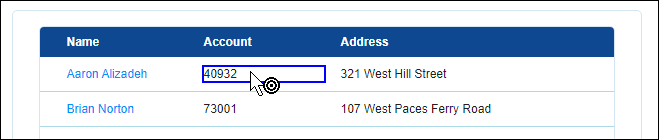
- In the Select Element window, with the <TD> element highlighted, click Create Control, and then click Close.
- On the Interrogation Form, in the Control name list, select 40932, and then enter tdAccountNum to rename the element.
- On the toolbar, click Save to save the project.
4 Adjust the match rules for the Customers table
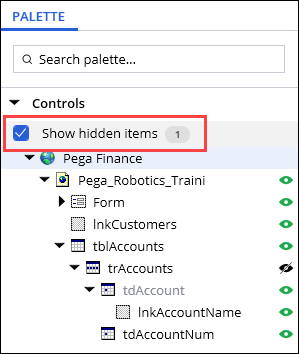
- In Pega Robot Studio, in the Application Designer, on the Palette, click Show hidden items checkbox to display the tdAccount control.
- Click trAccounts to refresh the application designer window.
- On the right, in the Property Grid, in the UseKeys list, select true.

- In the Match rules section, click the Add rule menu, then select Property Match Rule to open the Match Rule Designer window.
- In the Match Rule Designer window, select height, and then click Create Match Rules to add a new match rule for the control.
The new match rules unmatches the separator lines between the rows of data.
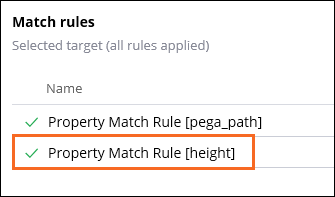
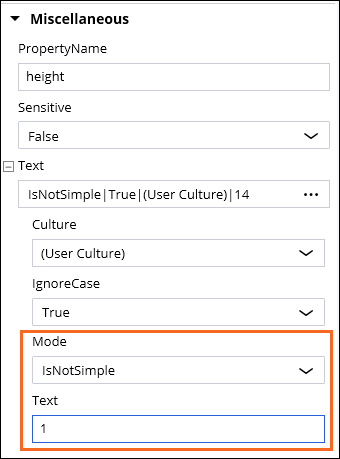
- In the Match rules section, click Property Match Rule [height] to display the match rule properties in the Property Grid.
- In the Property Grid, in the Miscellaneous section, in the Mode list, select IsNotSimple.
- In the Text field, enter 1.
- On the Palette tab, click tdAccount to refresh the Application Designer and display the Targets tab for the tdAccount control.
- In the Match rules section, in the Property Match Rule [pega_rowcol] row, click the Delete icon to remove the match rule.

- Click the Add rule menu, then select Property Match Rule to open the Match Rule Designer window.
- In the Match Rule Designer window, select pega_col, and then click Create Match Rules to add the new match rule for the control.
The new match rule matches only the column instead of both the row and the column of the table cell.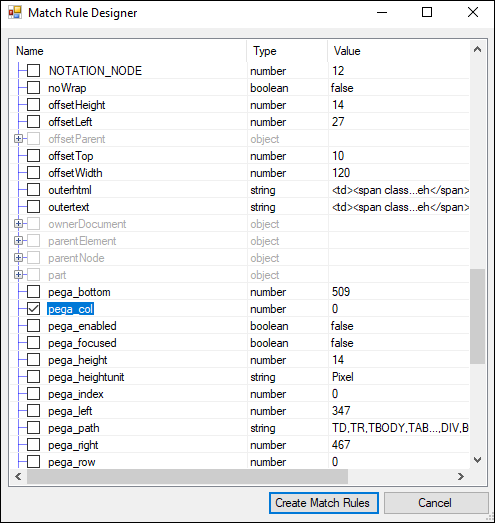
- Repeat steps 10-12 for the tdAccountNum control.
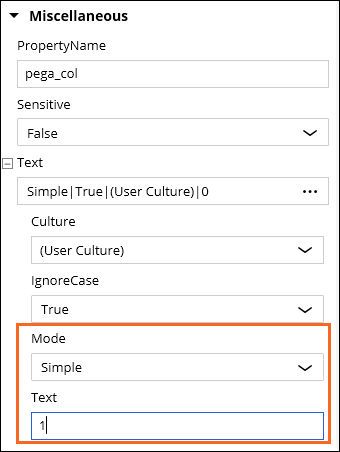
- In the Match rules section of the tdAccountNum control, click Property Match Rule [pega_col] to refresh the Property Grid and display the match rule properties.
- In the Property Grid, in the Miscellaneous section, in the Text field, enter 1 to match the control in the correct column.
- On the toolbar, click Save to save your edits to the application.
5 Interrogate the Customer Information view
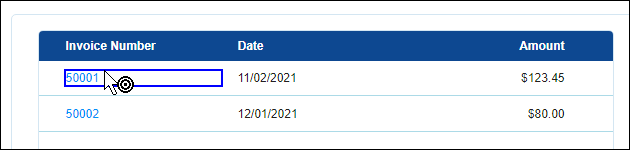
- In the Pega Finance web application, in the Customers table, click Aaron Alizadeh to open the information view for the customer profile.
- On the the Interrogation Form, drag the Target icon to the first row of the Invoice Number column.
- Release the target to display the Select Element window.
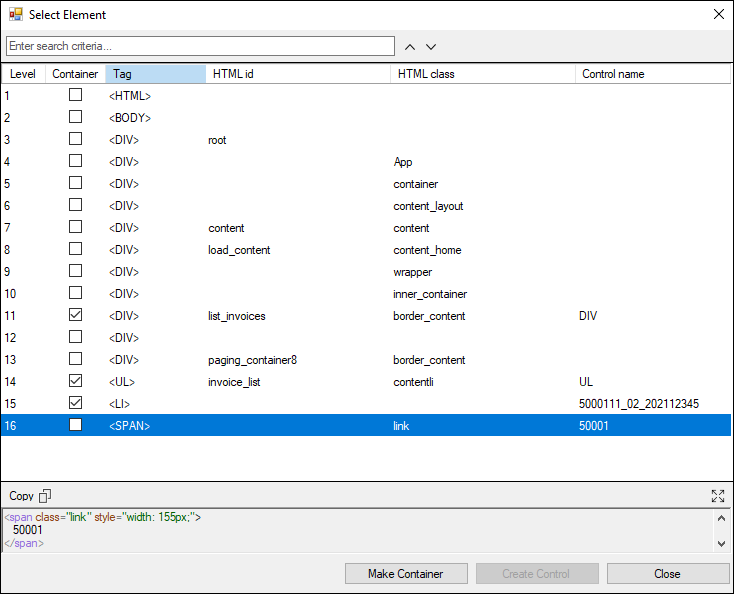
- In the Select Element window, click the <SPAN> row, and then click Create Control.
- Click the <UL> row, and then click Create Container.
- Repeat step 5 for the following elements with an HTML id of list_invoice:
- <LI>
- <DIV>
- Click the Close icon to close the Select Element window.
- On the Interrogation Form, select the DIV control in the Control name list.
- Rename the control to cntrInvoices.
- Repeat steps 8 and 9 for the following controls:
Control
New name
UL
tblInvoices
5000111_02_202112345
trInvoices
50001
lnkInvoice
- In Pega Robot Studio, on the Palette tab, click trInvoices to refresh the Application Designer and display the Targets tab for the trInvoices control.
- In the Property Grid, in the UseKeys list, select true.
- On the Palette, click lnkInvoice to refresh the Application Designer and display the Targets tab for the lnkInvoice control.
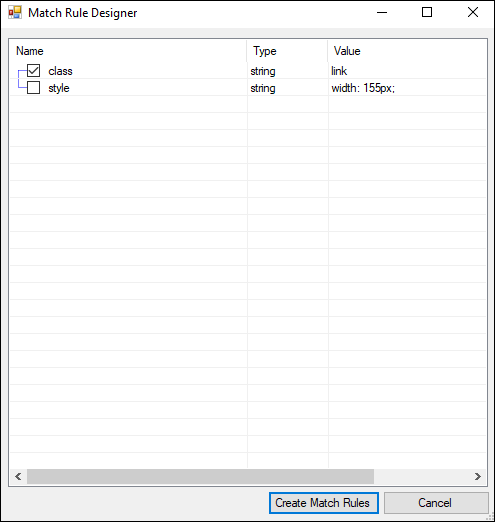
- In the Match rules section, click Add rule, then select Attribute Match Rule to open the Match Rule Designer window.
- In the Match Rule Designer window, select class, and then click Create Match Rules to add a match rule to the lnkInvoice control.
- On the toolbar, click Save to save your edits to the application.
6 Interrogate a customer without open invoices
- In the Pega Finance web application, in the navigation pane, click Customers to display the list of customers.
- In the Customers table, click Brian Norton to display the information view for the customer.
- On the Interrogation Form, in the Interrogation mode list, select Default.
- Drag the Target icon to the
There are no invoicestext, highlighting the smallest area possible.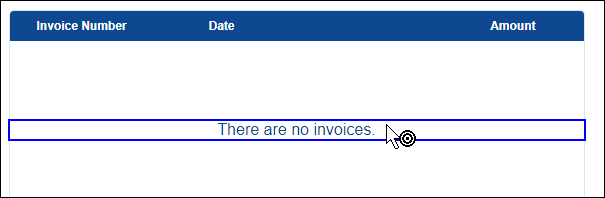
- On the Interrogation Form, click the Control name field and rename the newly interrogated control to lblNoInvoices.
7 Interrogate the detailed invoice view
- In the Pega Finance web application, in the navigation pane, click Customers to display the list of customers.
- In the Customers table, click Aaron Alizadeh to display the information view for the customer.
- In the Invoices table, click 50001 to display the invoice details.
- Drag the Target icon to the Date input field.
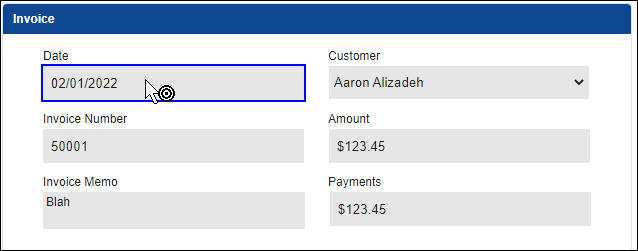
- On the Interrogation Form, click the Control name field and rename the newly interrogated control to txtInvoiceDate.
- Repeat steps 4 and 5 for the following fields:
Input field
Control name
Customer
txtInvoiceCustomer
Invoice Number
txtInvoiceNum
Amount
txtInvoiceAmount
Invoice Memo
txtInvoiceMemo
Payments
txtInvoicePayments
- In the Application Designer, on the toolbar, click Stop interrogation to close the Interrogation Form and the Pega Finance web application.
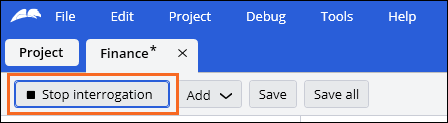
- Click Save all to save your project.
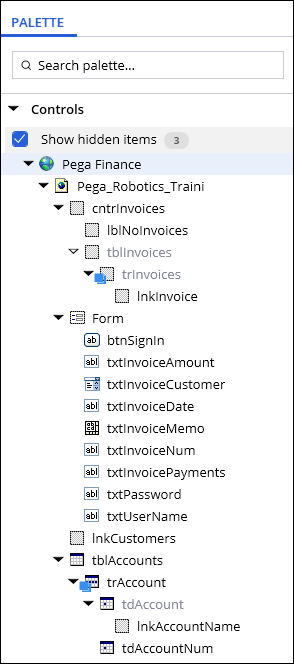
Confirm your work
In Pega Robot Studio, in the Pega Finance application designer, confirm that the control hierarchy on the Palette matches the following figure:
This Challenge is to practice what you learned in the following Modules:
Available in the following mission:
Want to help us improve this content?