
Setting up data ingestion
3 Tasks
40 mins
Scenario
The project team at U+ Bank performed a data mapping workshop and mapped its existing data model to the analytical data model for the financial services customer. The U+ Bank data warehouse team prepared the customer and account data files and the manifest files. IT developed the technical infrastructure to upload the data daily to a repository that Pega Customer Decision Hub™ can access.
As a decisioning architect, your role is to prepare the data jobs to populate customer and account tables in Pega Customer Decision Hub™.
Use the following credential to log in to the exercise system:
| Role | User name | Password |
|---|---|---|
| Decisioning architect | DecisioningArchitect | rules |
Your assignment consists of the following tasks:
Task 1: Clear the Customer and Account tables
As a decisioning architect, use the Customer and Account data sets to clear any test data created in Customer Decision Hub.
Note: The exercise system contains customer and account data generated from a Monte Carlo data set in a previous exercise.
Task 2: Create a new import data job for the customer data
As a decisioning architect, create a new data job to ingest the customer data file by using the details from the following table:
| Requirement | Detail |
|---|---|
|
Data source |
Customer |
|
Repository |
defaultstore |
|
File path |
/IngestionData/CustomerData/ |
|
Manifest file name |
CustomerDataIngestManifest.xml |
|
Data file name |
CustomerDataIngest.csv |
|
Date field formats |
Date time format: MM/dd/yyyy HH:mm Time format: HH:mm:ss |
|
Import using |
A schedule, once a day. |
|
Failure policy |
10 records per file. |
Confirm that the system successfully ingests the data.
Task 3: Create a new import data job for the account data
As a decisioning architect, create a new data job to ingest the account data file by using the details from the following table:
| Requirement | Detail |
|---|---|
|
Data source |
Account |
|
Repository |
defaultstore |
|
File path |
/IngestionData/AccountData/ |
|
Manifest file name |
AccountDataIngestManifest.xml |
|
Data file name |
AccountDataIngest.csv |
|
Date field formats |
Date time format: MM/dd/yyyy HH:mm Time format: HH:mm:ss |
|
Import using |
A schedule, once a day. |
|
Failure policy |
10 records per file. |
Confirm that the system successfully ingests the data.
Challenge Walkthrough
Detailed Tasks
1 Clear the Customer and Account tables
- On the exercise system landing page, click Pega CRM suite to log in to Customer Decision Hub.
- Log in as the decisioning architect:
- In the User name field, enter DecisioningArchitect.
- In the Password field, enter rules.
- In the header of Customer Decision Hub, in the search field, enter Customer, and then click the search icon.
- In the third filter list, select Exact Match.
- In the list of results, select the Customer data set with the Applies to class UBank-CDH-Data-Customer.
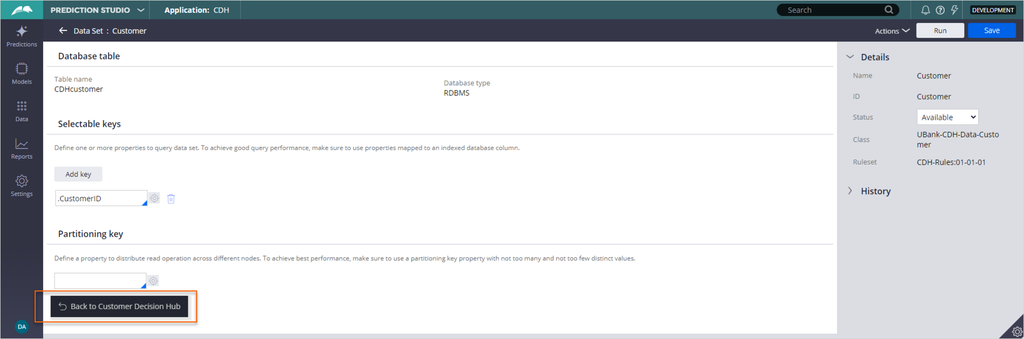
- In the upper-right corner, click the Run to truncate the data set:
- In the Run Data Set: Customer window, in the Operation list, select Truncate.
- In the upper-right corner, click Run to truncate the customer table.
- Close the Status Page window, and then close the Run Data Set: Customer window.
- In the lower-left corner, click Back to Customer Decision Hub to return to Customer Decision Hub.
- Repeat steps 3–5 for the Account data set to truncate the account data.

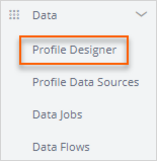
- In the navigation pane of Customer Decision Hub, click Data > Profile Designer to view data sources.
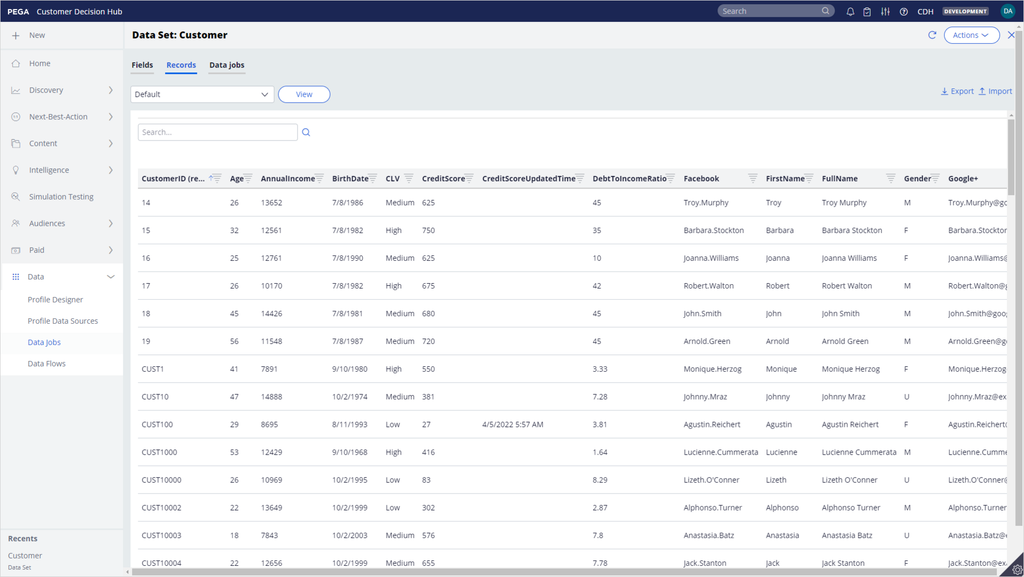
- On the Profile Designer landing page, click Customer to open the customer data source.
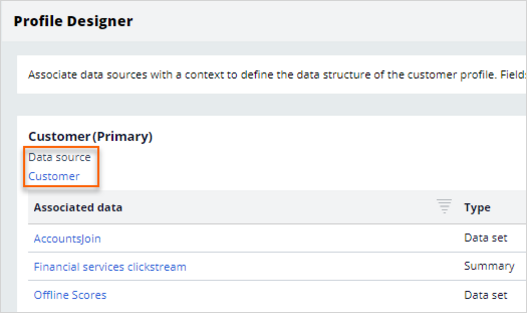
- On the Data Set: Customer landing page, click the Records tab to confirm that there are no items.

- Optional: To confirm that there are no items for the Account data set, repeat steps 8–10.
2 Create a new import data job for the customer data
- In the navigation pane of Customer Decision Hub, click Data > Data Jobs to create a new data job for ingesting customer data.
- On the Data Jobs landing page, click Create import data job.
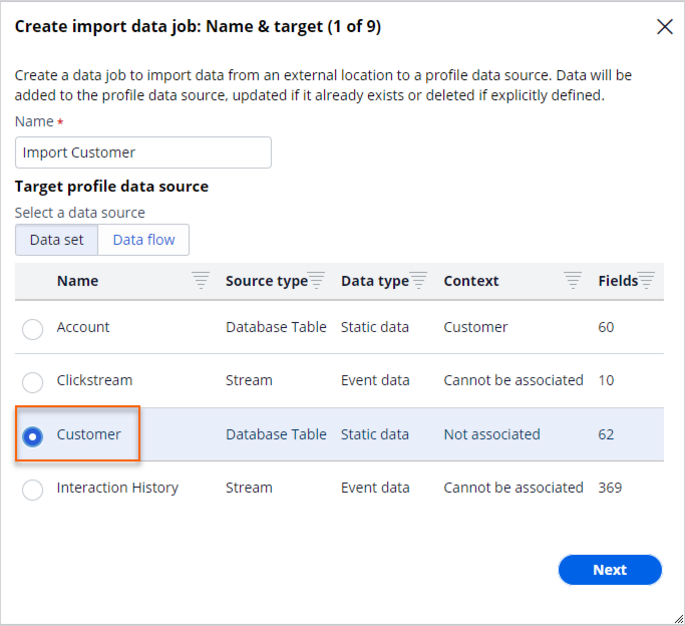
- In the Create import data job: Name & target (1 of 9) window, select Customer, then click Next.
- In the Create import data job: Repository (2 of 9) window, in the Repository list, select defaultstore, then click Next.
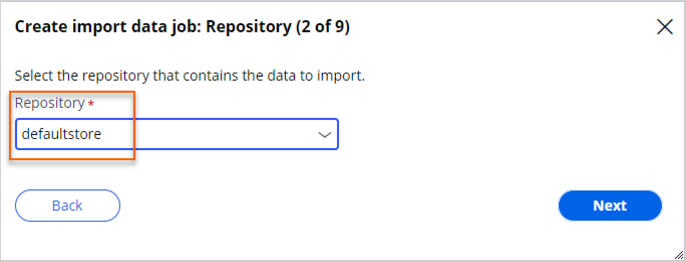 Note: For the purposes of the exercise, all files use the defaultstore (a system-managed temporary file storage) repository. In a real-life scenario, all files are typically in a file repository such as AWS S3.
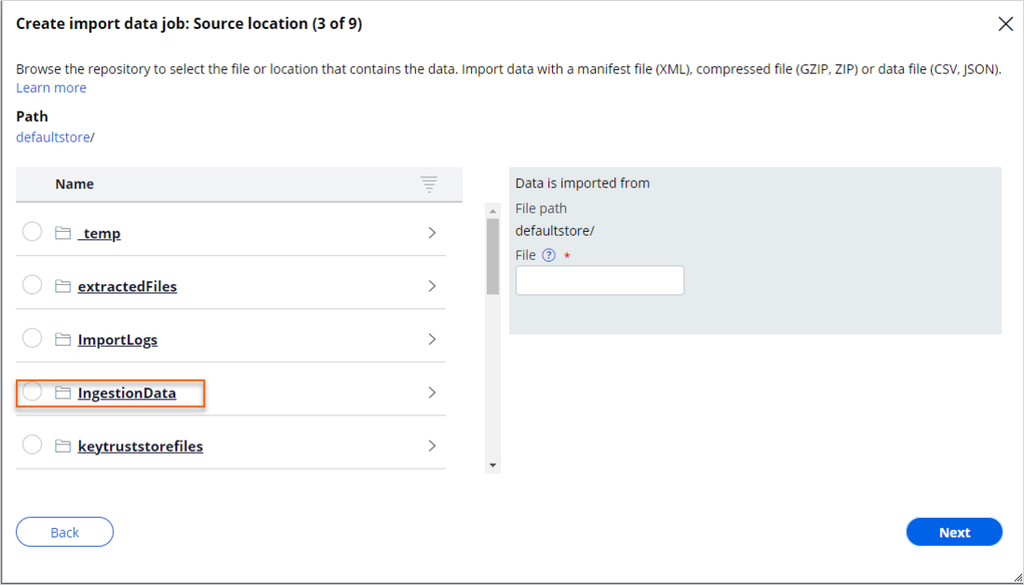
- In the Create import data job: Source location (3 of 9) window, in the IngestionData folder, navigate to the Customer manifest file:
- In the Name column, click the IngestionData folder.
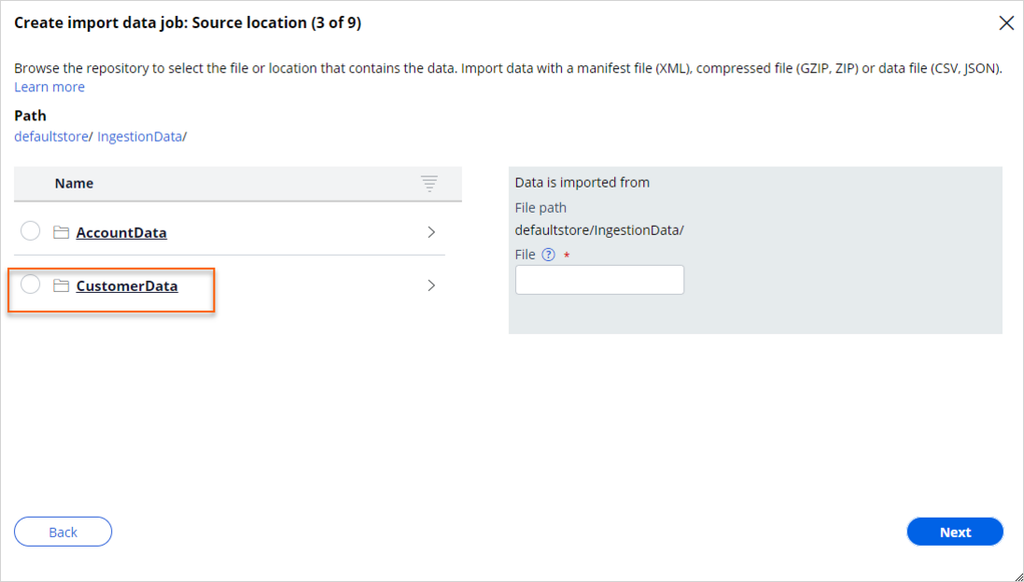
- In the Name column, click the CustomerData folder.
- In the Name column, select CustomerDataIngestManifest.xml.
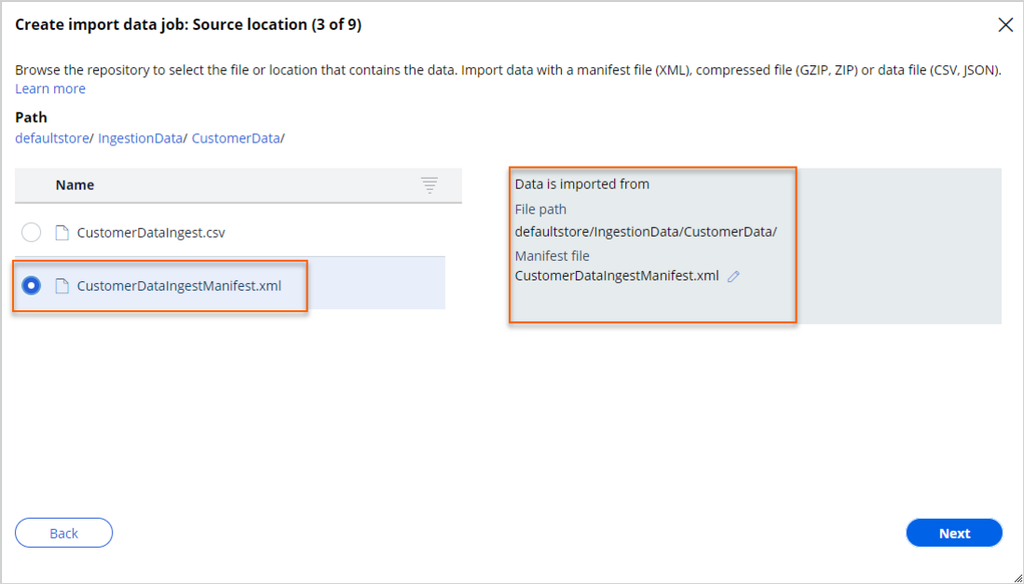
- Click Next.
- In the Name column, click the IngestionData folder.
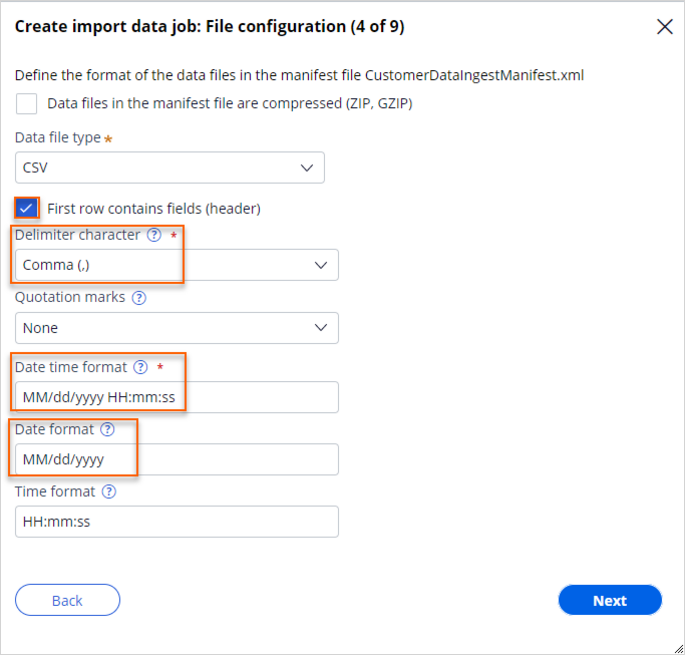
- In the Create import data job: File configuration (4 of 9) window, configure the following settings:
- Select the First row contains fields (header) checkbox.
- In the Delimiter character list, select Comma(,).
- In the Date time format field, enter MM/dd/yyyy HH:mm.
- In the Date format field, enter MM/dd/yyyy.
- Click Next.
- In the Create import data job: File preview (5 of 9) window, confirm the file contents:
- On the Manifest tab, confirm that the manifest file content is valid.
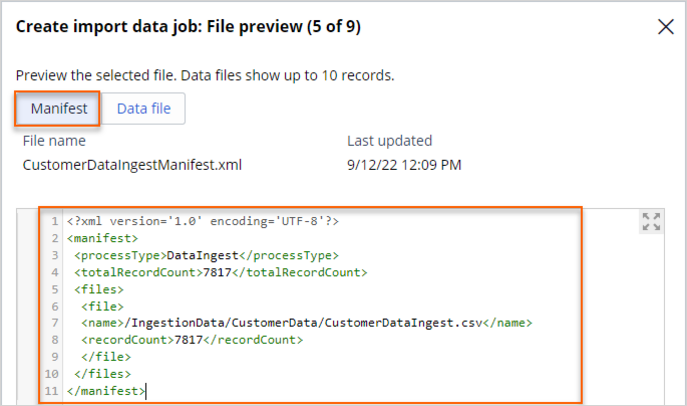
- In the Data file tab, confirm that the data file content is valid.
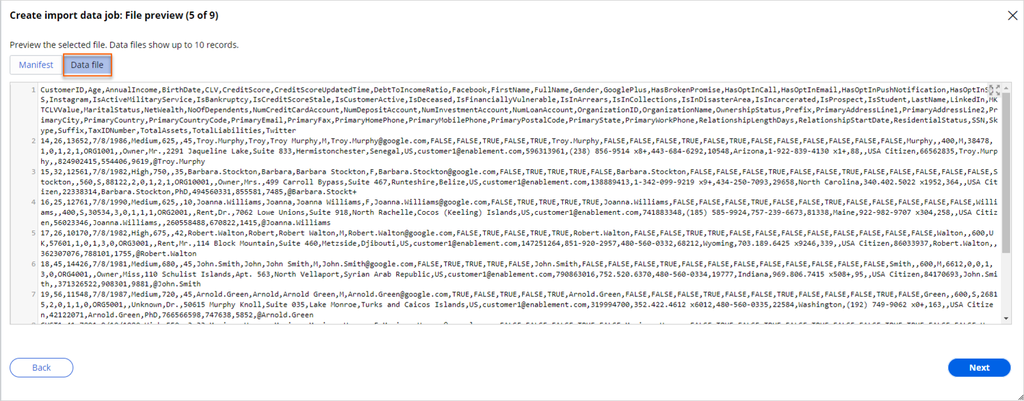
- Click Next.
- On the Manifest tab, confirm that the manifest file content is valid.
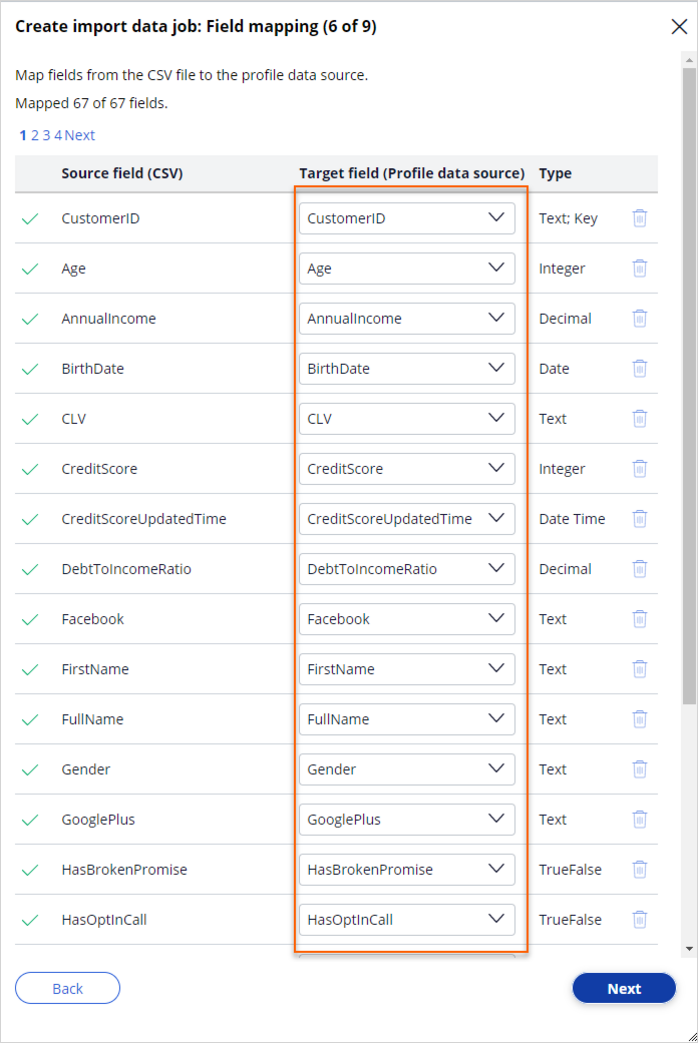
- In the Create import data job: Field mapping (6 of 9) window, confirm that the field mappings are correct, then click Next.
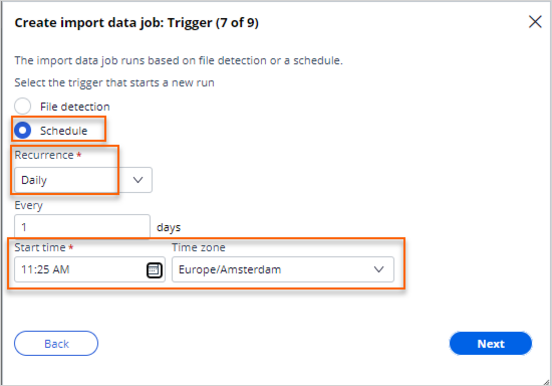
- In the Create import data job: Trigger (7 of 9) window, complete the following settings:
- In the Select the trigger that starts a new run section, select Schedule.
Caution: In a real-life scenario, the trigger that you select depends on the data ingestion requirements. Use the File detection option to trigger the data ingestion process by a token file. File detection is the most used option, as the process initiates only when all files for ingestion are ready for processing. Use the Schedule option only when you know the exact time and guarantee that the system can ingest the file. The system does not process the file if the file is not in the repository at the scheduled time.
- In the Recurrence list, select Daily.
- In the Start time field, enter a time in the near future.
Note: Add five to ten minutes to the current time in your time zone when the process can start.
For example, if the current time is 13:30 PM EST, then set the start time to 13:35 PM EST. - In the Time zone list, select your time zone.
- Click Next.
- In the Select the trigger that starts a new run section, select Schedule.
- In the Create import data job: Failure policy (8 of 9) window, complete the following settings:
- In the Fail a run after more than field, enter 10.
- Click Next.

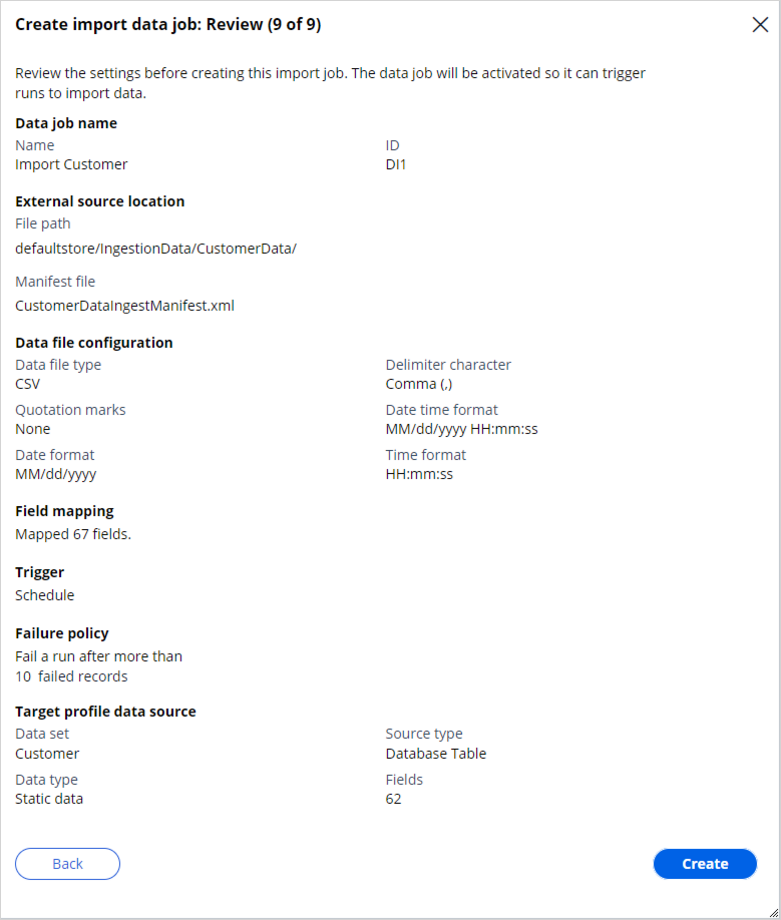
- In the Create import data job: Review (9 of 9) window, review the configuration, then click Create.
- On the Data Jobs landing page, double-click the Import Customer row to see its details.
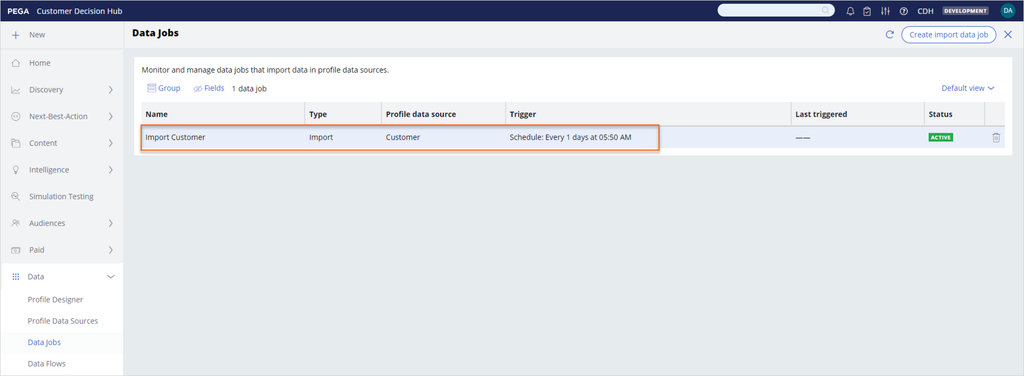
- On the Data Job: Import Customer landing page, in the Runs section, confirm that there are no scheduled jobs..

- Wait for the time that you configured for the schedule, and then, in the upper-right corner, click Refresh.
Note: The time is always displayed in the time zone format (America/New_York) configured in the Localization settings in the OperatorID record.
- On the Data Job: Import Customer landing page, confirm that the system ingests the records.
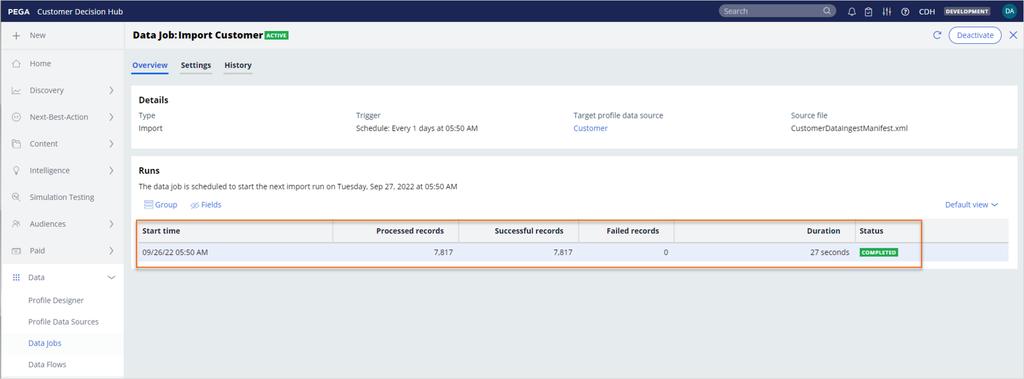
- In the Details section, in the Target profile data source field, click the Customer data source.
- On the Data Set: Customer landing page, click the Records tab to confirm that the system ingests the customer data.
3 Create a new import data job for the account data
- In the navigation pane of Customer Decision Hub, click Data > Data Jobs to create a new data job for ingesting account data.
- On the Data Jobs landing page, in the upper-right corner, click Create import data job.
- In the Create import data job: Name & target (1 of 9) window, select Account, then click Next.
- In the Create import data job: Repository (2 of 9) window, in the Repository list, select defaultstore, and then click Next.
- In the Create import data job: Source location (3 of 9) window, in the IngestionData folder, navigate to the Account manifest file:
- In the Name column, select the IngestionData folder.
- In the Name column, select the AccountData folder.
- In the Name column, select AccountDataIngestManifest.xml.
- Click Next.
- In the Create import data job: File configuration (4 of 9) window, configure the following settings:
- Select the First row contains fields (header) checkbox.
- In the Delimiter character list, select Comma(,).
- In the Date time format field, enter MM/dd/yyyy HH:mm.
- In the Date format field, enter MM/dd/yyyy.
- Click Next.
- In the Create import data job: File preview (5 of 9) window, confirm the file contents:
- In the Manifest tab, confirm that the manifest file content is valid.
- In the Data file tab, confirm that the data file content is valid.
- Click Next.
- In the Create import data job: Field mapping (6 of 9) window, confirm that the field mappings are correct, then click Next.
- In the Create import data job: Trigger (7 of 9) window, complete the following settings:
- In the Select the trigger that starts a new run field, select Schedule.
- In the Recurrence list, select Daily.
- In the Start time field, enter a time in the near future.
Note: Add five minutes to the current time in your time zone.
For example, if the current time is 13:30 PM EST, set the start time to 13:35 PM EST. - In the Time zone list, select the time zone that you are in.
- Click Next.
- In the Create import data job: Failure policy (8 of 9) window, complete the following settings:
- In the Fail a run after more than field, enter 10.
- Click Next.
- In the Create import data job: Review (9 of 9) window, review the configuration, then click Create.
- On the Data Jobs landing page, double click on the Import Account row, to see its details.
- On the Data Job: Import Account page, confirm there are no Runs.
- Wait for the time that you configured for the schedule, and then, in the upper-right corner, click Refresh.
Note: The time is always displayed in the time zone format (America/New_York) configured in the Localization settings in the OperatorID record.
- On the Data Job: Import Account landing page, confirm that the system ingests the records.
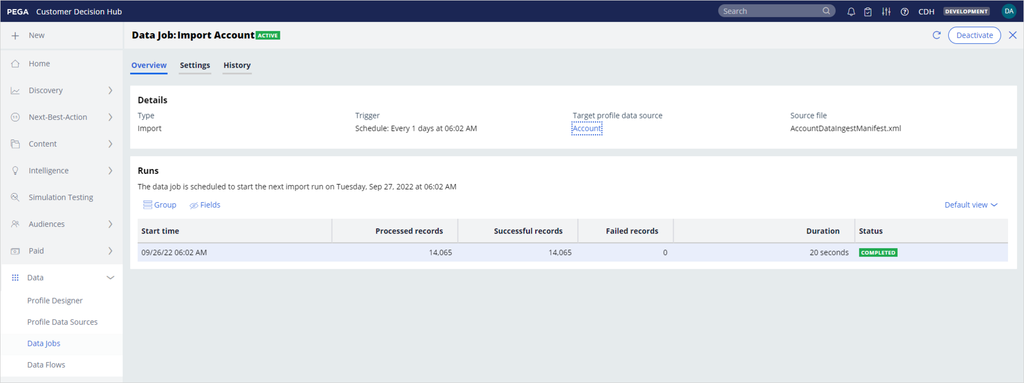
- In the Details section, in the Target profile data source field, click the Account data source.
- On the Data Set: Account landing page, click the Records tab to confirm that the system ingests the account data.
This Challenge is to practice what you learned in the following Module:
Available in the following mission:
If you are having problems with your training, please review the Pega Academy Support FAQs.
Want to help us improve this content?