Data analysis and monitoring through auto-balancing
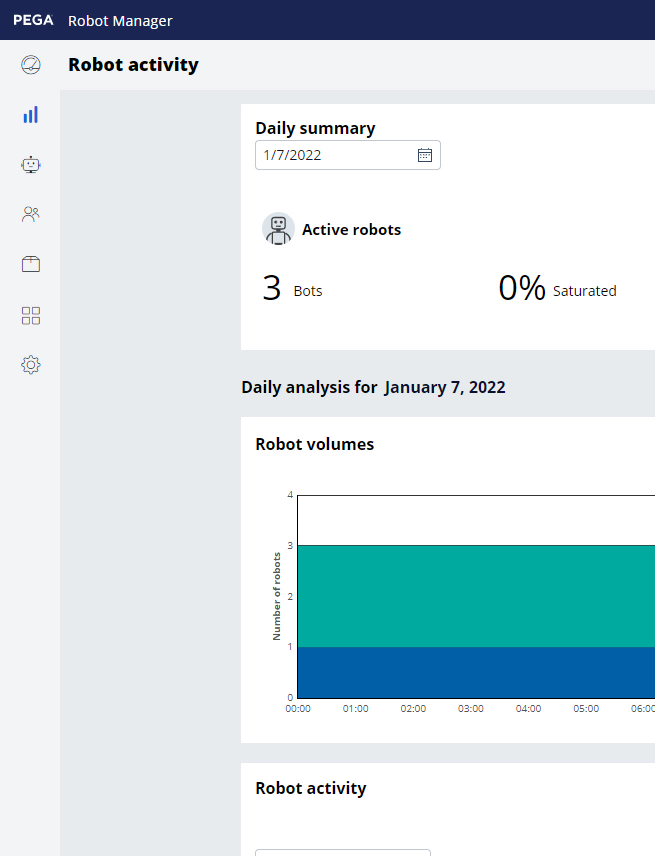
Use the Analysis dashboard in the Analytics tab in Robot Manager to open the Robot Activity page with multiple interactive charts that display performance data and a detailed view of work groups and individual robots in your application. For example, viewing various types of work group and robot data allows you to understand whether the number of assigned robots is sufficient to process the current assignments within the SLA timeline.
The Robot Activity page contains two main sections of reports: Daily Summary and Daily Analysis. You switch between the two views by clicking the and buttons.
In the center of the following image, slide the vertical line to view how to access the Robot and Work group views on the Robot activity page.

Analysis dashboards
Note: The following content, referenced from Pega Community, is included here to help you better achieve the module learning objectives.
Verify and improve the quality of your application by recording a set of interactions for a case type or portal in scenario tests. As a result, you ensure that your application runs correctly and that the end-user experience that you deliver is error-free and works as expected.
Before you begin:
- Create a test ruleset in which to store the scenario test. For more information, see Creating a test ruleset to store test cases.
- Add the pxScenarioTestAutomation privilege to your access role. For more information, see Granting privileges to an access role.
- Set the pzPegaSUT dynamic system setting to true. For more information, see Configuring dynamic system settings.
- Launch the portal in which you want to do the test. For example: In the header of Dev Studio, click Launch portal, and then select the portal in which you want to create a scenario test. Scenario testing works best with portals that you build on UI Kit.
-
In the footer of the portal, click Toggle runtime
toolbar, and then click Toggle Automation
Recorder, as shown in the following figure:
Toggle Automation Recorder icon 
-
In the Scenario tests pane, click Create test
case, and then select the test type:
- To record a test for a portal, select Portal.
- To record a test for a case, select Case type, and then select the type of case for which you want to record the test.Note: When you select the case type, the system creates a new case of that type.
-
Record the steps for the test by clicking the user interface elements.
When you hover over a testable element, an orange highlight box appears. When you click an element, you record an implicit assertion and add the interaction to the list of test steps, as shown in the following figure:
Scenario testing 
- Optional:
To provide specific UI attributes, add an explicit assertion to the test:
- Hover over an element.
- Click the Mark for assertion icon on the orange highlight box.
- In the Expected results section, click Add assertion.
- Define the assertion by completing the Name, Comparator, and Value fields.
- Click Save step.
-
To add latency to a web browser and actions on a web page
to prevent tests from failing during complex processing or slow UI rendering,
delay the processing of a step:
- Click the Mark for assertion icon on the orange highlight box.
- In the Wait field, enter the number of milliseconds by which to delay the processing of the step.
-
Click Save step.
Tip: You can add delays to all steps in all scenario tests in your application at once. For more information, see Delaying scenario test execution.Note: Delaying the processing of a single step takes precedence over delaying all of the steps at the application level.
- When you finish adding steps, in the Test case pane, click Stop and save test case.
-
On the New test case form, save the test:
- In the Name field, enter a name for the test.
- Optional: To provide additional information about the test, in the Description field, enter extra information.
- In the Context section, select a branch or ruleset in which you want to save the test.
- In the Apply to field, enter the name of a class that is relevant to the test.
- Click Save.
This Topic is available in the following Module:
If you are having problems with your training, please review the Pega Academy Support FAQs.
Want to help us improve this content?