Routing based on context data
Intelligent routing rules are used to predetermine the queue for a customer, which allows them to skip queue selection and helps ensure that they are routed to the right pool of CSRs.
You can configure intelligent routing conditions to route customers to a specific queue based on languages, source channels, message types, the connections configured in Digital Messaging Manager, and context data.
In a shopping app, for example, customers are directed to the High Roller queue when their cart value exceeds 100,000 USD by context data routing.
Video
Transcript
This demonstration shows you how to route customers to a specific queue based on context data.
Consider a scenario in which U+ Bank wants to define routing conditions to direct chat conversations to a specific queue, based on the pre-existing general tags and the custom context data tags configured in Digital Messaging Manager. Firstly, the bank wants to route all chat conversations to the Technical queue on escalation if the customer has a joint bank account.
Before you begin, let us recall what context data is.
Context data is metadata attached to each message sent by a customer. Some context data parameters come automatically from the browser or device, but with Web Messaging, the organization can define custom tags about anything on their website and pass name or value pairs as context data. For example, e-commerce organizations can tag and pass the current cart value of the end customer.
If you navigate to the digital messaging interface, you can launch the digital messaging manager.
From the digital messaging manager, look at the configurations for the Retail bank web messaging channel and the context data fields. Observe that the custom tags First Name, Last Name, and Account Type are already configured for the web messaging channel.
Let us now implement U+ Bank's business scenario. Log in to App Studio, and then click Settings > Chat and messaging. In the list of chat and messaging settings, click Routing to configure intelligent routing conditions.
In the Intelligent routing section, click Add routing condition to add a routing condition for the queue.
Now add a routing condition according to the business scenario.
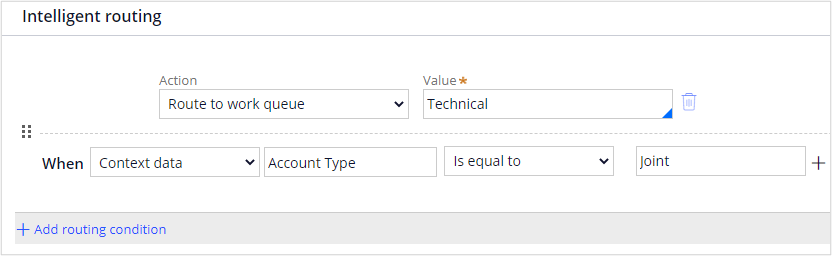
In the Action list, the system displays the Route to work queue as the default selection to route the incoming requests to the work queues. In the Value field, select the Technical queue from the list to route the service requests.
In the When section, select Context data as the routing action. In the Enter context data field, enter Account Type as the value. Select Is equal to as the comparator, and then enter Joint in the box next to the comparator.
In this case, customers will be routed to the Technical queue when their bank account type is equal to Joint.
Save the changes, and then log off.
Now, log in to the Interaction Portal as a Customer Service Representative, and then, in the header, click the Chat icon to make the agent available for all the existing queues.
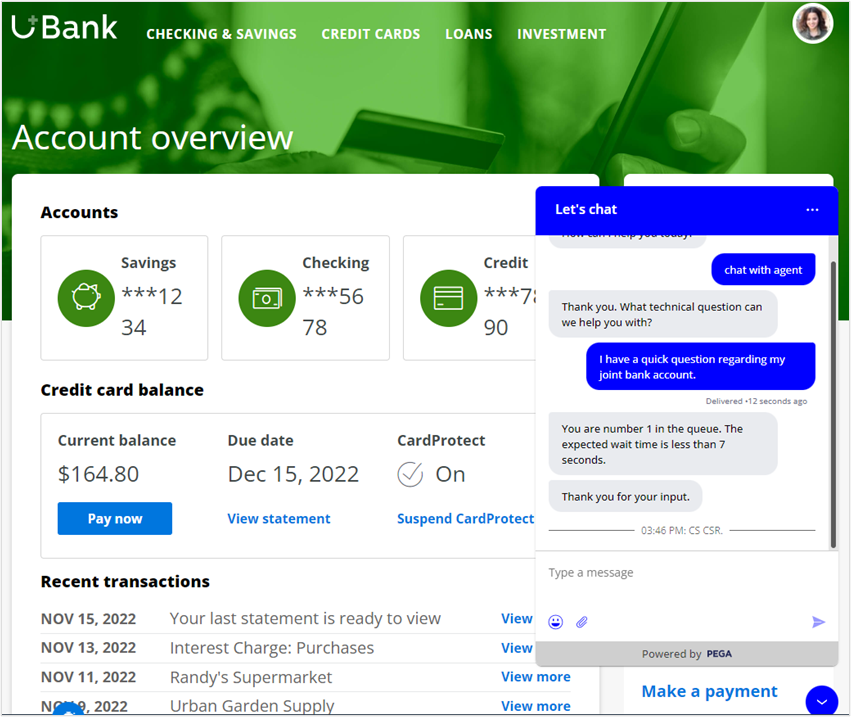
Now, on the U+ Bank website, log in as Sara, who has a joint bank account. Start a conversation by entering chat with agent in the chat window. Observe that the system routes the service request to the Technical queue directly on escalation.
You have reached the end of this demo. What did it show you?
- How to route customers to a specific queue based on context data.
This Topic is available in the following Module:
If you are having problems with your training, please review the Pega Academy Support FAQs.
Want to help us improve this content?