Routing email to queues
Introduction
This video will show you how to create a new email topic and route email to a particular work queue. It will also explain how text analytics is used for NLP (Natural Language Processing) topic detection and entity extraction.
Concept video
Transcript
U+, a telco, recently introduced an email channel for customer interactions. Currently, when customers email the contact center, the emails are routed to a common work queue and are not categorized. A work queue is a container that holds work that is waiting to be assigned to operators.
As a strategy designer, you have been tasked with building intelligent email routing into the system.
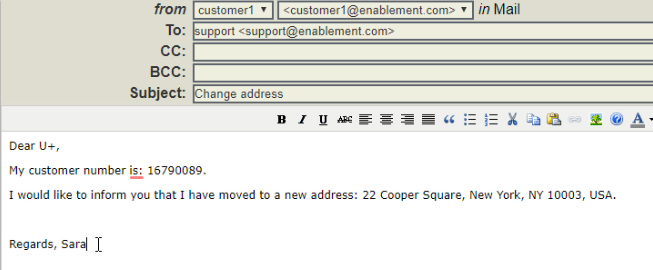
Assume a customer is sending an email to the contact center requesting a change of address.
This is the contact center application. This email generates a case in the contact center application. A case is a work request that is created in the application.
Navigate to the My Workbaskets tab and select Inbound Correspondence. Here you can see that the case is under a common work queue. This is because it is not associated with a topic or case type, and the email routing is not configured.
Click on the case that was created for the address change email.
Notice that the case is uncategorized.

In order to route emails to the right work queues, you need to configure the email channel interface with case types and configure intelligent routing of emails based on associated topics.
In Dev studio, navigate to Applications > Channels and interfaces > Email channel. Now, select the Mysupport email channel. This is the new channel configuration/interface used by U+ that allows incoming emails. This is the email channel interface used by U+.
Test the existing behavior of the email channel. To test the address change email, provide the content of the email and click Test. Note that the topic is undetected, and the associated outcome, the work queue, is InboundCorrespondence.
To configure a new case type, navigate to the Behavior tab. The existing case types are listed under the Suggested Cases section. You can add as many case types as you need. For now, you are only interested in adding the address change case type.
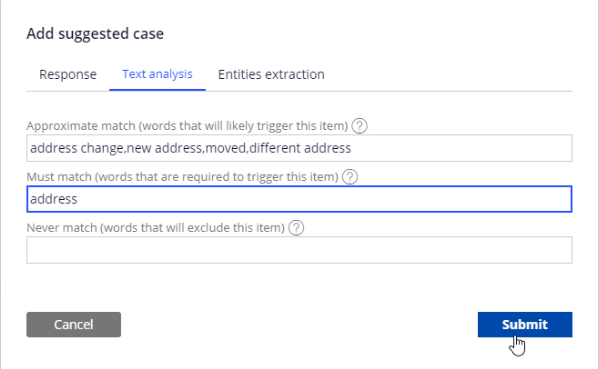
To add a new case type, click on +Add suggested case. In the Add suggested case pop-up window, select Account Address Change as the case type. Then, navigate to the Text analysis tab and enter the values for the approximate match of words that are likely to trigger this case type. For example, you could enter “address change”, “new address”, “moved”, “different address” as approximate match words, and “address” as a must match word. These definitions represent the rules that will be used for topic detection.
You have now configured the new case type, which will associate an address change email with the Account Address Change case.
Next, configure the routing to ensure the emails are sent to the right work queues. Address change emails need to be routed to the Account Maintenance work queue.
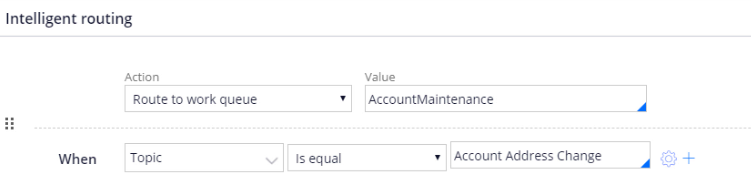
To route an email to a work queue, click on +Add condition. In the new condition configuration area, select the action, Route to a work queue and specify a work queue. In this case, Account Maintenance. Then, add a When condition with the NLP->Topic as Account Address Change. The Topic is the result of the NLP text processing that is executed on the email.
You have completed all the configuration steps. You can now save your configuration and start the test execution. Use the Test window to check your work. Notice that the email is now associated with the Account Address Change topic, and the outcome (the work queue) is AccountMaintenance. You can also see how NLP has identified different entities in the text.

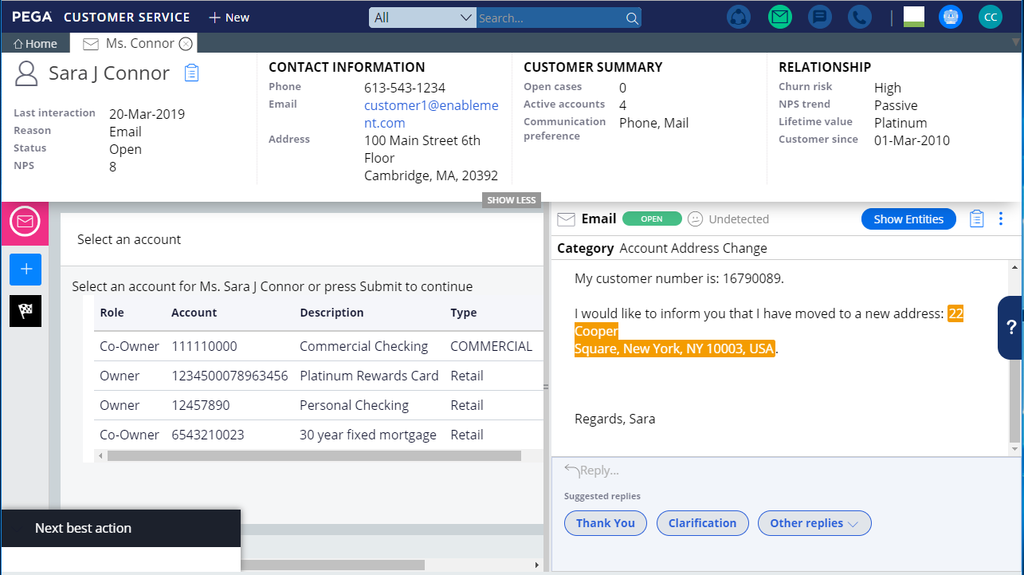
Perform an end-to-end test to ensure the email is categorized correctly in the contact center application. Send the email again with the same content. Verify that the email is now routed to the right work queue, AccountMaintenance. Open the case and verify that the topic has been correctly detected as Account Address Change. Click Show Entities to view the entities identified by NLP.
This video has concluded. What did it show you?
- How to create a case type in an email channel
- How to route an email to a desired work queue
- How text analytics is used for NLP-based topic detection and entity extraction