Using wait logic
Using wait logic
Sometimes, business users might come across a use case such as waiting for a specific application to start or some information to be displayed. Pega Robot Studio™ provides a logic that causes an automation to wait or pause until certain objects such as screens, forms, or applications appear on the desktop.
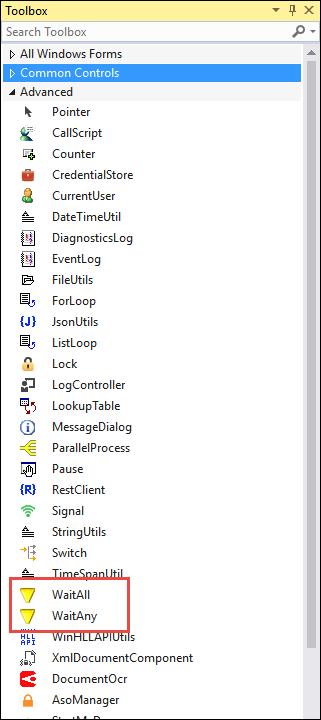
Pega Robot Studio contains two wait components: WaitAll and WaitAny. The components are accessible from the Advanced tab of the Toolbox. Both the WaitAll and WaitAny components have a TimeOut parameter that specifies the amount of time the Wait component allows to elapse for creation of input components. If the input components do not appear within the specified time, the Timeout event is triggered.
WaitAll
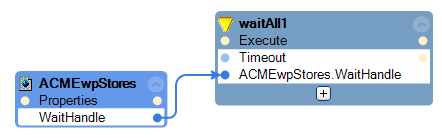
The WaitAll component triggers an event only if all the objects specified in a group are created. If the components are not created within the interval specified in the Timeout property, the WaitAll component triggers the Timeout event.
To add the WaitAll component solution, open the Toolbox window, search for WaitAll, and then click and drag the WaitAll component to your solution. To connect each object to the WaitAll component, select each object in the Object Explorer and then add the WaitHandle property to the solution. Connect the blue data port from the WaitHandle property and connect the port to the WaitAll component.
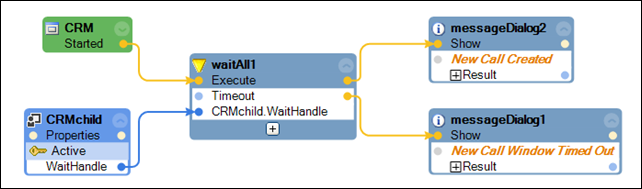
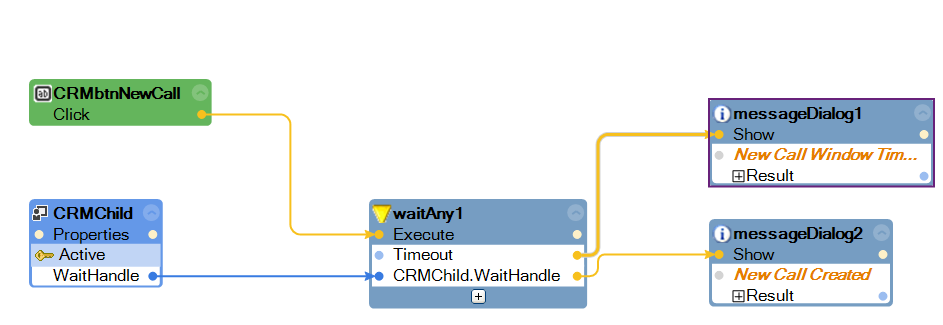
In the following example, the automation waits for the creation of all CRMChild windows. If any of the windows are not created before the time-out period, the automation displays a New Call Window Timedout message. If all windows are created within the time-out period, the automation displays a New Call Created message.
WaitAny
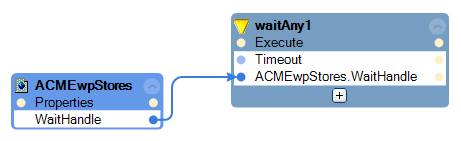
The WaitAny component triggers an event when any one object in a group is created. If an object is not created within the Timeout property value, the WaitAny component triggers the Timeout event.
To add the WaitAny component solution, open the Toolbox window, search for WaitAny, and then click and drag the WaitAny component to your solution. To connect each object to the WaitAny component, select each object in the Object Explorer and then add the WaitHandle property to the solution. Connect the blue data port from the WaitHandle property and connect the port to the WaitAny component.
In the following example, the automation waits for the creation of any CRMChild windows. If no windows are created before the time-out period, the automation displays a New Call Window Timedout message. If any of the windows are created within the time-out period, the automation displays a New Call Created message.
WaitForEvent
Pega Robot Studio provides an additional function WaitForEvent to implement wait logic in the automation workflow.
When the execution control reaches a WaitForEvent design block, it triggers the logic of the Setup event. Completion of the Setup event logic triggers the Fired event to proceed with the downstream logic. If the Setup event fails to complete within the time-out period, the time-out event is triggered.
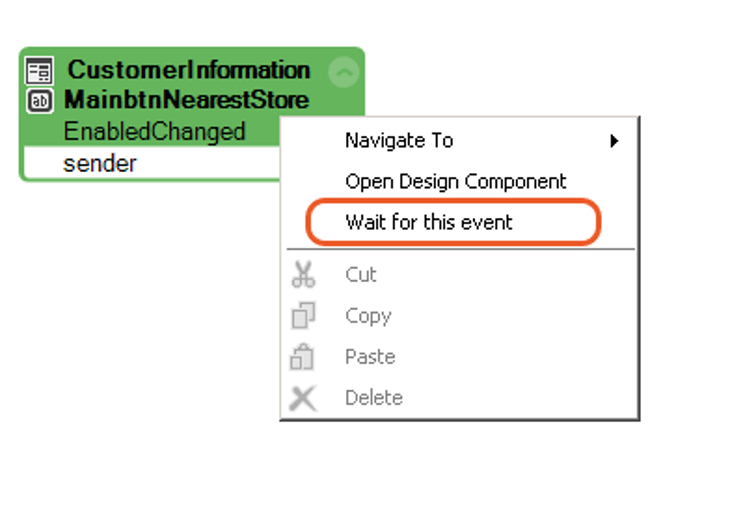
To add the WaitForEvent function on an event, right-click the event and select the Wait for this event option.
In the following example, when the execution control reaches WaitForEvent method, the Setup event is triggered to execute the PerformClick method. If the PerformClick method executes successfully within the period specified in the Timeout property, the Fired event is triggered to run the Execute method of ACME_P_GetNearestStore. If the execution of the PerformClick method is unsuccessful within the specified period, the Timeout event is triggered.

WaitForCreate
The WaitForCreate method applies to an adapter or a control. It enables the automation to wait for the creation of the selected control before triggering a Result event. The Result event can be connected to a downstream logic of the automation.
There are two forms of the method: one with a parameter and one without, as shown in these design blocks.
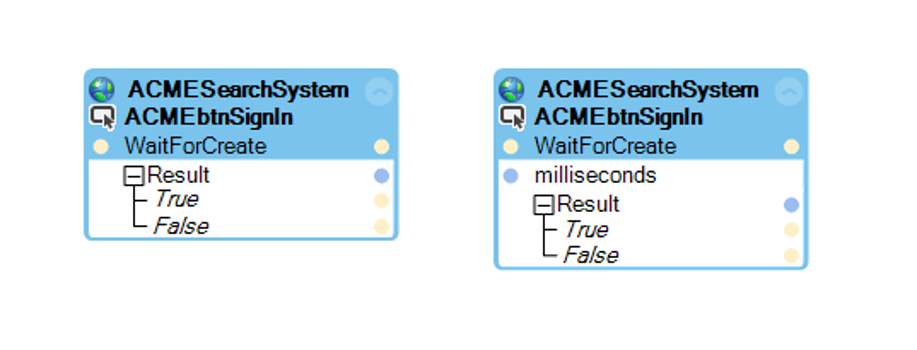
The method without a parameter waits the time specified by the control's Timeout property (default of 30000 milliseconds) for evaluating the matched status of the control. The method with one parameter lets you specify the amount of time, in milliseconds, to wait before triggering the Result event.
This Topic is available in the following Module:
If you are having problems with your training, please review the Pega Academy Support FAQs.
Want to help us improve this content?