Configuring a decision table
Configuring a decision table
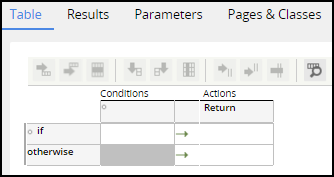
Create a decision table to derive a value that has one of a few possible results, where a comparison condition can detect each result. A decision table lists two or more rows, each containing one or more conditions and a result.
Follow these steps to create and configure a decision table for automating a decision:
- Open the Application Explorer.
- Select the class in which you want to create the decision table.
- Right-click and select Create > Decision > Decision Table. The New Record form opens.
- In the Label field, enter a name that describes the purpose of the table.
- Click Create and open. The decision table rule form opens.
- On the table under Conditions, click the empty header cell. The Decision Table property chooser dialog opens.
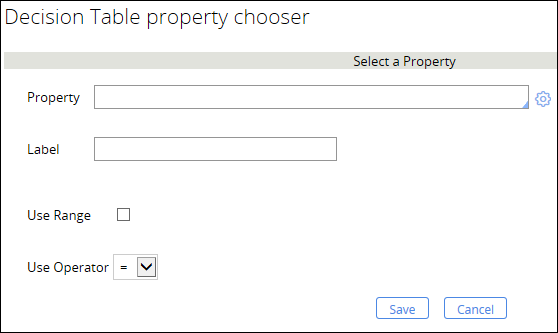
- In the Property field, enter or select a property. You can alternately click the gear icon to build an expression.
- In the Label field, enter the name of the property that you entered in the column header.
- In the Use Operator drop-down, select a comparison operator.
The following example shows a completed dialog.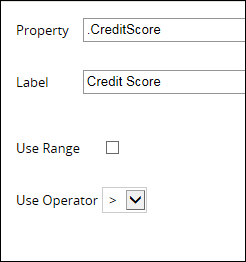
- Click Save. The Decision Table property chooser dialog closes, returning you to the decision table rule form.

- If you want to add another condition property, add a column to the right of the first column by selecting the add column icon on the control header.

- Add a second property to the new column.
- In the if row, click the empty cell under the first property and enter a value.
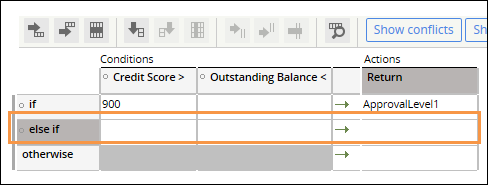
- In the Return column, enter a return result. The following image shows the first condition set.
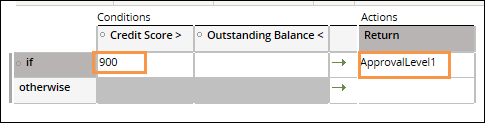 Note: If you are using two or more conditions, you must enter at least one condition in the row. In the previous example, only the Credit Score condition must be true in order to return Approval Level 1. The Outstanding Balance value does not affect the decision.
 - If you want to add conditions, select the add row icon on the control.
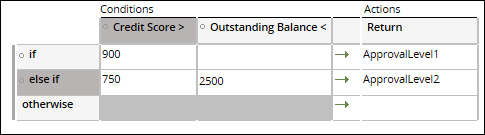
- Enter values in the first and second columns and a return value. In this example, values for Credit Score and Outstanding Balance are entered.
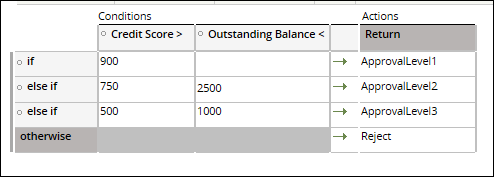
- Enter another row and return action. Repeat this process until you add all the rows required to create the decision table.
- Add a return value to the otherwise row.
- Click Save.