Configuring a decision tree
Configuring a decision tree
Create a decision tree to use if...then...else decision logic that calculates a value from a set of test conditions organized as a tree structure.
Follow these steps to create and configure a decision tree for automating a decision:
- Create the decision tree.
- Add a condition and result.
- Optionally, nest the conditions
Create the decision tree
- Open the Application Explorer.
- Select the class in which you want to create the decision tree.
- Right-click and select Create > Decision > Decision Tree. The New Record form opens.
- In the Label field, enter a name that describes the purpose of the tree.
-
Click Create and open. The decision tree rule form opens.
Add a condition and the result
-
On the form, select the branch to display the columns.

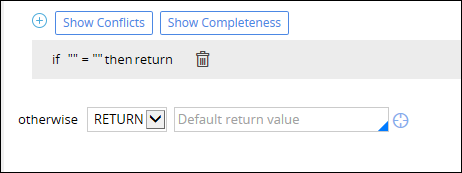
- In the first field, enter a property or a literal value.
- In the drop-down to the right of the field, select a comparison operator.
- In the next field, enter a property or literal value used in the comparison.
- In the then drop-down, select the action you want the system to perform when the condition evaluates to true. To return a result when the condition evaluates to true, select return.
- In the field to the right of the then drop-down, enter a property or value result that you want the system to return. The following shows a completed condition.

When you click out of the branch, the condition is displayed on the form.

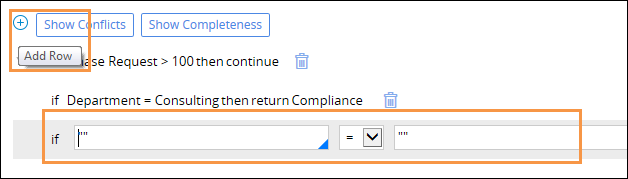
Nest the conditions
- When you create a condition, in the then drop-down, select continue to create a nested branch. The return field to the right of the drop-down is removed. An indented condition branch is displayed under the first row.

- Select the second branch to display the columns.
-
Specify a condition and result in this branch. The following condition is an example of an indented branch.

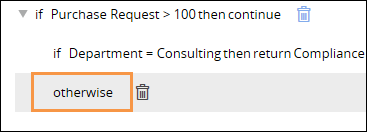
- To add an otherwise condition to the indented branch, select the Plus icon.
-
In the second branch, select otherwisein the then drop-down. The system changes the branch to otherwise.
-
Select the otherwise row to display the result field and to enter a value.
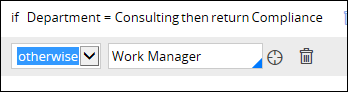
-
Enter a value in the otherwise field at the bottom of the table. This is the result when neither of the nested conditions evaluate to true. The following image provides an example of a completed decision tree.

- Click Save.