
Creating internal email treatments
You can send offer emails to qualified customers in an always-on outbound environment using email treatments. An email treatment helps to design a visually appealing email message for customers.
Video
Transcript
This demo shows you how to create an email treatment to present offer details in an email.
U+, a retail bank, wants to promote their Rewards credit card via email. They want to send the email to qualified customers in an always-on outbound environment.
The email is personalized and contains the offer details and a call to action. When customers click the APPLY TODAY call to action in the email, they are directed to the credit cards page on the bank’s website to learn more about the offer and apply for it if interested.
This is Pega Customer Decision Hub™ portal. To send emails in an always-on outbound environment, you need to add an email treatment to every action that you want to promote through email. An email treatment contains the message that you want to communicate to customers.
In this case, you create and add an email treatment to the Rewards card. Open the Rewards card to add new treatments to the action.
You can manage treatments associated with an action on the Treatments tab. To associate a treatment with an action, click Add channel.
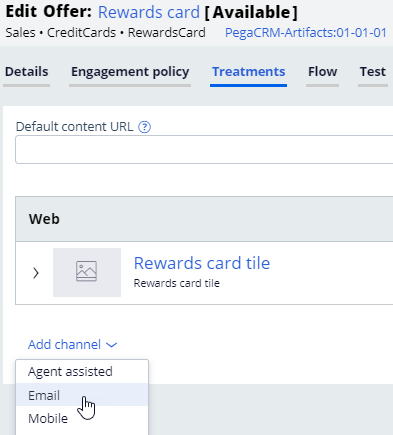
You can use an existing email treatment or create a new one. In this case, you want to create a new treatment.
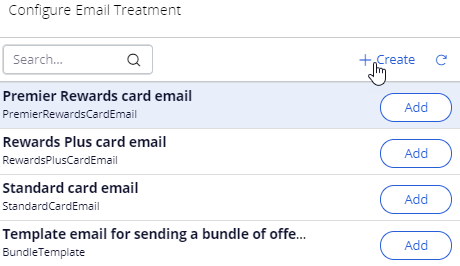
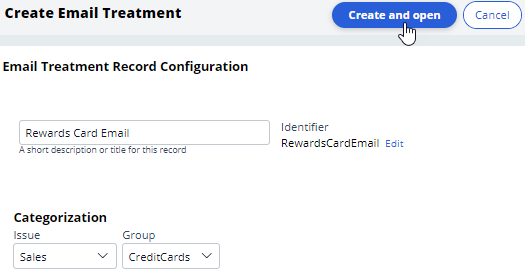
Now, enter an appropriate short description to create the new treatment. It is a best practice to create the treatment in the same issue/group hierarchy in which you plan to use it; this will make the treatment easier to access and manage.
Then, enter the email content.
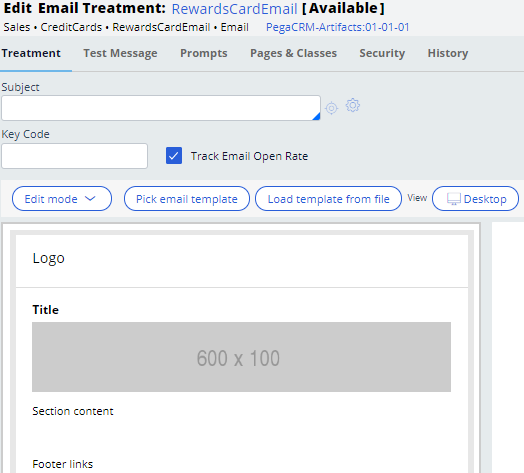
First, enter the email subject. You can include both static text and dynamic placeholders in the subject.
To access dynamic placeholders, start typing dot followed by Customer to access customer properties or OfferData to access action properties.
Dynamic placeholders allow you to personalize the subject. You can construct the placeholders with both customer and offer attribute properties.
At runtime, the properties are replaced with the real values. For example, if the customer’s first name is Stephen, the generated subject line reads: Hi Stephen, here’s your U+ Bank card.
Then, enter an appropriate keycode. When the Track Email Open Rate option is enabled, the system records an impression when a customer opens an email.
You can design the email using one of the three edit modes: Simple Rich Text Editor, Source Only, and Templated Email.
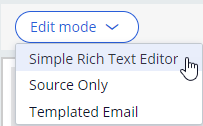
The Simple Rich Text Editor provides a blank page with a rich text editor, which allows you to compose an email manually.
The Source Only mode allows you to work with HTML content only. If the content is designed in an external tool, you can copy and paste the HTML content in this mode.
The Templated Email mode provides you with several easy-to-use templates for designing appealing emails; this is also the default mode.
These are the available template options.
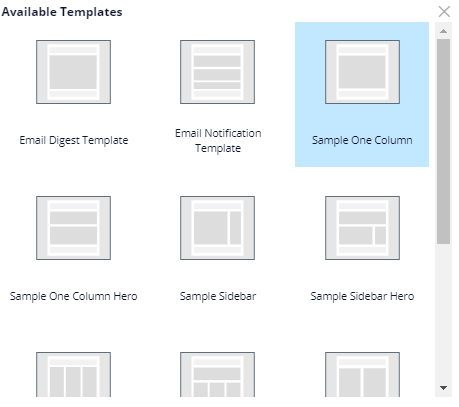
In this case, you use the default Simple One Column template.
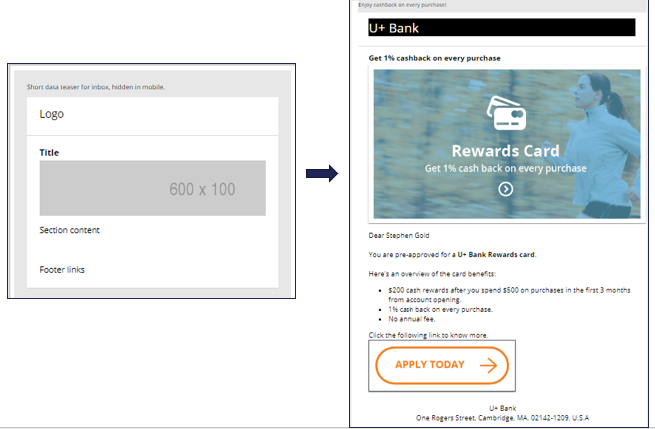
The Simple One Column template contains four sections: Preheader, Header, Body, and Footer.
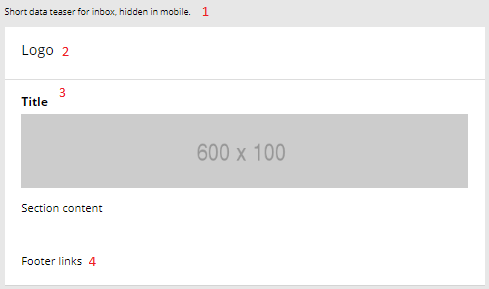
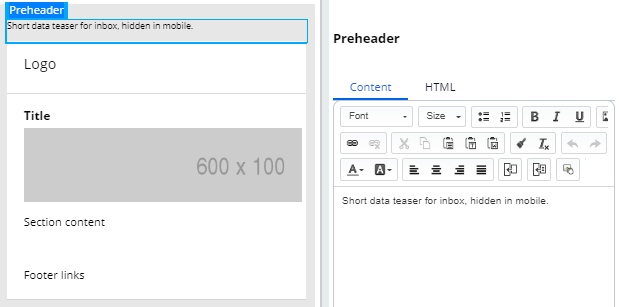
The Preheader section can contain a short data teaser for inbox that is intended to persuade customers to read the email further. This text is hidden on a mobile device.
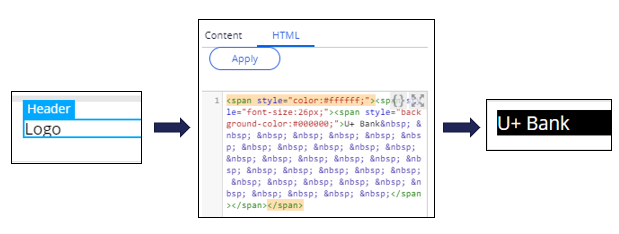
The Header section can contain the organization’s logo.
The Body section contains a placeholder for a title, image, text, or buttons as required. This section is where the main content goes.
The Footer section can contain contact details or links, if any.
When you click on the different placeholders or sections in the template, an editing pane is displayed on the right side of the screen.
This editor also allows you to copy and paste HTML content from other tools using the HTML tab.
For example, here is how you can create an HTML version of the U+ Bank logo by using HTML code.
While composing the section, you can see the preview on the left.
You can also add a title to the email.
To add an image, you can open the image placeholder, which opens the Image Properties.
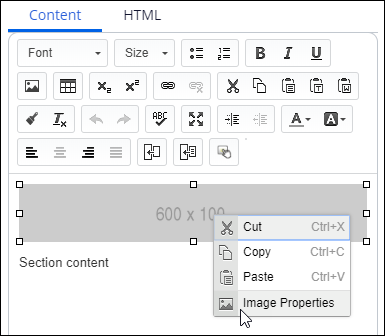
In the Image Properties, you can reference an image from a content server.
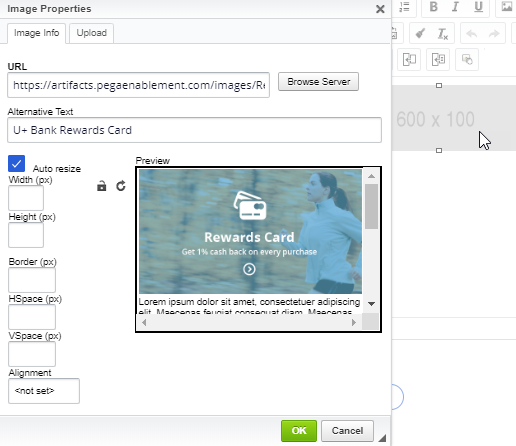
It is best practice to host an image on an external server and reference it in the email. Do not embed images directly in the email, as it makes the email bulky.
In the email content, you can add static content and dynamic placeholders to personalize the message.
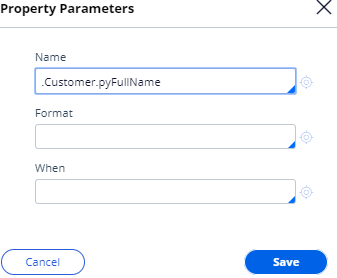
For example, the property .Customer.pyFirstName can be added as a placeholder. The customer’s real first name will replace the placeholder at the time of email delivery.

To add a customer or offer attribute as a dynamic placeholder, use the Insert Property button.
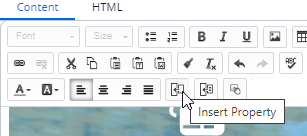
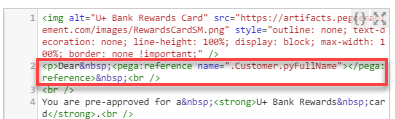
Any property that you add in an email treatment has an equivalent Pega markup tag (pega:reference) to reference customer or offer attributes. After you insert the property, you can view the tag (which is automatically added) in the HTML tab. When you design the email in an external application, you can use these tags to add dynamic placeholders, so the personalization works when you import the HTML into the email treatment.
Note that to add an offer attribute, you can add a dynamic placeholder, which is then replaced with the offer attribute at the time of email delivery. For example, you can use <<.OfferData.pyLabel>> to reference the offer attribute.
In this case, you may want to replace U+ Bank card names with an offer attribute by using the <<.OfferData.pyLabel>> placeholder.
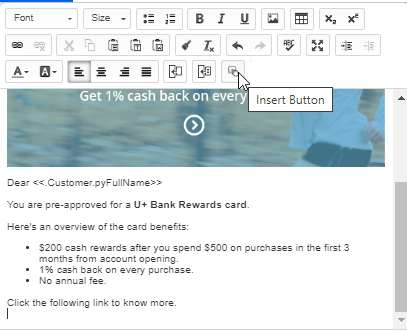
You can also add links or buttons that the customer can click to respond to an offer or view more details. In this case, you add an APPLY TODAY call to action button.
In the Button Parameters, the Function drop-down menu lists the possible functions that you can assign to a button.
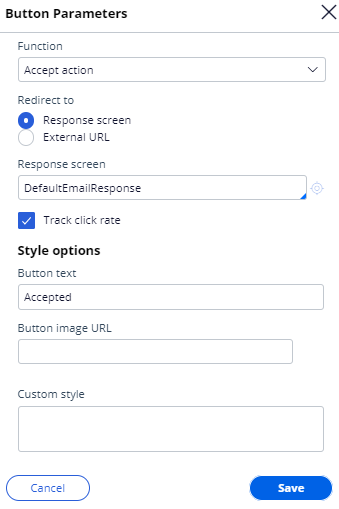
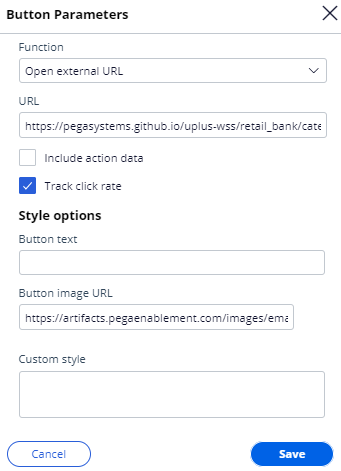
Now, select Open external URL and provide an external URL that opens when the customer clicks the button. Then, provide the button image URL.
A composed email looks like this.
Now, save the treatment and add it to the Rewards card action.
You can send the email to test accounts or to yourself to test the visualization and rendering of the content on various email clients.
To test the treatment, switch to the Test Message tab. In this tab, you can specify the target email addresses and the email subject specifically for the test.
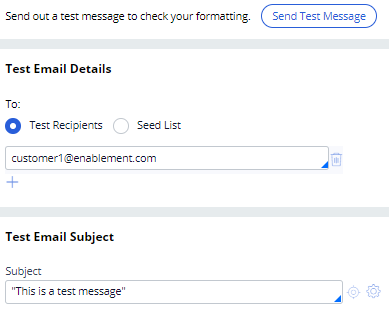
To test the treatment, click Send Test Message. Once the test is complete, you can check the emails in the email client.
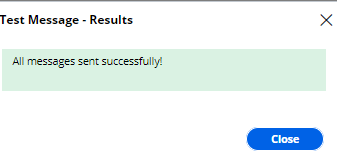
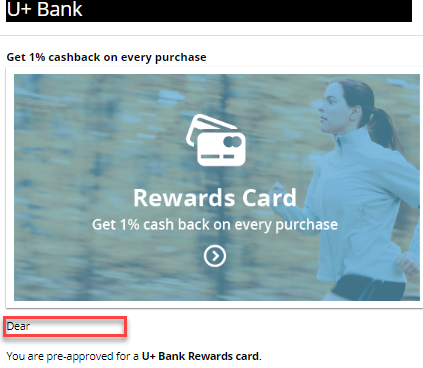
Note that none of the attribute placeholders are populated when you manually enter the recipients’ email address. However, you can test the functionality of the buttons and links.
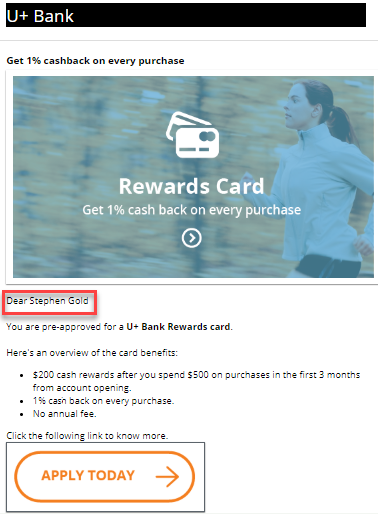
To populate the attribute placeholders, you can use a seed list as test input.

A seed list contains test customer data. It contains values for customer attributes, including email addresses.
When using a seed list to test the Treatment, the dynamic placeholders are replaced with customer information from the seed list.
Note that the customer name placeholder is replaced with the data from the seed list.
This demo has concluded. What did it show you?
- How to add an email treatment to an action
- How to use dynamic placeholders to populate the customer and offer attributes in an email treatment
- How to use HTML code to generate content in an email treatment
- How to use an image from an external server in an email treatment
- How to add a button to an email treatment
- How to send emails to test accounts to test the visualization and rendering of the email content
- How to use seed lists to test the dynamic placeholders
This Topic is available in the following Module:
If you are having problems with your training, please review the Pega Academy Support FAQs.
Want to help us improve this content?