Modifying the properties of an object
Modifying the properties of an object
The following steps outline how to modify an object's default properties before the object is used in a project.
- In the Object Hierarchy, click the object to select.
- In the Properties window, scroll to find the property requiring editing. You cannot change property values in gray.
- Click File > Save.
If a property contains a Boolean value, True/False, double-click the value to change it.
Sometimes a property value requires more modification. If this is the case, you see an ellipses button. Click the ellipses button to display the property editor window.
Establishing a standardized naming convention for controls and components is important and a Pega Robot Studio™ recommended practice. Whether you are building an automation, debugging a solution, or troubleshooting match rules, renaming the controls to something descriptive of their function makes it easier to identify the controls to complete the task.
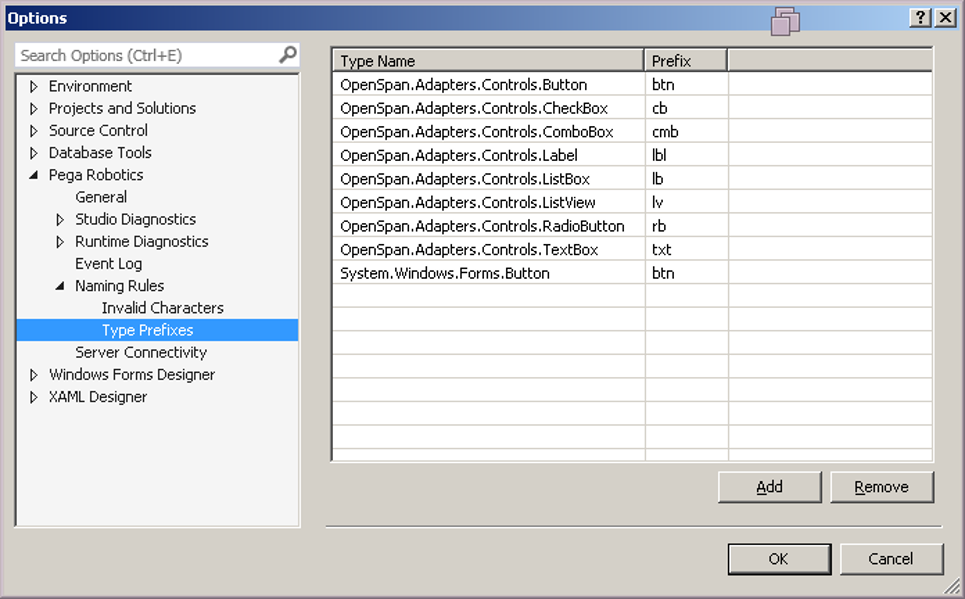
To rename controls, Pega Robot Studio follows the standard object prefixes from Microsoft Visual Studio, as shown in the following image.
Unless the project documentation states differently, use the following conventions when naming controls, :
- Object type prefix + Name of object
- The object prefix is in lower case
- Capitalized each word of the object's name.
For example, btnSignIn and txtFirstName.
This Topic is available in the following Module:
- Adapters v1
If you are having problems with your training, please review the Pega Academy Support FAQs.
Want to help us improve this content?
