
Dismissing a Citrix logon window automatically
Required information for window dismissal
Before you can set up dismissing a logon window, you must first identify the following information about the window:
| Property | Description |
|---|---|
| Class Name | The class name for the window. |
| Window Title | The name of the window as displayed by Windows. |
| X Position | The x-coordinate, relative to the application window, of a pixel inside the button to be clicked in the window to be dismissed. |
| Y Position | The y-coordinate, relative to the application window, of a pixel inside the button to be clicked in the window to be dismissed. |
There are several ways to retrieve this information, such as Spy++, or you can use Robot Studio to gather this information. The process that follows uses Robot Studio and Paint to locate the needed information.
Identifying the window to be dismissed
To identify the necessary information using Robot Studio, follow these steps:
- In Solution Explore, right-click on the project and choose Add > New Windows Application.
- On the Add New Item Window, enter a temporary name for the application. Click .
Note: This adapter will be deleted, so the specific name is not important
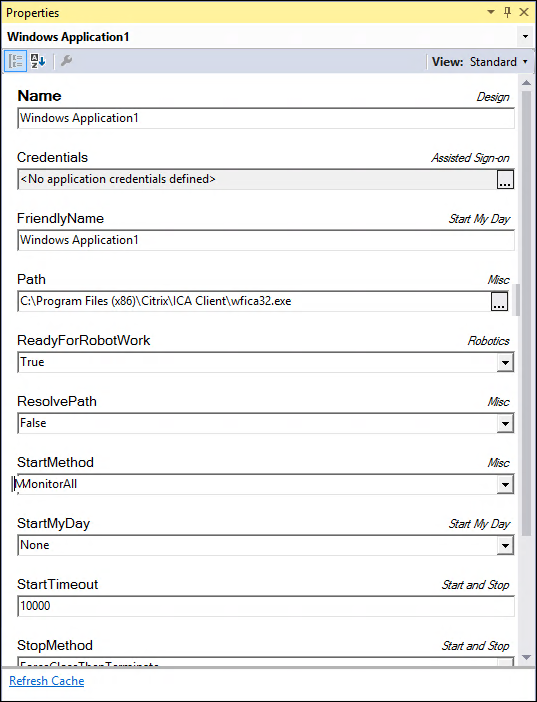
- In the properties window for the adapter you just added, set the ResolvePath property to false.
- In the Path property, enter the name of the executable for the ICA receiver. This is likely wfica32.exe.
- In the StartMethod property, select MonitorAll.
- Save the project. Click on the button.

- Log-in to your Citrix access point and launch the published PegaRuntime application.
- When the window to be dismissed appears, click the Bullseye icon to interrogate the window.
- Click on the displayed window. Robot Studio will interrogate the Windows form.

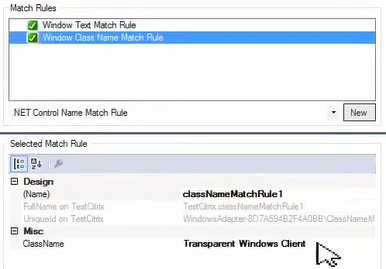
- Using the Window Text Match Rule and the Window Class Name Match Rule found in the match rules frame of the adapter design window, note the text of the window and the window class name.
Note: Save this information outside robot studio as it will be needed to dismiss the window
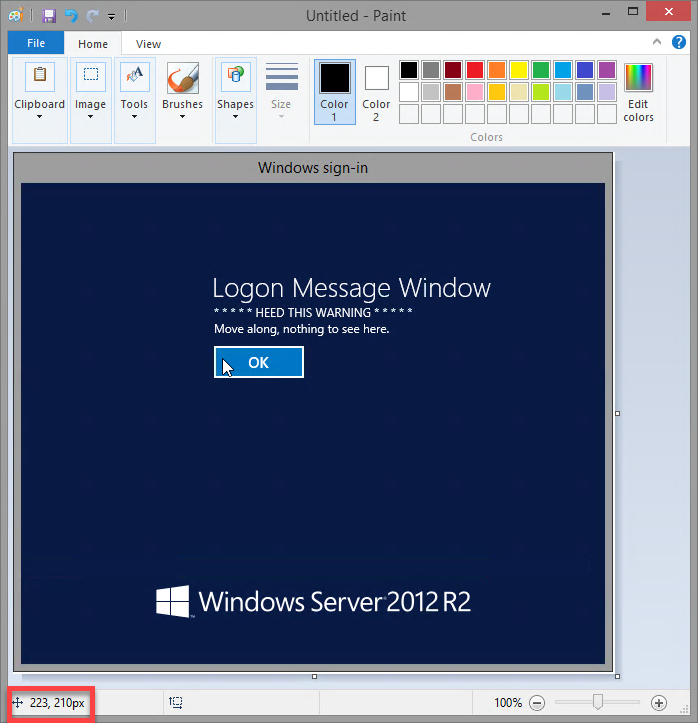
- Take a screenshot of the application window you wish to dismiss.
- Open the screenshot in Paint or a tool like Snagit and hover your cursor over the button that needs be clicked.
Note: The (x,y) coordinates are in the same place you saved the window title and window class name.
The following image is from Paint.
- In Robot Studio, stop the interrogation by clicking on the Bullseye icon again.
- In Solution Explorer, right click on the temporary Windows adapter you previously added. Select Delete. This adapter is no longer needed for your project.
- Click to confirm the deletion.
Dismissing a Windows Logon form
Once you have identified the window class name, window title, and the (x,y) coordinates inside the OO button, follow these steps to configure Citrix context to automatically dismiss a logon window.
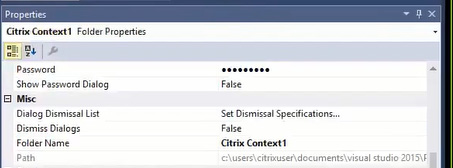
- In Solution Explorer, click on the Citrix Context project item.
- In the Properties window, in the section, click the Dialog Dismissal List property, and then click on the More icon.
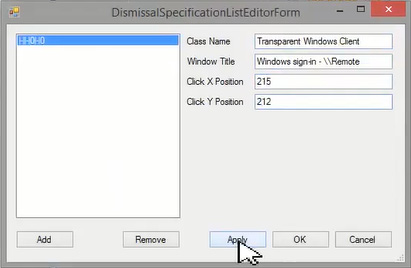
- On the DismissalSpecificationListEditorForm window, enter the information that you previously gathered:
- Class Name – The class name for the window.
- Window Title – The name of the window.
- Click X Position – The x coordinate when the mouse was over the OK button.
- Click Y Position – The y coordinate when the mouse was over the OK button.
- Click
- Click
- In the Properties toolbar, in the section, set the value of the Dismiss Dialog property to true.
- Save the solution and create the deployment package.
- Copy both the
.manifestand.openspanfiles to the Citrix server. - In Robot Studio, run the solution to test the result.
Note: Testing of the solution is dependent on the Citrix environment being configured properly for mixed-mode solution development.
This Topic is available in the following Module:
If you are having problems with your training, please review the Pega Academy Support FAQs.
Want to help us improve this content?