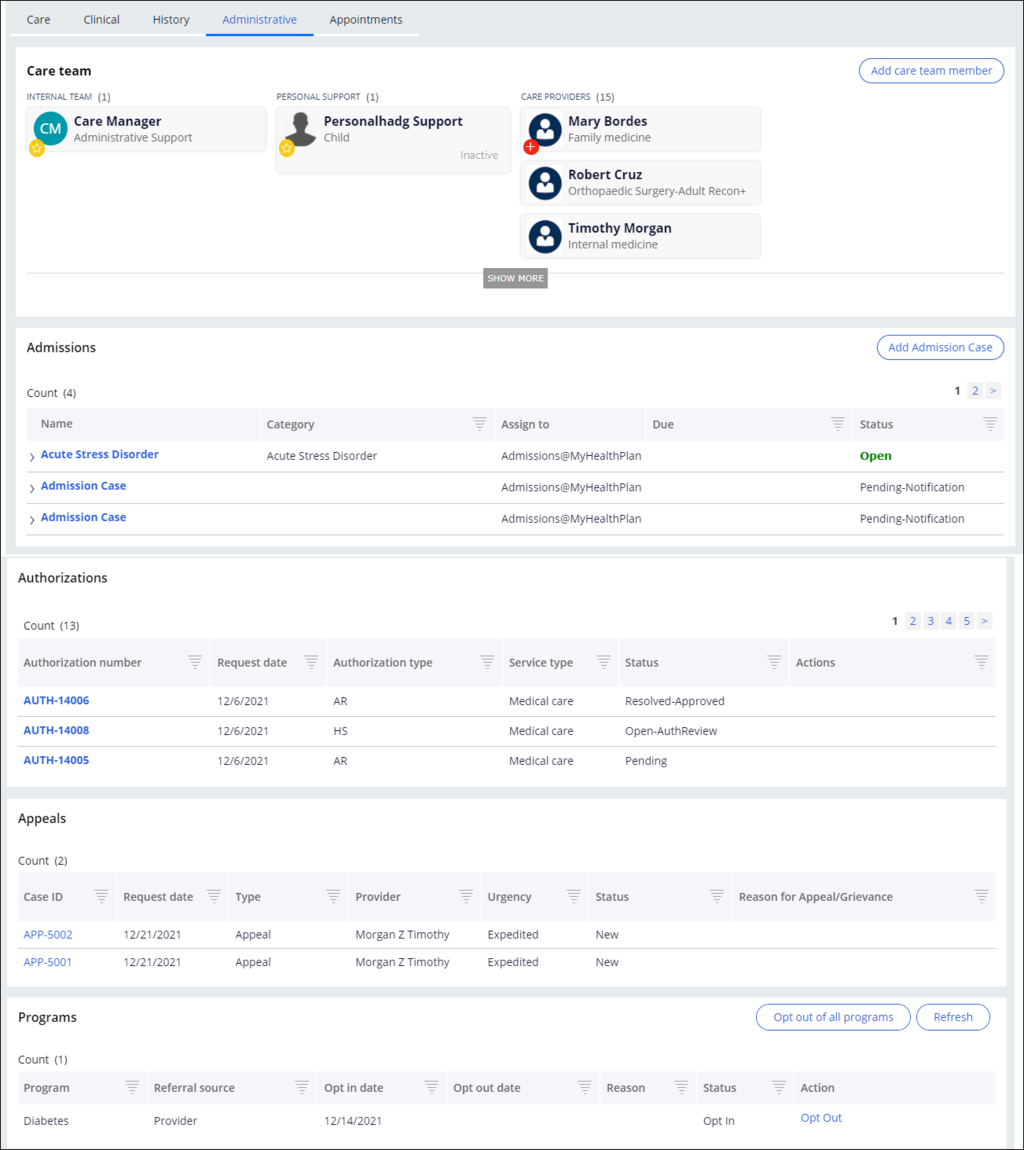
Patient 360 Administrative tab
In Patient 360, the Administrative tab provides access to manage multiple types of cases for patients and information about the cases, as shown in the following figure:
For more information about the rules for editing or configuring any of the sections on the Administrative tab, see the Configuration and details for the Administrative tab.
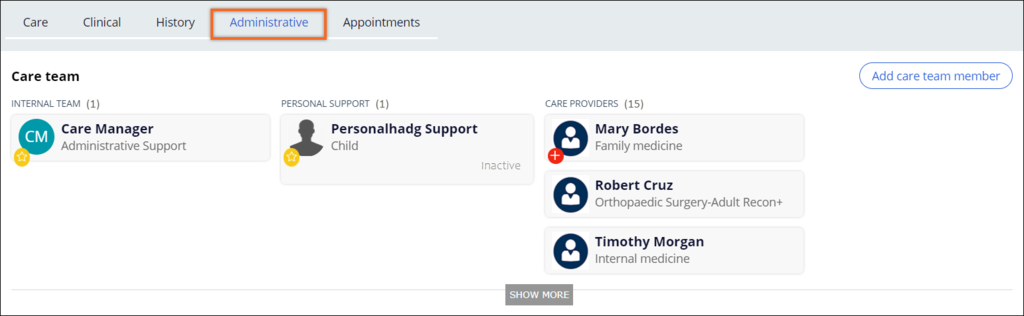
Care team section
The Care team section displays care team details and contains three labels, as shown in the following figure: Internal Team, Personal Support, and Care Provider. Each category has a primary contact, for example, the Care Provider category indicates the primary care physician (PCP).
Each section displays the care team members who are associated with the category. By default, up to three care team members for each category are displayed, but you can view all team members at once by clicking . You can also add a care team member by clicking in the upper-right corner of the tab.
The data class for the care team contacts is PegaHCCMF-Data-Party-Contact. The data model for the care team is maintained through this class.
As shown in the following figure, clicking on a care team member slot displays a pop-up with additional information and functionality.
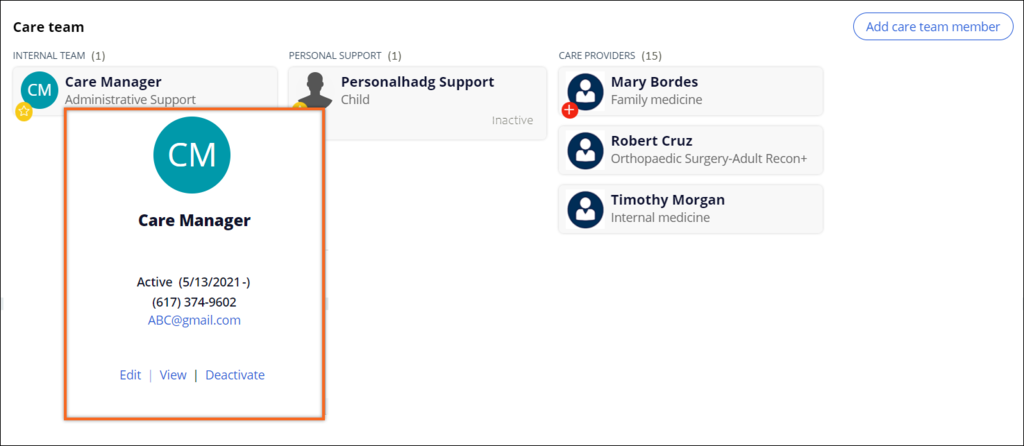
The Activate option is displayed if the care team patient is in a deactivated state and the Deactivate option is displayed when the care team patient is in an activated state. The Remove option is displayed if the contact is not a primary care physician and the contact should not be associated with any case conferences or visit cases.
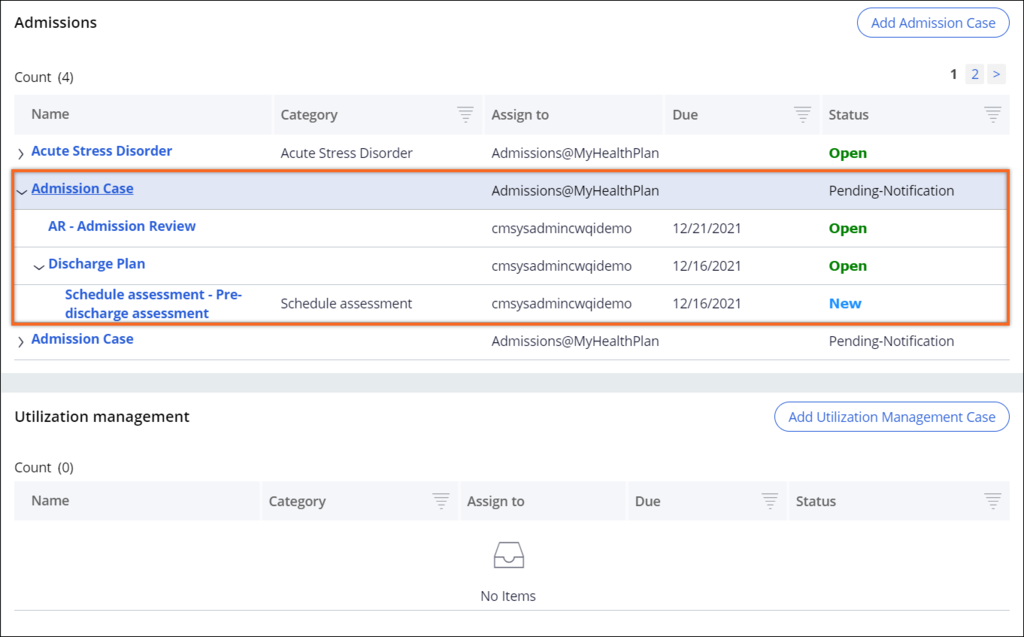
Admissions and Utilization management sections
When you expand the tree grid structure, as shown in the figure below, the section displays all types of cases, either active or resolved, with their respective child items, such as Concurrent review, Discharge plan, Discharge worksheet, and any related tasks.
The section displays all the Utilization management cases that are either active or resolved. There can be only one active Admission or Utilization Management case at any given time.
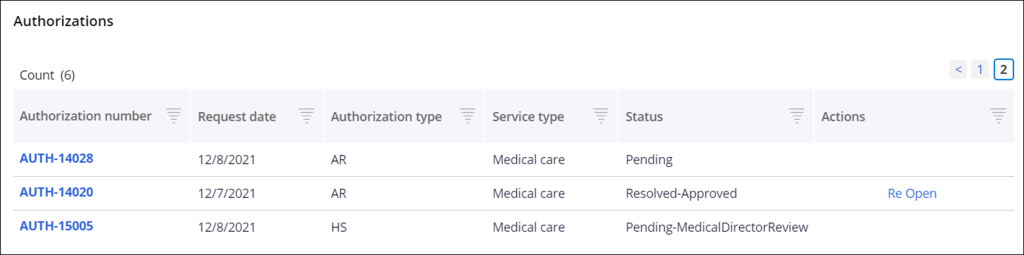
Authorizations section
As shown in the following figure, the section displays cases with active or resolved statuses. In the column, the action is available for authorizations with the Resolved-Denied status. The action is available for authorizations with the Resolved-Cancelled status.
Declined programs section
The section displays program referrals that are declined or rejected. As shown in the figure below, you can re-open or activate the declined programs after a certain threshold period (measured in days).
The Declare_CM_ENV.Value) rule represents the threshold period (in days) after which you can refer for declined programs. The Declare_CM_ENV.Value rule is where you select the workbasket to which declined programs are routed. (CM_NONPARTICIPATINGPROGRAM_WORKBASKET ).

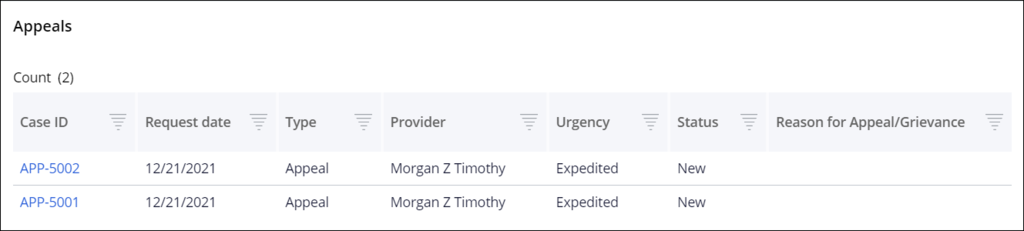
Appeals & grievances section
As shown in the figure below, the section displays appeals that are requested for denied authorizations. As part of the appeal review, if the decision is overturned, then the denied authorization is reopened.
Claims section
The section displays all medical, pharmaceutical, and dental claims, as shown in the following figure:

The data class for this information is PegaHC-Data-Claim. The data model for claims is maintained through this class.
Programs section
As shown in the following figure, the section displays a list of the programs in which a patient is enrolled.
Each program has or options. If a program is active, the option is displayed. You must select comments and a reason when you opt out of a selected program. If a program is inactive, the option is displayed. Confirmation of opting in is displayed, and the post-submission selected program is then opted-in on the backend. An button is also displayed. After each opt-out or opt-in action, a new row is added in the Program enrollment history, with the date that the action was performed.

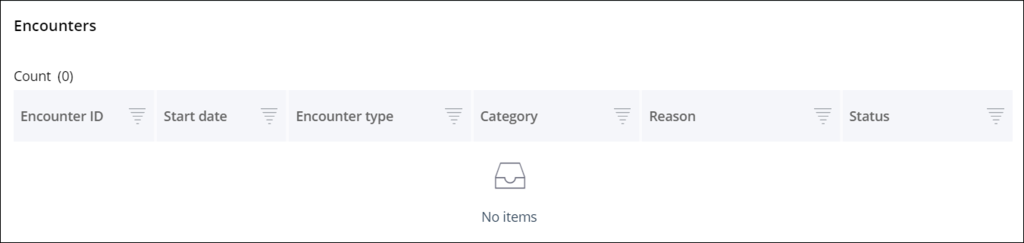
Encounters section
The section displays all the interactions between a patient and their healthcare provider, in the provision of healthcare services and assessment of their health status, as shown in the following figure:
Conversations section
Conversations are logged for tasks, alerts, goals, barriers, and interventions during case resolution, and also when a medication is added or updated.
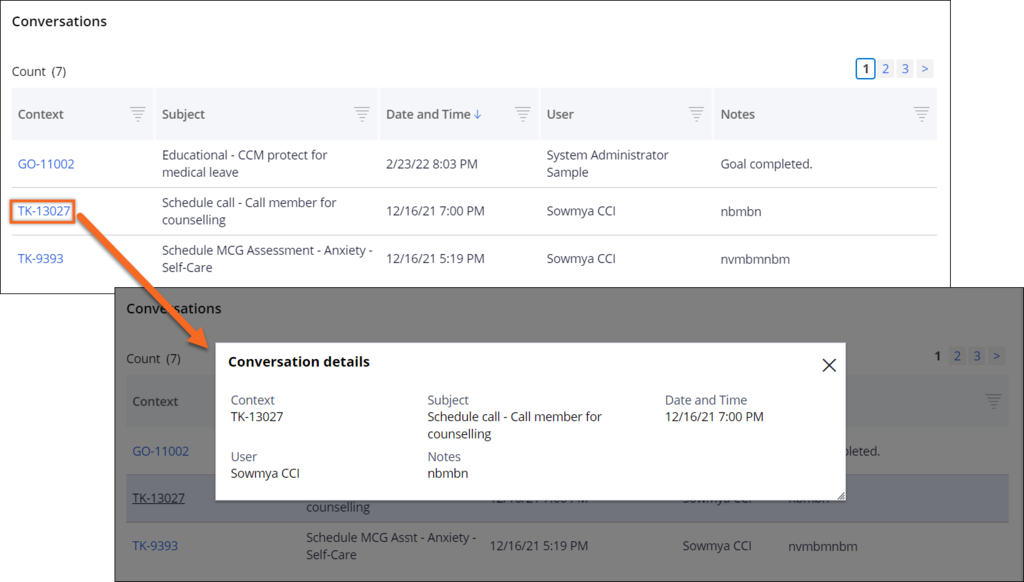
As shown in the figure above, if you customize the ShowContextInfo section with the necessary properties, clicking Context displays a pop-up window with additional details. This extension is applicable for all conversation logs except Medications.
Because look-up data pages do not support dynamic class referencing, you need to save the D_GetWO rule in the appropriate implementation-layer class context so that the data page can fetch the implementation-layer specific data. Otherwise, the look-up fails and the data page does not return any data.
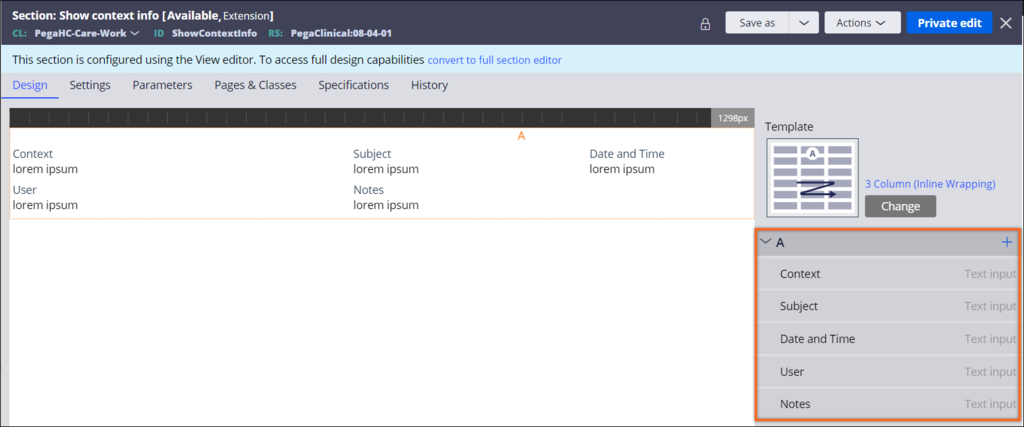
Extending fields for conversation details in the Patient 360 view
As shown in the following figure, you can add or modify the fields that provide the details in the dialog box during patient conversations.
- In the header of Dev Studio, in the field, enter
ShowContextInfo, and then press . - Click the rule.
- On the page, on the Design tab, use the controls in the right pane to edit the existing fields or add new fields.
For example, you might want to add a field for an assessment, a phone call, or the next visit.
- Click Save.
Incidents section
As shown in the figure below, the Incidents section displays all types of incidents that are stored in the PegaHC-Data-Incident class. When you click the Incident ID, the respective case or work object opens.
To add more details in the section seen when clicking Incident ID, you can customize the ReviewIncidentContent section in Dev Studio.

Check your knowledge with the following interaction:
This Topic is available in the following Module:
If you are having problems with your training, please review the Pega Academy Support FAQs.
Want to help us improve this content?